RaspberryPi 101: Part #3 – Uses #1: Media PC

(Apologies in advance for what will be an image-heavy post!)

Intro

XBMC (originally the XBox Media Centre) is an award-winning free and open source (GPL) software media player and entertainment hub for digital media. Raspbmc is a distribution of XBMC tailored specifically for the raspberry pi.

Using it you can easily stream audio and video from your local network, USB devices, and the interwebs for the price of a ‘pi, the cables needed, and an SD card.

Raspbmc Installer for Windows

Download the installer

There are various download options including getting the full ISO yourself and manually doing the install. The easiest and recommended option is to download the bootstrap installer which ensures you get the correct, and latest, version of XBMC and can also set up networking prior to the install, which saves the need to configure this manually from the pi itself.

The download options are all on the raspbmc download page

Run the installer

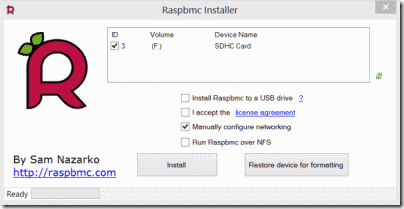
Insert the SD card you’re going to install raspbmc to; be sure you select the correct device in the setup screen as it does wipe the entire device during installation.

xbmc - windows installer - 1

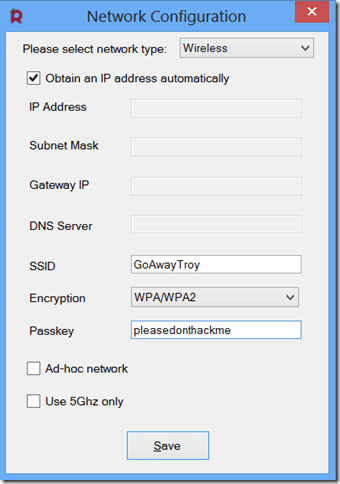
Set up networking

I think this is a great touch; allowing you to configure your network settings (wired or wireless) as part of the install process, so that your pi should just work after plugging in the power and SD card
xbmc - windows installer - 2 - network config

Plug it in, Go Go Go!

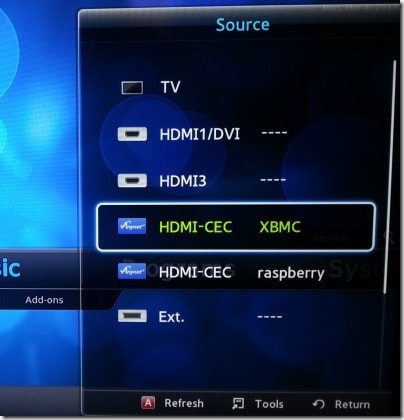
Once the bootstrap installer has been written to your SD card, put the SD card into your pi, plug it into the HDMI port and turn on the pi. If it supports HMDI CEC, your TV should automagically turn on and change to the new HDMI input.
2013-03-04 08.20.06

CEC (consumer electronics control) is the control protocol in HDMI which allow systems which run over an HDMI port to interact with the host device, either via the host’s remote control for input or transmitting similar input in order to control the host.

Automatically turning on your TV and changing to the correct HDMI source when you turn on you pi whilst running Raspbmc is one example of the device controlling the host.

Interacting with Raspbmc on your TV just using the TV remote control is an example of the host’s remote controlling the device.

This makes what could be a complex and nerdy device available to those other family members who may not be as nerdy as yourself; no need to ssh in to start a service to download a plugin, or VNC over to browse your network, or plug in a keyboard and mouse to search for some music. Pretty clever stuff!

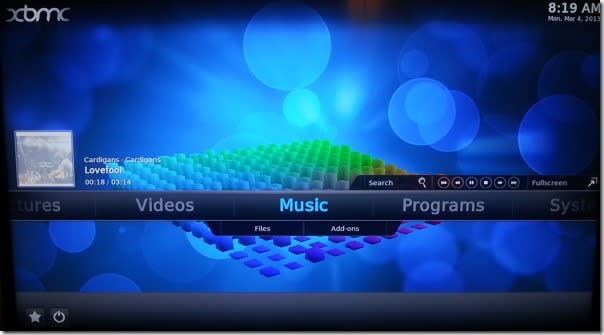
After a lengthy wait to download the full latest XBMC distro (I presume) and setup your system you should be presented with the default XMBC home screen
2013-03-04 08.19.39

From here you can do oh so many things! Stream your music from your network or attached USB device, stream video likewise (y’know, bog standard media centre stuff), if you have a PVR backend then you can use it to view live TV, the EPG, configure recording and pause of live TV.

2013-03-04 08.18.23

You can install a selection of plugins for audio, video, themes, and other things like weather apps. If you choose to install video add onsyou can find such awesome plugins as Wired and TED (and Anime Vice.. there’s some weirdass cartoons on that one):
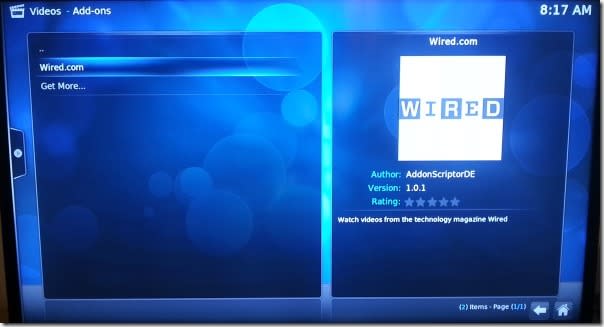
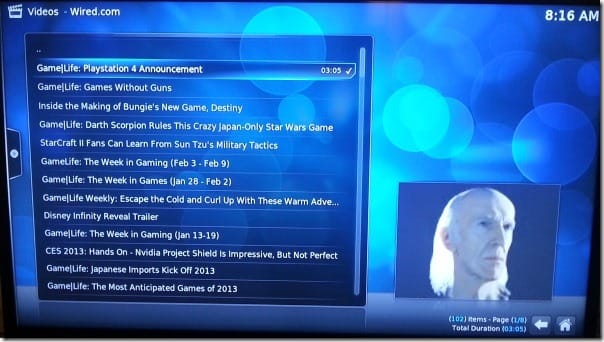
 2013-03-04 08.17.03

2013-03-04 08.16.49

2013-03-04 12.23.14

These can effortlessly stream HD video to your TV, which I think is pretty impressive for something so small and cheap!

The weather app is pretty decent too, except I could not for the life of me figure out how to change it from Fahrenheit to Centigrade.
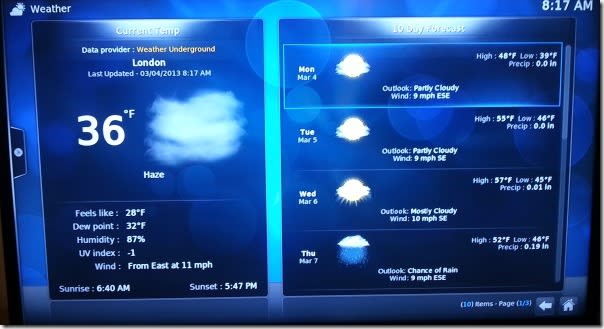
 2013-03-04 08.17.32    

ssh is running by default, but the default pi password doesn’t seem to be "raspberry". As such, I had to connect it to my tv to set the password (under Programs -> Add-ons -> System Configuration -> Password Management). I believe the default settings are username “root” password “root”

In summary

This is a fantastic use for a pi, especially if you don’t already have a media centre setup. However, as you can read from my Year of 101s #2 : Smart TV posts, I already have a media centre built into my TV for this sort of thing; it can already install apps (the TED app works great, as do all of the catch up tv ones) so I wouldn’t use Raspbmc myself.
RaspberryPi 101: Part #2 – Setup

So part 1 was a quick intro to what a pi is and what it can do. This post is about getting and setting yours up.

Installation

1. Get a raspberryPi

You can get one from a few places these days, but the big UK reseller is element14/Farnell
element14 farnell

2. Get a linux distro

As mentioned in the last post, you can get a few different operating systems to run and the recommended ones to start with are on the raspberrypi website

3. Put the distro on a suitable SD card

3.1 Writing the image to the SD card

The methods for doing this differ depending on your dekstop OS;

  • Mac and Linux you can use the existing “dd” and “df” commands to check and write the image to the SD card
  • For Windows you need to use the Win32DiskImager “used for writing images to USB sticks or SD/CF cards on Windows”

3.2 BerryBoot

Steps 2 and 3 can actually be shortcut by either buying an SD card with a distro already installed, or installing BerryBoot bootloader which bootstraps your installation to give you the easiest possible route to installation:
berryboot

Berryboot is OSS and you can even dig into the source over on github

Random tangent #1: HDMI CEC
BerryBoot supports the fantastic HDMI CEC which “is an HDMI feature designed to allow the user to command and control up-to ten CEC-enabled devices, that are connected through HDMI, by using only one of their remote controls”; this means that you don’t even need to connect a keyboard for most of the berryboot setup process and can just use your tv remote.

There’s more info over on elinux about just how important CEC is for HDMI capable devices and writing software for these devices.

Want to start understanding the CEC messages? Check cec-o-matic

This is the same feature that XBMC uses to allow full and simple navigation of the media centre features just using your remote control – more on XBMC later.

Checkpoint! Base Installation Complete

You’ll now have a version of linux (or RISC OS) running on your pi. If you’ve chosen RISC then I can’t really help you, since the last time I used it was playing games on my uncle’s computer as a young lad (check out those vids – classic 90s gaming at its “best”).

Anyway. From here on in I’ll assume you’ve gone with Raspbian. Wheezy should be pretty much the same I think.

Starting it all up #1: Raspbian

Plug it all in

Put the SD card in, the HDMI cable to your tv/monitor, the network cable in, your USB keyboard which you’ll need for the initial installation (unless you’re berrybooting with it’s CEC awesomeness), and finally the power cable; there is no power switch on the pi so once the cable is plugged in you’re running.

You should see the initial configuration screen where you can setup the locale and turn on SSH (do so).

Then you can choose to get to a terminal or boot into a desktop environment.

SSH

With raspbian this is just a case of enabling ssh from the config menu; after that you can ssh in from another machine on the same network. If you don’t know the IP address of your pi, either plug it in to an HDMI capable display and execute “ifconfig” or just check the devices attached to your router from the router admin screen.

more info on pi ssh

Bluetooth

Setting up a bluetooth keyboard may not be much use if you’ve already got ssh running and want to access the terminal only, however if you’re accessing the pi directly you will either need to plug in a USB HCI device (keyboard/mouse) or set up bluetooth.

1. Get a supported device

There’s a list of confirmed working devices over on elinux.

I went for the dinky little TOPDIGI UA01 Bluetooth USB Dongle from Amazon
TOPDIGI UA01 Bluetooth USB Dongle from Amazon

2. Setup bluetooth on the pi

2.1 install bluetooth software

[code]pi@raspberrypi ~ $ sudo -s
root@raspberrypi:/home/pi# apt-get install bluez[/code]

2.2 scan for nearby devices

[code]root@raspberrypi:/home/pi# hcitool scan[/code]
Your device should appear in those found; use the MAC in the following steps.

2.3 pair your pi to the device

[code]root@raspberrypi:/home/pi# bluez-simple-agent hci0 00:11:22:33:44:55
RequestPinCode: 0000
Enter PIN Code: Release
New device (/org/bluez/3964/hci0/dev_00_11_22_33_44_55)[/code]

Obviously your MAC will be different to the dummy one I’ve used..

2.4 trust the paired device so it’ll auto connect in future

[code]root@raspberrypi:/home/pi# bluez-test-device trusted 00:11:22:33:44:55 yes[/code]

WiFi

Since I’m bored with swapping the ethernet cable from my tv to get this on the network (the switch has no spare ports.. too much living room tech..), I’ve just ordered an Edimax EW-7811UN 150Mbps Wireless Nano USB Adapter
Edimax TEEEENY TINY wifi adapter

Portable Power

Since I’m bored with swapping my phone charger over to power the pi, I’ve just ordered a PowerGen 5200mAh External Battery Pack High Capacity Power Bank Charger
Powergen

I’ll report back on how they work out for me soon. I should find that having a fully portable pi will allow me to mess around with it even more!

Summary

That’s it for this one! You’re now set up with a Linux computer, bluetooth keyboard, and ssh. You can do with this whatever you would do with a normal low power distro (Puppy, DSL, #!.. or is it !#.. hmm..), but you can also interact wiht the outside world via GPIO.

Next Up

I’ll be installing XBMC and having a play. I play, so you don’t have to. See? I care.

Aside #2 – RPi + VirtualBox = :(

Whilst I’ve been attempting to learn a new thing each month this year, I’ve been finding it really tricky to keep to the pretty loose schedule. As such, I though I’d try and note down every time a shiny new thing takes my interest, so that I have some idea why I’m incapable of completing a series of blog posts.

Running Pi distros in VirtualBox

Apparently you can run raspberryPi distros in virtualbox (totally doesn’t work though..)

Converting a .img to a .vdi:

"C:\Program Files\Oracle\VirtualBox\VBoxManage.exe" convertfromraw -format VDI path:\to\input.img path:\to\output.vdi

Instigator
— trying to get decent screenshots of the various pi OS without having to take pics of the tv

Year of 101s: March – RaspberryPi

Part #1 – Intro

I’m committing to doing 12 months of “101”s; posts and projects themed at beginning something new (or reasonably new) to me. January was all about node development awesomeness. February was (sort of) all about Samsung Smart TV apps.

March is going to be about me playing with the raspberryPi!

So what’s a RaspberryPi?

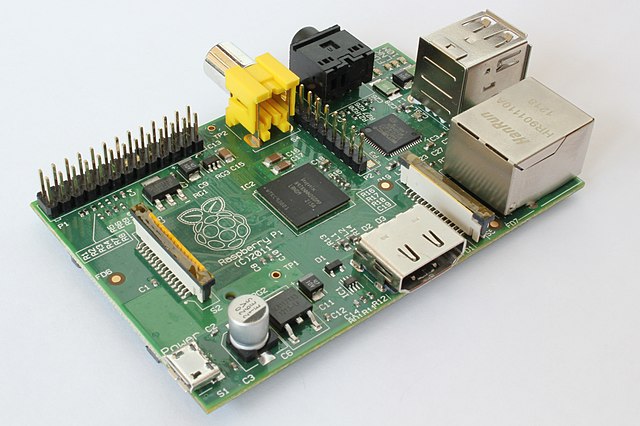
RaspberryPi
The Raspberry Pi is a credit-card sized, single-board, low cost, barebones computer, intented to be mainly used within the classroom as a cheap way to teach programming.

There are more than one version of the Pi and I’ll be referring to Model B during these posts, as it’s what I have.

Hardware

A bare printed circuit board (PCB) contains:

  • a double USB port,
  • HDMI and composite video outputs,
  • an ethernet port,
  • SD slot,
  • headphone jack,
  • and a micro usb sized power socket (so chargers for most modern android or blackberry phones will work, as will a USB to MicroUSB cable plugged into a PC or even your TV)

It’s pretty low-power as it’s just got:

  • 512MB RAM,
  • 32-bit 700MHz ARM processor,
  • but – a GPU capable of decoding 1080p HD video!

Software

Since the Pi runs from the OS loaded on to the SD card, then it’s up to your level of hackery skill to determine what software you’re going to run. Check out the wiki page to see what OSs are being, or have already been, ported to run.

The most popular ones are most likely those recommended by the fine people at raspberrypi.org, namely: a version of Debian (Raspbian), RISC OS, or a version of Arch Linux.

Raspbian is easy to pick up if you’ve ever played with Linux before.

Uses

Media centre
There’s a fantastic port of XBMC called Raspbmc which allows you to easily make a Media Centre PC (I’ll cover this in a later post).

Arcade machine
Play really old games on a really underpowered device. YES!

High Performance Computing (HPC) environment
Want to get some more power? Buy a truck of Lego and 64 raspberyPis and network them together in a HPC stylee!

Loads of others!
Srsly. (At least) One guy has sent his almost into space. Amazeballs.

It’s all up to your imagination and time; I have one but not the other so let’s see what I come up with this month..!

How do you use it?

Knowledge of either Python of C++ seems to be the main way to get into working with the device; python is the recommended language for general development most likely due to it reading like a high level language and not needing compilation; just edit, save, execute.

Next up

Setting up the thing; getting an OS on it, getting a bluetooth keyboard working, setting up SSH – that sort of thing.