Summing CSV data with Powershell

As I’ve mentioned previously, I tend to use Powershell for all manner of random things. This time around I wanted to use it to avoid having to upload a csv to google drive or opening up my other laptop that has Excel on it, just to get some numbers.

I’m self-employed, so I have to regularly do my personal tax return. My – extremely inefficient – process involves leaving it until the last minute, then trawling through my online bank account and downloading each month’s statement in csv format and digging through these to find the numbers I need to fill out the various documents.

Naturally, I’d prefer to do this automatically, ideally scripted. So I did!

Continue reading

Rate-Limiting, Powershell, Pester, and the ZenDesk API

Have you ever had to utterly hammer an API via a little Powershell script, only to find you’re getting rate limited, and lose all that previously downloaded data before you could persist it somewhere?

I have. I’ve recently put together a script to query a customer support ticketing system’s API, get a list of all tickets within a given time period, then query again to get to get the full content for each ticket.

All of this data is being added to a custom Powershell object (as opposed to churning out to a file as I go) since I convert it all to Json right at the end.

I’d rather not get half way through a few thousand calls and then have the process fail due to being throttled, so I’ve chosen to create a little function that will check for – in my case – an HTTP 429 response (“Too Many Requests”), get the value of the “Retry-After” header, then wait that many seconds before trying again.

This particular implementation is all quite specific to the ZenDesk API, but could easily be adapted to other APIs which rate limit/throttle and return the appropriate headers.

Continue reading

Unit Testing Powershell with Pester

I write a lot of Powershell these days; it’s my go-to language for quick jobs that need to interact with external systems, like an API, a DB, or the file system for example.

Nothing to configure, nothing to deploy, nothing to set up really; just hack a script together and run it. Perfect for one-off little tasks.

I’ve used it for all manner of things in my career so far, most notably for Azure automation back before Azure had decent automation in place. We’re talking pre-Resource Manager environment creation stuff.

I would tie together a suite of separate scripts which would individually:

  • create a Storage account,
  • get the key for the Storage account,
  • create a DB instance,
  • execute a DB initialisation script,
  • create a Service Bus,
  • execute a Service Bus initialisation script,
  • deploy Cloud Services,
  • start/stop/restart those services

Tie that lot together and I could spin up an entire environment easily.

powershell_azure_createdb

Continue reading

Setup StatsD and Graphite in one script

Trying to get this working over the past 6 months has almost driven me insane. However, thanks to this epic script as a starting point, my script below ACTUALLY WORKS (for me, on my machine, YMMV).

I can create a VM powershell-stylee and then ssh in to create this script, and execute it.

It results in a statsd endpoint which pushes metrics to the local Graphite (carbon) instance regularly. Good luck, let me know if it works for you too!

Checking if an email address exists using Powershell, Telnet, MX, and PONIES

(Ok, maybe not ponies.)

I’ve stolen and edited a fantastic telnet powershell function from here and am using it to directly telnet to an MX server and check for the existence of a user.

The edited powerful powershell generic telnet method is here:

[powershell]
Function Get-Telnet
{ Param (
[Parameter(ValueFromPipeline=$true)]
[String[]]$Commands = @("helo hi"),
[string]$RemoteHost = "HostnameOrIPAddress",
[string]$Port = "25",
[int]$WaitTime = 1000
)
#Attach to the remote device, setup streaming requirements
$Socket = New-Object System.Net.Sockets.TcpClient($RemoteHost, $Port)
If ($Socket)
{ $Stream = $Socket.GetStream()
$Writer = New-Object System.IO.StreamWriter($Stream)
$Buffer = New-Object System.Byte[] 1024
$Encoding = New-Object System.Text.AsciiEncoding

#Now start issuing the commands
ForEach ($Command in $Commands)
{
Write-Host $Command
$Writer.WriteLine($Command)
$Writer.Flush()
Start-Sleep -Milliseconds $WaitTime
}

$Result = ""
#Save all the results
While($Stream.DataAvailable)
{ $Read = $Stream.Read($Buffer, 0, 1024)
$Result += ($Encoding.GetString($Buffer, 0, $Read))
}
}
Else
{ $Result = "Unable to connect to host: $($RemoteHost):$Port"
}
$Result
}
[/powershell]

You call it by passing in a param array of commands, a host, and a delay time between each command being sent, e.g.:

[powershell]
Get-Telnet -RemoteHost "192.168.10.1" -Commands "admin","password","terminal pager 0","show run" -WaitTime 1500
[/powershell]

I’m only interested in hitting a mail server, so my commands are below.

  1. Start a session: “helo example.com”
  2. Create a new email from a dummy user: “mail from: <[email protected]>”
  3. Set the recipient to the user we’re trying to validate: “rcpt to: <$email>”

If the user exists then the third command returns status code “250”; if not, the status code is “550” – this is all I’ll check for.

The script below will split an email address and get the domain, find out the MX record using Resolve-DnsName, then log on via telnet to the mail server and attempt to create a mail to that user, returning the results of all commands and checking for an occurrence of “550”.

(syntax highlighter is throwing a wobbly if I use an email address inside the code block, so imagine “botATexample.com” is “[email protected]”)
[powershell]
try {
$notexists = true

$email = Read-Host ‘Enter an email address to test’
$columns = $email -split ‘@’

$mx = (Resolve-DnsName -Type MX –Name $columns[1] -ea 0)
if ($mx -ne $null){
$notexists = (Get-Telnet -RemoteHost $mx.NameExchange[0] -Commands "helo example.com","mail from: <botATexample.com>","rcpt to: <$email>" -WaitTime 500).Contains("550")
}

if ($notexists) {Write-Host "Doesn’t exist"}
else {Write-Host "Exists! "}
}
catch [system.exception] {
Write-Host $_.Exception.ToString()
}
[/powershell]

The results might look something like this:

check_email_exists_telnet_powershell

Notes

A helluva lot of mail servers will block this telnet connection! Therefore this is not a reliable method to get all existing users from a list of email addresses; it will result in a LOT of false negatives.

However, those that it returns as real users will certainly be real users.

Scripting a StatsD, MongoDB, ElasticSearch metrics server on Azure with Powershell

At Mailcloud I am constantly destroying and rebuilding environments (intentionally!), especially the performance test ones. I also need to gather oodles of metrics from these tests, and I have a simple script to create the VM and another to install all of the tools I need.

This article will cover using a simple Powershell script to create the Linux VM and then a slightly less simple bash script to install all the goodies. It’s not as complicated as it may look, and considering you can get something running in a matter of minutes from a couple of small scripts I think it’s pretty cool!

Stage 1, Creating the VM using Powershell

Set up the variables

[powershell]
# os configuration
# Get-AzureVMImage | Select ImageName
# I wanted an ubuntu 14.10 VM:
$ImageName = "b39f27a8b8c64d52b05eac6a62ebad85__Ubuntu-14_10-amd64-server-20140625-alpha1-en-us-30GB"

# account configuration
$ServiceName = "your-service-here"
$SubscriptionName= "your azure subscription name here"
$StorageAccount = "your storage account name here"
$Location = "your location here"

# vm configuration – setting up ssh keys is better, username/pwd is easier.
$user = "username"
$pwd = "p@ssword"

# ports
## ssh
$SSHPort = 53401 #set something specific for ssh else powershell generates a random one

## statsd
$StatsDInputPort = 1234
$StatsDAdminPort = 5678

## elasticsearch
$ElasticSearchPort = 12345
[/powershell]

Get your Azure subscription info

[powershell]
Set-AzureSubscription -SubscriptionName $SubscriptionName `
-CurrentStorageAccountName $StorageAccount

Select-AzureSubscription -SubscriptionName $SubscriptionName
[/powershell]

Create the VM

Change “Small” to one of the other valid instance sizes if you need to.

[powershell]
New-AzureVMConfig -Name $ServiceName -InstanceSize Small -ImageName $ImageName `

| Add-AzureProvisioningConfig –Linux -LinuxUser $user –Password $pwd -NoSSHEndpoint `

| New-AzureVM –ServiceName $ServiceName -Location $Location
[/powershell]

Open the required ports and map them

[powershell]
Get-AzureVM -ServiceName $ServiceName -Name $ServiceName `
| Add-AzureEndpoint -Name "SSH" -LocalPort 22 -PublicPort $SSHPort -Protocol tcp `

| Add-AzureEndpoint -Name "StatsDInput" -LocalPort 8125 -PublicPort $StatsDInputPort -Protocol udp `

| Add-AzureEndpoint -Name "StatsDAdmin" -LocalPort 8126 -PublicPort $StatsDAdminPort -Protocol udp `

| Add-AzureEndpoint -Name "ElasticSearch" -LocalPort 9200 -PublicPort $ElasticSearchPort -Protocol tcp `

| Update-AzureVM

Write-Host "now run: ssh $serviceName.cloudapp.net -p $SSHPort -l $user"
[/powershell]

The whole script is in a gist here

Stage 1 complete

Now we have a shiny new VM running up in Azure, so let’s configure it for gathering metrics using a bash script.

Stage 2, Installing the metrics software

You could probably have the powershell script automatically upload and execute this, but it’s no big deal to SSH in, “sudo nano/vi” a new file, paste it in, chmod, and execute the below.

Set up the prerequisites

[bash]
# Prerequisites
echo "#### Starting"
echo "#### apt-get updating and installing prereqs"
sudo apt-get update
sudo apt-get install screen libexpat1-dev libicu-dev git build-essential curl -y
[/bash]

Install nodejs

[bash]
# Node
echo "#### Installing node"
. ~/.bashrc
export "PATH=$HOME/local/bin:$PATH"
mkdir $HOME/local
mkdir $HOME/node-latest-install

pushd $HOME/node-latest-install
curl http://nodejs.org/dist/node-latest.tar.gz | tar xz -strip-components=1
./configure -prefix=~/local
make install
popd

## the path isn’t always correct, so set up a symlink
sudo ln -s /usr/bin/nodejs /usr/bin/node

## nodemon
echo "#### npming nodemon"
sudo apt-get install npm -y
sudo npm install -g nodemon

[/bash]

Add StatsD

Here I’ve configured it to use mongo-statsd-backend as the only backend and not graphite. Configuring Graphite is a PAIN as you have to set up python and a web server and deal with all the permissions, etc. Gah.

[bash]
# StatsD
echo "#### installing statsd"
pushd /opt
sudo git clone https://github.com/etsy/statsd.git
cat >> /tmp/localConfig.js << EOF
{
port: 8125
, dumpMessages: true
, debug: true
, mongoHost: ‘localhost’
, mongoPort: 27017
, mongoMax: 2160
, mongoPrefix: true
, mongoName: ‘statsD’
, backends: [‘/opt/statsd/mongo-statsd-backend/lib/index.js’]
}
EOF

sudo cp /tmp/localConfig.js /opt/statsd/localConfig.js
popd
[/bash]

Mongo and a patched mongo-statd-backend

You could use npm to install mongo-statsd-backend, but that version has a few pending pull requests to patch a couple of issues that mean it doesn’t work out of the box. As such, I use my own patched version and install from source.

[bash]
# MongoDB
echo "#### installing mongodb"
sudo apt-key adv -keyserver hkp://keyserver.ubuntu.com:80 -recv 7F0CEB10
echo ‘deb http://downloads-distro.mongodb.org/repo/ubuntu-upstart dist 10gen’ | sudo tee /etc/apt/sources.list.d/mongodb.list
sudo apt-get update && sudo apt-get install mongodb-org -y
sudo service mongod start
cd /opt/statsd

## Mongo Statsd backend – mongo-statsd-backend
## the version on npm has issues; use a patched version on github instead:
sudo git clone https://github.com/rposbo/mongo-statsd-backend.git
cd mongo-statsd-backend
sudo npm install
[/bash]

Ready to start?

Let’s kick off a screen

[bash]
# Start StatsD
screen nodemon /opt/statsd/stats.js /opt/statsd/localConfig.js
[/bash]

Fancy getting ElasticSearch in there too?

To pull down and install the java runtime, install ES and the es-head, kopf, and bigdesk plugins, add the below script just before you kick off the “screen” command.


# ElasticSearch
echo "#### installing elasticsearch"
sudo apt-get update && sudo apt-get install default-jre default-jdk -y
wget https://download.elasticsearch.org/
elasticsearch/elasticsearch/elasticsearch-1.1.1.deb && sudo dpkg -i elasticsearch-1.1.1.deb
sudo update-rc.d elasticsearch defaults 95 10
sudo /etc/init.d/elasticsearch start

## Elasticsearch plugins
sudo /usr/share/elasticsearch/bin/plugin -install mobz/elasticsearch-head
sudo /usr/share/elasticsearch/bin/plugin -install lukas-vlcek/bigdesk

You can now browse to /_plugin/bigdesk (or the others) on the public $ElasticSearchPort port you configured in the powershell script to see your various ES web interfaces.

The whole script is in a gist here.

Stage 2 complete

I use StatsD to calculate a few bits of info around the processing of common tasks, in order to find those with max figures that are several standard deviations away from the average and highlight them as possible areas of concern.

I have an Azure Worker Role to pull azure diagnostics from table and blob storage and spew it into the Elasticsearch instance for easier searching; still figuring out how to get it looking pretty in a Grafana instance though – I’ll get there eventually.

Upload to Azure Blob Storage using Powershell

I needed to automate the process of uploading images to Azure blob storage recently, and found that using something like the excellent Azure Storage Explorer would not set the Content Type correctly (defaulting to “application/octetstream”). As such, here’s a little script to loop through a directory and do a basic check on extensions to set the content type for PNG or JPEG:

The magic is in Set-AzureStorageBlobContent.

Don’t forget to do the usual dance of calling the following!

These select your publish settings file, and set which subscription is the currently active one:

  • Import-AzurePublishSettingsFile
  • Set-AzureSubscription
  • Select-AzureSubscription

Update

Actually, the Aug 2014 version of Azure Storage Explorer already sets the content type correctly upon upload. Oh well. Still a handy automation script though!

Getting past Powershell & SQL’s “Incorrect syntax near ‘GO’ ” message

Many a night have I bashed my head on the keyboard when seeing “Incorrect syntax near ‘GO'” come back from a powershell script trying to execute a batch SQL script.

After learning that “GO” is not actually SQL, and more of a SQL Server Management Studio “batch helper”, I quickly knocked together this powershell script to execute SQL batch scripts remotely. Fits nicely into an environment creation pipeline, so it does.

Param(
    [string]$Server,
    [string]$DB,
    [string]$user,
    [string]$Pwd,
    [string]$Script
)

$batches = $Script -split "GO\r\n"

$SqlConnection = New-Object System.Data.SqlClient.SqlConnection
$SqlConnection.ConnectionString = "Server=$Server;Database=$DB;User ID=$user;Password=$Pwd;Trusted_Connection=False;Encrypt=True;Connection Timeout=30;"
$SqlConnection.Open()

foreach($batch in $batches)
{
    if ($batch.Trim() -ne ""){

        $SqlCmd = New-Object System.Data.SqlClient.SqlCommand
        $SqlCmd.CommandText = $batch
        $SqlCmd.Connection = $SqlConnection
        $SqlCmd.ExecuteNonQuery()
    }
}
$SqlConnection.Close()

Scripting the setup of a developer PC, Part 3 of 4 – Installing.. uh.. everything.. with Chocolatey.

This is part three of a four part series on attempting to automate installation and setup of a development PC with a few scripts and some funky tools. If you haven’t already, why not read the introductory post about ninite or even the second part about the command line version of WebPI? Disclaimer: this series was inspired by a blog from Maarten Balliauw.

Installing.. uh.. everything..: Chocolatey

Chocolatey is sort of “apt-get for windows” using powershell; it doesn’t quite achieve that yet, but the idea is the same; imagine nuget + apt-get. It works exactly like nuget but is meant to install applications instead of development components. The next release will support webpi from within chocolatey, but more on that in a moment.

There’s not much to look at yet, but that’s the point; you just type what you want and it’ll find and install it and any dependencies. I want to install virtualclonedrive, some sysinternals goodies, msysgit, fiddler, and tortoisesvn.

Before you start, make sure you’ve relaxed Powershell’s execution policy to allow remote scripts:
[powershell]Set-ExecutionPolicy Unrestricted[/powershell]

Ok, now we can get on with it. I can now execute a new powershell script to install choc and those apps:

[powershell]# Chocolatey
iex ((new-object net.webclient).DownloadString(‘http://bit.ly/psChocInstall’))

# install applications
cinst virtualclonedrive
cinst sysinternals
cinst msysgit
cinst fiddler
cinst tortoisesvn[/powershell]

This script will download (DownloadString) and execute (iex) the chocolatey install script from the bit.ly URL, which is just a powershell script living in github:
https://raw.github.com/chocolatey/chocolatey/master/chocolateyInstall/InstallChocolatey.ps1

This powershell script currently resolves the location of the chocolatey nuget package:
http://chocolatey.org/packages/chocolatey/DownloadPackage

Then, since a nupkg is basically a zip file, the chocolatey script unzips it to your temp dir and fires off chocolateyInstall.ps1; this registers all of the powershell modules that make up chocolatey. The chocolatey client is essentially a collection of clever powershell scripts that wrap nuget!

Once chocolatey is installed, the above script will fire off “cinst” – an alias for “chocolatey install” – to install each listed application.

What’s even more awesome is that the latest – not yet on the “master” branch – version of Chocolatey can install using webpi. To get this beta version, use the extremely terse and useful command from Mr Chocolatey himself, Rob Reynolds (@ferventcoder):

Adding in the install of this beta version allows me to use choc for a few more webpi components:

[powershell]# Chocolatey
iex ((new-object net.webclient).DownloadString(‘http://bit.ly/psChocInstall’))

# install applications
cinst virtualclonedrive
cinst sysinternals
cinst msysgit
cinst fiddler
cinst tortoisesvn

# getting the latest build for webpi support: git clone git://github.com/chocolatey/chocolatey.git | cd chocolatey | build | cd _{tab}| cinst chocolatey -source %cd%
# I’ve already done this and the resulting nugetpkg is also saved in the same network directory:
cinst chocolatey –source “Z:\Installation\SetupDevPC\”

# Now I’ve got choc I may as well use it to install a bunch of other stuff from WebPI;
# things that didn’t always work when I put them in the looong list of comma delimited installs
# IIS
cinst IIS7 -source webpi
cinst ASPNET -source webpi
cinst BasicAuthentication -source webpi
cinst DefaultDocument -source webpi
cinst DigestAuthentication -source webpi
cinst DirectoryBrowse -source webpi
cinst HTTPErrors -source webpi
cinst HTTPLogging -source webpi
cinst HTTPRedirection -source webpi
cinst IIS7_ExtensionLessURLs -source webpi
cinst IISManagementConsole -source webpi
cinst IPSecurity -source webpi
cinst ISAPIExtensions -source webpi
cinst ISAPIFilters -source webpi
cinst LoggingTools -source webpi
cinst MetabaseAndIIS6Compatibility -source webpi
cinst NETExtensibility -source webpi
cinst RequestFiltering -source webpi
cinst RequestMonitor -source webpi
cinst StaticContent -source webpi
cinst StaticContentCompression -source webpi
cinst Tracing -source webpi
cinst WindowsAuthentication -source webpi[/powershell]

Best bit about this? When you run the first command you’ll download and install the latest version of the specified executable. When this succeeds you’ll get:

[code] has finished successfully! The chocolatey gods have answered your request![/code]

Nice.

You’ll hopefully see your Powershell window update like this a few times:
choc_install (click to embiggen)

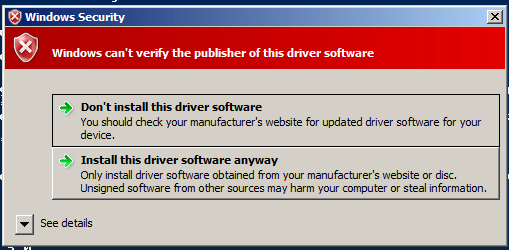
But depending on your OS version (I’m using Windows Server 2008 R2) you might see a few alerts about the unsigned drivers you’re installing:
choc_alert

That doesn’t seem to be avoidable, so just click to install and continue.

You might also find that your own attempts to install the beta version of chocolatey fail with errors like these:
choc_install_choc_fail1
or
choc_install_choc_fail2 (click to embiggen)

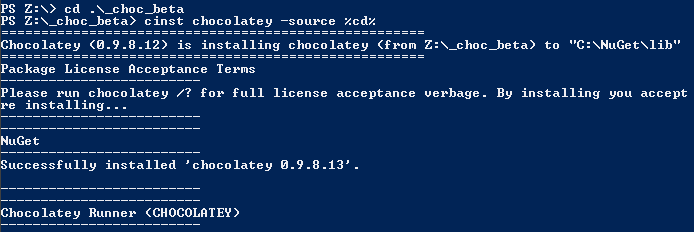
This is due to how you reference the directory in which your beta choc nuget package lives. If you reference it from a root dir (e.g. “Z:\”) then it’ll fail. Put it in a subdirectory and you’re golden:
choc_install_choc_success2
or using “%cd%” as the source dir (assuming you’re already in that dir):
choc_install_choc_success1

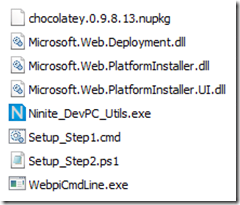
So, with my new powershell script and the beta chocolatey nupkg, along with the existing script for ninite, webpi and their components, my PC Setup directory now looks like this:

281211_autoinstall_choc_dir_contents

The last part of this series focuses on installing other things that either can’t be done or just didn’t work using one of the previous options, a list of “interesting things encountered”, and a conclusion to the whole project; see you back in:

Scripting the setup of a developer PC, Part 4 of 4 – Installing Custom Stuff, Interesting Things Encountered, and Conclusion.

Update: The chocolatey “beta” I mentioned is actually now in the mainline.