I’ve been using SublimeText for a while now as a no-frills text editor; it has a nice Zen mode which hides all of the tabs and menus and pushes it to full screen which I’ve found perfect for taking notes during seminars:
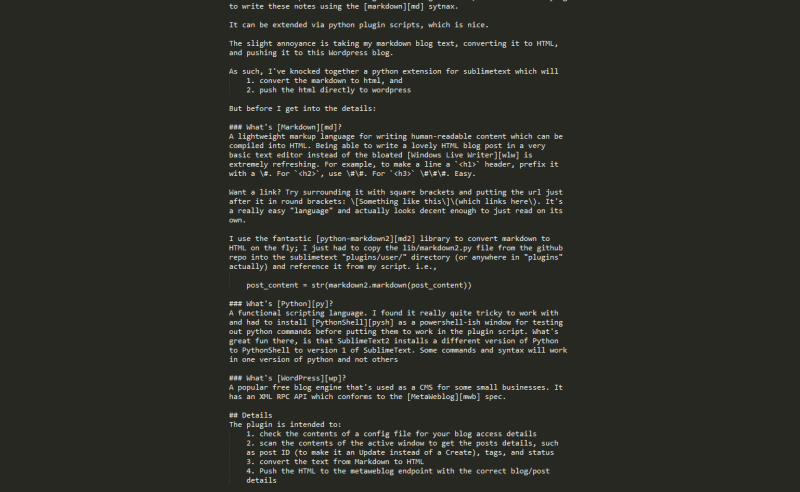
I have been trying to take notes using the markdown sytnax, but have found the process between taking the notes in markdown, converting them to HTML, and publishing the HTML to a blog a bit of a pain.
Given that SublimeText supports extension via plugin scripts written in Python, I’ve knocked together an extension which will
- convert the markdown to html
- push the html directly to wordpress
Before I get into the details of the script, maybe a little background would be useful:
A lightweight markup language for writing human-readable content which can be compiled into HTML. Being able to write a lovely HTML blog post in a very basic text editor instead of the bloated Windows Live Writer is extremely refreshing.
For example, to make a line a <h1> header, prefix it with a #. For <h2>, use ##. For <h3> ###. Easy.
Want a link? Try surrounding it with square brackets and putting the url just after it in round brackets: [Something like this](which links here). It’s a really easy “language” and actually looks decent enough to just read on its own.
To include an image you just need to write 
A syntax reference page can be found here.
One problem I do have is the basic support for code highlighting within markdown is poor, obviously, since HTML only has a single <code> block. The Markdown generated HTML conflicts with my wordpress Syntaxhighlighter plugin, hence the ugly clode blocks in this post.
There is support for “fenced-code-blocks” wihtin many implementations of markdown, and with the library that I’m also using, but this is still not playing nicely with Syntaxhighlighter. I’m sure I’ll figure something out eventually – please bear with me until then.
I use the fantastic python-markdown2 library to convert markdown to HTML on the fly; I just had to copy the lib/markdown2.py file from the github repo into the sublimetext “plugins” directory – I created a Markdown subdirectory for it – and reference it from my script. i.e.,
post_content = str(markdown2.markdown(post_content,extras=["code-friendly"]))

A functional scripting language. I found it really quite tricky to work with and had to install PythonShell as a powershell-ish window for testing out python commands before putting them to work in the plugin script. What’s not great fun is that SublimeText2 installs a different version of Python to PythonShell to version 1 of SublimeText to any version you explicitly install yourself.
Some commands and syntax will work in one version of python and not others
One great example is setting up a proxy; the syntax for this is completely different between versions of python and whatever example code you’re reading might be using the syntax that your version of python doesn’t support.
Working with a functional language took a lot of getting used to; I’d want to return an object from a method but had to instead return a comma delimited list of base types. It’s all a little odd to me, and my messy code shows that!

A popular free blog engine that’s used as a CMS for some small businesses. It has an XML RPC API which conforms to the MetaWeblog spec, and you can really dig into this by looking through the php files that make up a WordPress installation.
Since I’m using Amazon EC2 as my wordpress host I can use Kitty to SSH in and browse to /var/www/html/xmlrpc.php to see the metaweblog service api itself. That file references wp-includes/class-wp-xmlrpc-server.php which contains all of the underlying functionality for the api implementation. This is great reference material to make sure you’re passing the correct values of the correct types to the correct endpoints.
Details
The sublimemarkpress plugin is intended to:
- check the contents of a config file for your blog access details
- scan the contents of the active window to get the posts details, such as post ID (to make it an Update instead of a Create), tags, and status
- convert the text from Markdown to HTML
- Push the HTML to the metaweblog endpoint with the correct blog/post details
1. Getting the Blog setup details from a config file
The plugin relies on a settings file called “sublimemarkpress.sublime-settings” using the structure:
{
    "xmlrpcurl": <URL to xml rpc endpoint>,
    "username": <username>,
    "password": <password>
}
to read it:
s = sublime.load_settings("sublimemarkpress.sublime-settings")
mbURL = s.get("xmlrpcurl")
mbUsername = s.get("username")
mbPassword = s.get("password")
2. Get the text and strip out the blog post data
The plugin expects the top of your text file/active window to have optional tags to define blog post details:
<!--
#post_id:<id of existing post - optional>
#tags:<comma delimited list of post tags - optional>
#status:<draft or publish - optional>
-->
To get the entire contents of the active window:
all_lines_in_page = self.view.lines(sublime.Region(0, self.view.size()))
Then to extract the header details:
post_id, tags, status, has_header_content = self.GetHeaderContent(all_lines_in_page, header_lines)
where GetHeaderContent is the hack-y:
def GetHeaderContent(self, all_lines_in_page, header_lines):
    page_info = {"has_header_content":False,"post_id":None, "tags":"", "status":""}

    if self.view.substr(all_lines_in_page[0]).startswith("<!--"):
        page_info["has_header_content"] = True
        self.MoveCurrentLineToHeader(header_lines, all_lines_in_page)

        # post_id
        if self.view.substr(all_lines_in_page[0]).startswith("#post_id"):
            page_info["post_id"] = self.view.substr(all_lines_in_page[0]).split(":")[1]
            self.MoveCurrentLineToHeader(header_lines, all_lines_in_page)

        #post tags
        if self.view.substr(all_lines_in_page[0]).startswith("#tags"):
            page_info["tags"] = self.view.substr(all_lines_in_page[0]).split(":")[1]
            self.MoveCurrentLineToHeader(header_lines, all_lines_in_page)

        #post status
        if self.view.substr(all_lines_in_page[0]).startswith("#status"):
            page_info["status"] = self.view.substr(all_lines_in_page[0]).split(":")[1]
            self.MoveCurrentLineToHeader(header_lines, all_lines_in_page)

        self.MoveCurrentLineToHeader(header_lines, all_lines_in_page) # removes the closing comment tag
    return page_info["post_id"],page_info["tags"],page_info["status"],page_info["has_header_content"]

def MoveCurrentLineToHeader(self, header_lines, all_lines_in_page):
        header_lines.insert(len(header_lines),all_lines_in_page[0])
        all_lines_in_page.remove(all_lines_in_page[0])
3. Convert the rest from Markdown to HTML
As mentioned earlier, thanks to the great python-markdown2 library, this is simply a case of calling the “markdown” method, passing in the content to process:
post_content = str(markdown2.markdown(post_content,extras=["code-friendly"]))
I actually do a test to see if the markdown library can be imported first, then if it fails I don’t even try to convert from markdown to HTML:
can_markdown = False
try:
    import markdown2 # markdown
    can_markdown = True
except ImportError:
    can_markdown = False
4. Post to metaweblog api
Build up the request using the blog details, post details, and HTML content:
content = self.BuildPostContent(self.view, {"content": post_content, "title": title, "tags": tags, "status": status})

def BuildPostContent(self, view, page_data):
    return {"description": page_data["content"], "post_content": page_data["content"], "title": page_data["title"], "mt_keywords": page_data["tags"], "post_status": page_data["status"]}
Then submit it to the api:
proxy = xmlrpclib.ServerProxy(mbURL)

if post_id == None:
    post_id = proxy.metaWeblog.newPost(blog_id, mbUsername, mbPassword, content)
else:
    proxy.metaWeblog.editPost(post_id, mbUsername, mbPassword, content)
Extra bits and making it all work
To execute a command from a plugin within SublimeText, firstly you need to import the sublimetext library at the top:
import sublime, sublime_plugin # sublime
then name your class “something<command>” and have it take the “sublime_plugin.TextCommand” parameter:
class PublishCommand(sublime_plugin.TextCommand):
Then to run it you need to hit ctrl+’ to bring up the command window and type:
view.run_command("<name of the class minus the 'Command' suffix>")
e.g. for my plugin:
view.run_command("publish")
You can try this out with loads of the plugins included with a SublimeText install
That’s about it
All of this is in a small github repo. I’d appreciate it if you want to fork the repo and help show me how python should actually be structured. And written.
Known Issues
Categories
These need to be requested, looped through and matched against those associated with a post, added if those specified don’t exist, and the IDs associated with the post. Couldn’t be arsed.
As such, when you post to your blog you’ll see the entry is “uncategorised” and you’ll have to manually edit this.
Images
Since I’m just fooling around with a text editor, uploading images is still a little out of scope.
Random reference material
- pyblog – for helping to work out the guts of how python interacts with the metaweblog api
- I used Fiddler & Windows Live Writer for investigating traffic and finding out what the actual parameter being used to specify “tags” is within the metaweblog api:
mt_keywords
