Automate Your WebPageTest Private Instance With Terraform: 2021 Edition

This article assumes you have an understanding of what Terraform is, what WebPageTest is and some AWS basics.

all the logos

Have you ever wanted to have your WebPageTest setup managed as infrastructure as code, so you can keep all those carefully tuned changes and custom settings in source control, ready to confidently and repeatedly destroy and rebuild at a whim?

Sure you have.

In this article I’ll show how to script the setup of your new WPT server, installing from a base OS, and configuring customisations – all within Terraform so you can easily rebuild it with a single command.


Continue reading

Google’s Chrome User Experience Data in WebPageTest

This article assumes that you know the basics of AWS, WebPageTest, SSH, and at least one linux text editor.

Chrome User Experience Report logo + WebPageTest Logo + Core Web Vitals' LCP thresholds. Quite a busy hero image, I'll admit.

When talking to people about website performance stats, I’ll usually split it into Real User Metrics (RUM) and Automated (Synthetic/Test Lab):

  • RUM is performance data reported from the website you own, reported into the analytics tool you have integrated.
  • Automated are scripted tests that you run from your own performance testing tool against any website you like.

RUM is great: you get real performance details from real user devices and can investigate the difference in performance for many different options.

For example, iPhone vs Android, Mac vs Windows, Mobile vs Desktop, Chrome vs Firefox, UK vs US, even down to ISP and connection type, in order to see who is getting a good experience and who can be improved.

This data is invaluable in prioritising performance improvements, since you can tie it back to the approximate number of users it will affect, and therefore the impact on your business.

There are loads of vendors who can provide this for you (I’ve used many of them), or you can write your own – if you’re a glutton for punishment (and high AWS bills – ask me how I know…😁)

However, since this is measured on your own website and reported into your own tooling, you can only see such real-world performance detail for your own website; no real-world user experience data from your competitors.

Automated tests are great: you get detailed measurements of any website you can access – your own or competitors, or basically any website – in a repeatable fashion so that you can track changes over time.

You can have as many automated tests as you like, you can test from wherever you’re able to set up a test agent, and with whatever device you’re able to automate or emulate.

However, since these are all automated tests running because you said so, you can’t use them to understand how users are using your site, on which devices, what devices are underperforming others, and from where.

Again, there are a load of vendors who can provide this for you; writing your own is a bit more of a headache though – I wouldn’t recommend it, especially while wpt continues to be free for self hosting.

What if you could get some of the usual key performance metrics you’re used to with RUM, but for sites you don’t own such as your competitors?

In this article I’ll talk about the Google Chrome User Experience dataset and how to use it in your performance test setup to find the intersection of RUM and Automated performance test results, wiring it all up into your WebPageTest setup! Continue reading

WebPageTest Private Instance: 2021 Edition

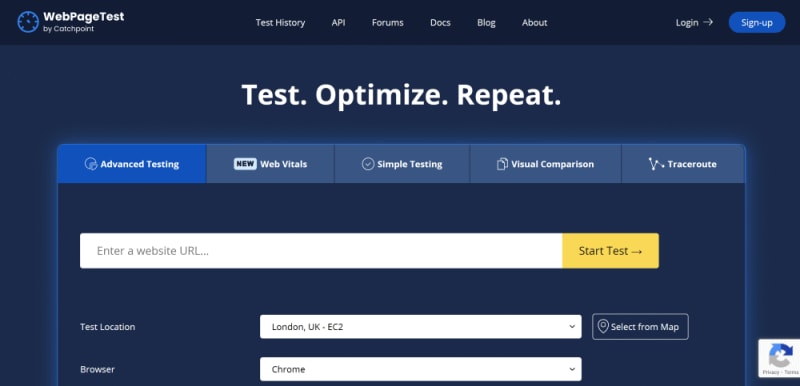
Catchpoint's WebPageTest

The fantastic WebPageTest, free to use and public, has been available to set up your own private instances for many years; I wrote this up a while back, and scripted a Terraform version to make this as easy and automated as possible.

For AWS it was just a case of creating an EC2 instance (other installation options are available) with a predefined WPT server AMI (amazon machine image), add in a few configuration options and boom – your very own, autoscaling, globally distributed, website performance testing solution! New test agents would spin up automatically in other AWS regions, all based on WebPageTest Agent AMIs.

In 2020 WebPageTest was bought by Catchpoint and we finally saw improvements being made, pull requests being closed, and the WebPageTest UI getting a huge update; things were looking great for WebPageTest enthusiasts! If you havent heard of Catchpoint before, they are a company who are all about global network and web application monitoring, so a good match for WebPageTest.

Unfortunately, however, this resulted in the handy WebPageTest server EC2 AMIs no longer existing. If you want your own private installation you now need to build your own WebPageTest server from a base OS. It can be a bit tricky, though it gives you greater understanding of how it works under the hood, so hopefully you’ll feel more confident extending your installation in future.

In this article, I’ll show you how to create a WebPageTest private instance on AWS from scratch (no AMI), create your own private WebPageTest agents using the latest and greatest version of WebPageTest, and wire it all up.

Continue reading

Customized WebPageTest Lighthouse Results using a Custom Test Agent

In my recent article Eco Worriers: Saving the Planet, One Unoptimized Website at a Time for the fantastic annual Perf Planet advent calendar, I mentioned how I created a Private WebPageTest setup to use my own custom test agents, which were configured to use an extra Lighthouse plugin (The Green Web Foundation’s "greenhouse").

In this article I’ll show how to create custom WebPageTest agents, and how to configure your Private WebPageTest instance to use these instead of the default test agents.

Continue reading

Node.js 101: Wrap up

Year of 101s, Part 1 – Node January

Summary – What was it all about?

I set out to spend January learning some node development fundementals.

Part #1 – Intro

I started with a basic intro to using node – a Hello World – which covered what node.js is, how to create the most basic of all programs, and mentioned some of the development environments.

Part #2 – Serving web content

Second was creating a very simple node web server, which covered using nodemon to develop your node app, the concept of exports, basic request routing, and serving various content types.

Part #3 – A basic API

Next was a simple API implementation, where I proxy calls to the Asos API, return a remapped subset of the data returned, reworked the routing creating basic search functionality and a detail page, and touched on being able to pass in command line arguements.

Part #4 – Basic deployment and hosting with Appharbor, Azure, and Heroku

Possibly the most interesting and fun post for me to work on involved deploying the node code on to three cloud hosting solutions where I discovered the oddities each provider has, various solutions to the problems this raises, as well as some debugging cleverness (nice work, Heroku!). The simplicity of a git-remote-push-deploy process is incredible, and really makes quick application development and hosting even more enjoyable!

Part #5 – Packages

Another interesting one was getting to play with node packages, the node package manager (npm), the express web framework, jade templating engine, and stylus css pre-processor, and deploying node apps with packages to cloud hosting.

Part #6 – Web-based development

The final part covered the fantastic Cloud9IDE, including a (very) basic intro to github, and how Cloud9 can still be used in developing and deploying directly to Azure, Appharbor, or Heroku.

What did I get out of it?

I really got into githubbing and OSSing, and really had to try hard to not over stretch myself as I had starting forking repos to try and make a few tweaks to things whilst working on the node month.

It has been extremely inspiring and has opened up so many other random tangents for me to explore in other projects at some other time. Very motivating stuff.

I’ve now got a month of half decent blog posts – I had only intended to do a total of 4 posts but including this one I’ve done 7, since I kept adding more information as it turned up and needed to split a few posts into two.

Also I’ve learned a bit about blogging; trying to do posts well in advance allowed me to build up the details once I’d discovered more whilst working on subsequent posts. For example, how Appharbor and Azure initially track master – but can be configured to track different branches. Also, debugging with Heroku only came up whilst working with packages in Heroku.

Link list

Node tutorials and references

Setting up a node development environment on Windows
Node Beginner – a great article, and I’ve also bought the associated eBooks.
nodejs.org – the official node site, the only place to go for reference

Understanding Javascript better

Execution in The Kingdom of Nouns
Object Orientation and Inheritance in Javascript

Appharbor

Appharbor and git

Heroku

Heroku toolbelt download and reference
node on Heroku

Azure

Checkout what Azure can do!

February – coming up, Samsung Smart TV App Development!

Yeah, seriously. How random is that?.. 🙂

EC2 WinSCP /var/www file upload

Since I use an Amazon EC2 Microinstance to host this blog and I noticed I had no favicon appearing (which is a bad thing) I thought I might as well make one and pop it up.

I took my usual avatar (Jiraya, the “Pervy Sage” from Naruto) and just let someone else do the hard work for me, uploading it to FavICO.com instead of even bothering to download an app to do it.

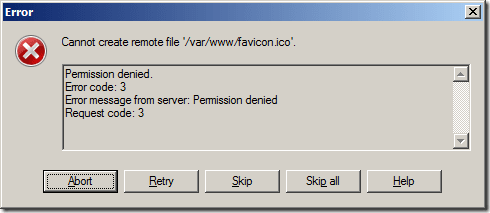
Then I opened up WinSCP and used my EC2 ppk to authenticate with my EC2 instance, took that favicon.ico file and tried to upload it to /var/www/html (the default website root if you install wordpress) only to receive the error:

ec2 var www upload permission error

Hmmm.

If you check the permissions on that folder (“stat /var/www” via SSH) you’ll see that it’s owned by the “root” group; since you’re logging on as ec2-user you’re not a member of that group.

Your options, according to the internet, appear to be;

The solution I found was much easier.

  • Upload the favicon to the ec2-user home directory via WinSCP
  • Move (mv) the favicon from the ec2-user directory to /var/www via SSH using “sudo” to get the necessary permissions

Easy.