Chef for Developers: part 4 – WordPress, Backups, & Restoring

I’m continuing with my plan to create a series of articles for learning Chef from a developer perspective.

Part #1 gave an intro to Chef, Chef Solo, Vagrant, and Virtualbox. I also created my first Ubunutu VM running Apache and serving up the default website.

Part #2 got into creating a cookbook of my own, and evolved it whilst introducing PHP into the mix.

Part #3 wired in MySql and refactored things a bit.

WordPress Restore – Attempt #1: Hack It Together

Now that we’ve got a generic LAMP VM its time to evolve it a bit. In this post I’ll cover adding wordpress to your VM via Chef, scripting a backup of your current wordpress site, and finally creating a carbon copy of that backup on your new wordpress VM.

I’m still focussing on using Chef Solo with Vagrant and VirtualBox for the time being; I’m learning to walk before running!

Kicking off

Create a new directory for working in and create a cookbooks subdirectory; you don’t need to prep the directory with a vagrant init as I’ll add in a couple of clever lines at the top of my new Vagrantfile to initialise it straight from a vagrant up.

Installing WordPress

As in the previous articles, just pull down the wordpress recipe from the opscode repo into your cookbooks directory:

[bash]cd cookbooks
git clone https://github.com/opscode-cookbooks/wordpress.git
[/bash]

Looking at the top of the WordPress default.rb file you can see which other cookbooks it depends on:

[bash]include_recipe "apache2"
include_recipe "mysql::server"
include_recipe "mysql::ruby"
include_recipe "php"
include_recipe "php::module_mysql"
include_recipe "apache2::mod_php5"
[/bash]

From the last post we know that MySql also depends on OpenSSL, and MySql::Ruby depends on build-essentials. Go get those both in your cookbooks directory as well as the others mentioned above:

[bash]git clone https://github.com/opscode-cookbooks/apache2.git
git clone https://github.com/opscode-cookbooks/mysql.git
git clone https://github.com/opscode-cookbooks/openssl.git
git clone https://github.com/opscode-cookbooks/build-essential.git
git clone https://github.com/opscode-cookbooks/php.git
[/bash]

Replace the default Vagrantfile with the one below to reference the wordpress cookbook, and configure the database, username, and password for wordpress to use; I’m basing this one on the Vagrantfile from my last post but have removed everything to do with the “mysite” cookbook:

Vagrantfile

[ruby]Vagrant.configure("2") do |config|
config.vm.box = "precise32"
config.vm.box_url = "http://files.vagrantup.com/precise32.box"
config.vm.network :forwarded_port, guest: 80, host: 8080

config.vm.provision :shell, :inline => "apt-get clean; apt-get update"

config.vm.provision :chef_solo do |chef|

chef.json = {
"mysql" => {
"server_root_password" => "myrootpwd",
"server_repl_password" => "myrootpwd",
"server_debian_password" => "myrootpwd"
},
"wordpress" => {
"db" => {
"database" => "wordpress",
"user" => "wordpress",
"password" => "mywppassword"
}
}
}

chef.cookbooks_path = ["cookbooks"]
chef.add_recipe "wordpress"
end
end
[/ruby]

The lines

[ruby] config.vm.box = "precise32"
config.vm.box_url = "http://files.vagrantup.com/precise32.box"
[/ruby]

mean you can skip the vagrant init stage as we’re defining the same information here instead.

You don’t need to reference the dependant recipes directly since the WordPress one has references to it already.

You also don’t need to disable the default site since the wordpress recipe does this anyway. As such, remove this from the json area:

[ruby] "apache" => {
"default_site_enabled" => false
},
[/ruby]

Note: An issue I’ve found with the current release of the WordPress cookbook

I had to comment out the last line of execution which just displays a message to you saying

[ruby]Navigate to ‘http://#{server_fqdn}/wp-admin/install.php’ to complete wordpress installation.
[/ruby]

For some reason the method “message” on “log” appears to be invalid. You don’t need it though, so if you get the same problem you can just comment it out yourself for now.

To do this, head to line 116 in cookbooks/wordpress/recipes/default.rb and add a # at the start, e.g.:

[ruby]log "wordpress_install_message" do
action :nothing
# message "Navigate to ‘http://#{server_fqdn}/wp-admin/install.php’ to complete wordpress installation"
end
[/ruby]

Give that a

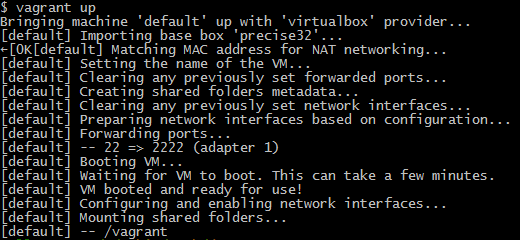
[bash]vagrant up
[/bash]

Then browse to localhost:8080/wp-admin/install.php and you should see:
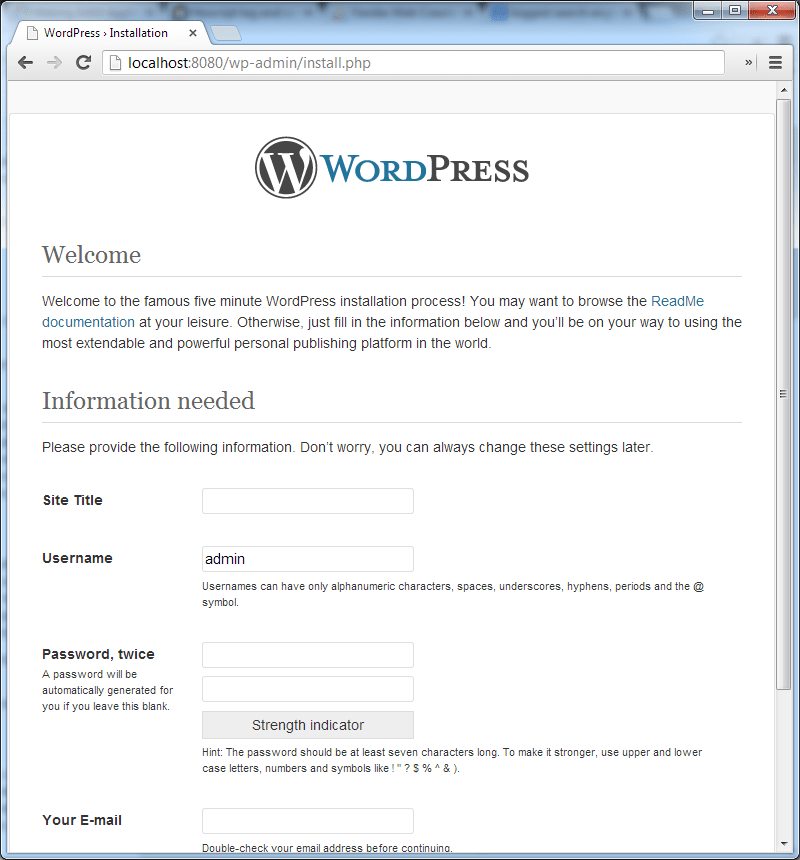
wordpress inital screen 8080

From here you could quite happily set up your wordpress site on a local VM, but I’m going to move on to the next phase in my cunning plan.

Restore a WordPress Backup

I’ve previously blogged about backing a wordpress blog, the output of which was a gziped tar of the entire wordpress directory and the wordpress database tables. I’m now going to restore it to this VM so that I have a functioning copy of my backed up blog.

I’d suggest you head over and read the backup post I link to above, or you can just use the resulting script:

backup_blog.sh

[bash]#!/bin/bash

# Set the date format, filename and the directories where your backup files will be placed and which directory will be archived.
NOW=$(date +"%Y-%m-%d-%H%M")
FILE="rposbowordpressrestoredemo.$NOW.tar"
BACKUP_DIR="/home/<user>/_backup"
WWW_DIR="/var/www"

# MySQL database credentials
DB_USER="root"
DB_PASS="myrootpwd"
DB_NAME="wordpress"
DB_FILE="rposbowordpressrestoredemo.$NOW.sql"

# dump the wordpress dbs
mysql -u$DB_USER -p$DB_PASS –skip-column-names -e "select table_name from information_schema.TABLES where TABLE_NAME like ‘wp_%’;" | xargs mysqldump –add-drop-table -u$DB_USER -p$DB_PASS $DB_NAME > $BACKUP_DIR/$DB_FILE

# archive the website files
tar -cvf $BACKUP_DIR/$FILE $WWW_DIR

# append the db backup to the archive
tar –append –file=$BACKUP_DIR/$FILE $BACKUP_DIR/$DB_FILE

# remove the db backup
rm $BACKUP_DIR/$DB_FILE

# compress the archive
gzip -9 $BACKUP_DIR/$FILE
[/bash]

That results in a gzipped tarball of the entire wordpress directory and the wordpress database dumped to a sql file, all saved in the directory specified at the top – BACKUP_DIR=”/home/<user>/_backup”

First Restore Attempt – HACK-O-RAMA!

For the initial attempt I’m just going to brute-force it, to validate the actual importing and restoring of the backup. The steps are:

  1. copy an archive of the backup over to the VM (or in my case I’ll just set up a shared directory)
  2. uncompress the archive into a temp dir
  3. copy the wordpress files into a website directory
  4. import the mysql dump
  5. update some site specific items in mysql to enable local browsing

You can skip that last one if you want to just add some HOSTS entries to direct calls to the actual wordpress backed up site over to your VM.

Prerequisite

Create a backup of a wordpress site using the script above (or similar) and download the archive to your host machine.

I’ve actually done this using another little vagrant box with a base wordpress install for you to create a quick blog to play around with backing up and restoring – repo is over on github.

For restoring

Since this is the HACK-O-RAMA version, just create a bash script in that same directory called restore_backup.sh into which you’ll be pasting the chunks of code from below to execute the restore.

We can then call this script from the Vagrantfile directly. Haaacckkyyyy…

Exposing the archive to the VM

I’m saving the wordpress archive in a directory called “blog_backup” which is a subdirectory of the project dir on the host machine; I’ll share that directory with the VM using this line somewhere in the Vagrantfile:

[ruby]config.vm.synced_folder "blog_backup/", "/var/blog_backup/"
[/ruby]

if you’re using Vagrant v1 then the syntax would be:

[ruby]config.vm.share_folder "blog", "/var/blog_backup/", "blog_backup/"
[/ruby]

Uncompress the archive into the VM

This can be done using the commands below, pasted into that restore_backup.sh

[bash]# pull in the backup to a temp dir
mkdir /tmp/restore

# untar and expand it
cd /tmp/restore
tar -zxvf /var/blog_backup/<yoursite>.*.tar.gz
[/bash]

Copy the wordpress files over

[bash]# copy the website files to the wordpress site root
sudo cp -Rf /tmp/restore/var/www/wordpress/* /var/www/wordpress/
[/bash]

Import the MySQL dump

[bash]# import the db
mysql -uroot -p<dbpassword> wordpress < /tmp/restore/home/<user>/_backup/<yoursite>.*.sql
[/bash]

Update some site-specific settings to enable browsing

Running these db updates will allow you to browse both the wordpress blog locally and also the admin pages:

[bash]# set the default site to locahost for testage
mysql -uroot -p<dbpassword> wordpress -e "UPDATE wp_options SET option_value=’http://localhost:8080′ WHERE wp_options.option_name=’siteurl’"
mysql -uroot -p<dbpassword> wordpress -e "UPDATE wp_options SET option_value=’http://localhost:8080′ WHERE wp_options.option_name=’home’"
[/bash]

Note: Pretty Permalinks

If you’re using pretty permalinks – i.e., robinosborne.co.uk/2013/07/02/chef-for-developers/ instead of http://robinosborne.co.uk/?p=1418 – then you’ll need to both install the apache::mod_rewrite recipe and configure your .htaccess to allow mod_rewrite to do its thing. Create the .htaccess below to enable rewrites and save it in the same dir as your restore script.

.htaccess

[bash]<IfModule mod_rewrite.c>
RewriteEngine On
RewriteBase /
RewriteRule ^index\.php$ – [L]
RewriteCond %{REQUEST_FILENAME} !-f
RewriteCond %{REQUEST_FILENAME} !-d
RewriteRule . /index.php [L]
</IfModule>
[/bash]

restore_backup.sh

[bash]# copy over the .htaccess to support mod_rewrite for pretty permalinks
sudo cp /var/blog_backup/.htaccess /var/www/wordpress/
sudo chmod 644 /var/www/wordpress/.htaccess
[/bash]

Also add this to your Vagrantfile:

[ruby]chef.add_recipe "apache2::mod_rewrite"
[/ruby]

The final set up and scripts

Bringing this all together we now have a backed up wordpress blog, restored and running as a local VM:
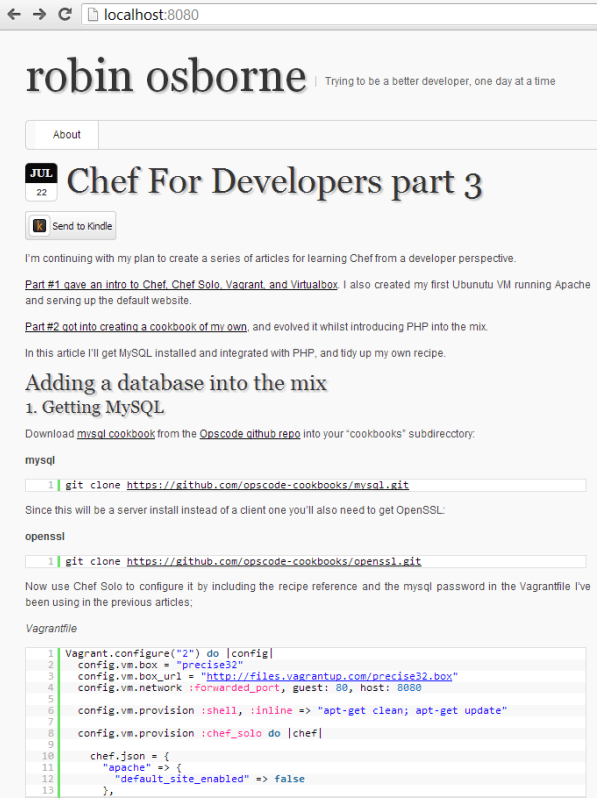
wordpress restore 1

The files needed to achieve this feat are:

Backup script

To be saved on your blog host, executed on demand, and the resulting archive file manually downloaded (probably SCPed). I have mine saved in a shared directory – /var/vagrant/blog_backup.sh:

blog_backup.sh

[bash]#!/bin/bash

# Set the date format, filename and the directories where your backup files will be placed and which directory will be archived.
NOW=$(date +"%Y-%m-%d-%H%M")
FILE="rposbowordpressrestoredemo.$NOW.tar"
BACKUP_DIR="/home/vagrant"
WWW_DIR="/var/www"

# MySQL database credentials
DB_USER="root"
DB_PASS="myrootpwd"
DB_NAME="wordpress"
DB_FILE="rposbowordpressrestoredemo.$NOW.sql"

# dump the wordpress dbs
mysql -u$DB_USER -p$DB_PASS –skip-column-names -e "select table_name from information_schema.TABLES where TABLE_NAME like ‘wp_%’;" | xargs mysqldump –add-drop-table -u$DB_USER -p$DB_PASS $DB_NAME > $BACKUP_DIR/$DB_FILE

# archive the website files
tar -cvf $BACKUP_DIR/$FILE $WWW_DIR

# append the db backup to the archive
tar –append –file=$BACKUP_DIR/$FILE $BACKUP_DIR/$DB_FILE

# remove the db backup
rm $BACKUP_DIR/$DB_FILE

# compress the archive
gzip -9 $BACKUP_DIR/$FILE
[/bash]

Restore script

To be saved in a directory on the host to be shared with the VM, along with your blog archive.

restore_backup.sh

[bash]# pull in the backup, untar and expand it, copy the website files, import the db
mkdir /tmp/restore
cd /tmp/restore
tar -zxvf /var/blog_backup/rposbowordpressrestoredemo.*.tar.gz
sudo cp -Rf /tmp/restore/var/www/wordpress/* /var/www/wordpress/
mysql -uroot -pmyrootpwd wordpress < /tmp/restore/home/vagrant/_backup/rposbowordpressrestoredemo.*.sql

# create the .htaccess to support mod_rewrite for pretty permalinks
sudo cp /var/blog_backup/.htaccess /var/www/wordpress/
sudo chmod 644 /var/www/wordpress/.htaccess

# set the default site to locahost for testage
mysql -uroot -pmyrootpwd wordpress -e "UPDATE wp_options SET option_value=’http://localhost:8080′ WHERE wp_options.option_name=’siteurl’"
mysql -uroot -pmyrootpwd wordpress -e "UPDATE wp_options SET option_value=’http://localhost:8080′ WHERE wp_options.option_name=’home’"
[/bash]

.htaccess

[bash]<IfModule mod_rewrite.c>
RewriteEngine On
RewriteBase /
RewriteRule ^index\.php$ – [L]
RewriteCond %{REQUEST_FILENAME} !-f
RewriteCond %{REQUEST_FILENAME} !-d
RewriteRule . /index.php [L]
</IfModule>
[/bash]

Vagrantfile

[ruby]Vagrant.configure("2") do |config|
config.vm.box = "precise32"
config.vm.box_url = "http://files.vagrantup.com/precise32.box"
config.vm.network :forwarded_port, guest: 80, host: 8080
config.vm.synced_folder "blog_backup/", "/var/blog_backup/"

config.vm.provision :shell, :inline => "apt-get clean; apt-get update"

config.vm.provision :chef_solo do |chef|

chef.json = {
"mysql" => {
"server_root_password" => "myrootpwd",
"server_repl_password" => "myrootpwd",
"server_debian_password" => "myrootpwd"
},
"wordpress" => {
"db" => {
"database" => "wordpress",
"user" => "wordpress",
"password" => "mywppassword"
}
}
}

chef.cookbooks_path = ["cookbooks"]
chef.add_recipe "wordpress"
chef.add_recipe "apache2::mod_rewrite"
end

# hacky first attempt at restoring the blog from a script on a share
config.vm.provision :shell, :path => "blog_backup/restore_backup.sh"
end
[/ruby]

myrootpwd

The password used to set up the mysql instance; it needs to be consistent in your Vagrantfile and your restore_backup.sh script

mywppassword

if you can’t remember your current wordpress user’s password, look in the /wp-config.php file in the backed up archive.

Go get it

I’ve created a fully working setup for your perusal over on github. This repo, combined with the base wordpress install one will give you a couple of fully functional VMs to play with.

If you pull down the restore repo you’ll just need to run setup_cookbooks.sh to pull down the prerequisite cookbooks, then edit the wordpress default recipe to comment out that damned message line.

Once that’s all done, just run

[bash]vagrant up[/bash]

and watch everything tick over until you get your prompt back. At this point you can open a browser and hit http://localhost:8080/ to see:
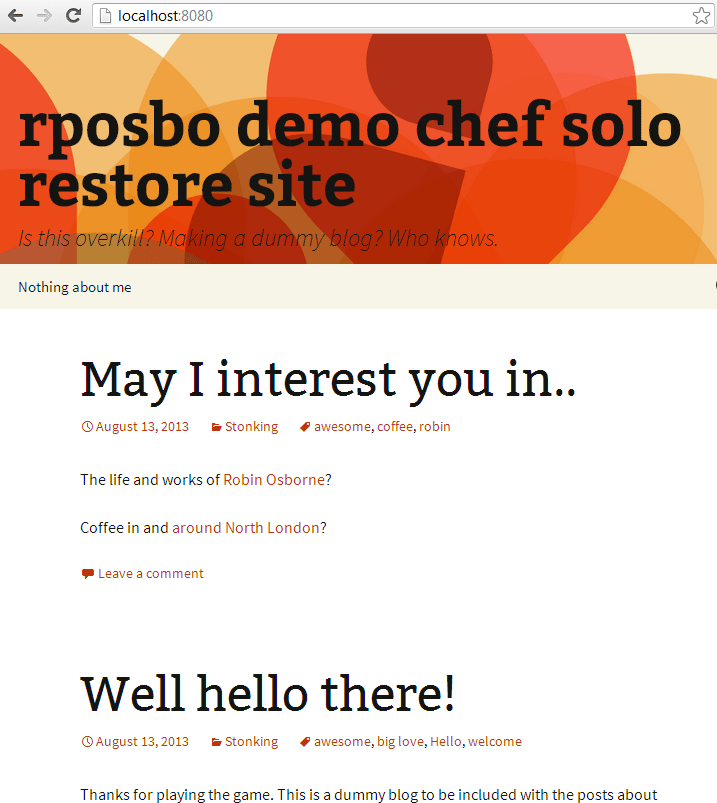
restored blog from github

Next up

I’ll be trying to move all of this hacky cleverness into a Chef recipe or two. Stay tuned.

Chef For Developers part 3

I’m continuing with my plan to create a series of articles for learning Chef from a developer perspective.

Part #1 gave an intro to Chef, Chef Solo, Vagrant, and Virtualbox. I also created my first Ubunutu VM running Apache and serving up the default website.

Part #2 got into creating a cookbook of my own, and evolved it whilst introducing PHP into the mix.

In this article I’ll get MySQL installed and integrated with PHP, and tidy up my own recipe.

Adding a database into the mix

1. Getting MySQL

Download mysql cookbook from the Opscode github repo into your “cookbooks” subdirecctory:

mysql

[bash]git clone https://github.com/opscode-cookbooks/mysql.git
[/bash]

Since this will be a server install instead of a client one you’ll also need to get OpenSSL:

openssl

[bash]git clone https://github.com/opscode-cookbooks/openssl.git
[/bash]

Now use Chef Solo to configure it by including the recipe reference and the mysql password in the Vagrantfile I’ve been using in the previous articles;

Vagrantfile

[ruby highlight=”14-17,26″]Vagrant.configure("2") do |config|
config.vm.box = "precise32"
config.vm.box_url = "http://files.vagrantup.com/precise32.box"
config.vm.network :forwarded_port, guest: 80, host: 8080

config.vm.provision :shell, :inline => "apt-get clean; apt-get update"

config.vm.provision :chef_solo do |chef|

chef.json = {
"apache" => {
"default_site_enabled" => false
},
"mysql" => {
"server_root_password" => "blahblah",
"server_repl_password" => "blahblah",
"server_debian_password" => "blahblah"
},
"mysite" => {
"name" => "My AWESOME site",
"web_root" => "/var/www/mysite"
}
}

chef.cookbooks_path = ["cookbooks","site-cookbooks"]
chef.add_recipe "mysql::server"
chef.add_recipe "mysite"
end
end
[/ruby]

No need to explicitly reference OpenSSL; it’s in the “cookbooks” directory and since the mysql::server recipe references it it just gets pulled in.

If you run that now you’ll be able to ssh in and fool around with mysql using the user root and password as specified in the chef.json block.

[bash]vagrant ssh
[/bash]

and then

[bash]mysql -u root -p
[/bash]

and enter your password (“blahblah” in my case) to get into your mysql instance.

MySQL not doing very much

Now let’s make it do something. Using the mysql::ruby recipe it’s possible to orchestrate a lot of mysql functionality; this also relies on the build-essential cookbook, so download that into your “cookbooks” directory:

Build essential

[bash]git clone https://github.com/opscode-cookbooks/build-essential.git
[/bash]

To get some useful database abstraction methods we need the database cookbook:

Database

[bash]git clone https://github.com/opscode-cookbooks/database.git
[/bash]

The database cookbook gives a nice way of monkeying around with an RDBMS, making it possible to do funky things like:

[ruby]mysql_connection = {:host => "localhost", :username => ‘root’,
:password => node[‘mysql’][‘server_root_password’]}

mysql_database "#{node.mysite.database}" do
connection mysql_connection
action :create
end
[/ruby]

to create a database.

Add the following to the top of the mysite/recipes/default.rb file:

[ruby]include_recipe "mysql::ruby"

mysql_connection = {:host => "localhost", :username => ‘root’,
:password => node[‘mysql’][‘server_root_password’]}

mysql_database node[‘mysite’][‘database’] do
connection mysql_connection
action :create
end

mysql_database_user "root" do
connection mysql_connection
password node[‘mysql’][‘server_root_password’]
database_name node[‘mysite’][‘database’]
host ‘localhost’
privileges [:select,:update,:insert, :delete]
action [:create, :grant]
end

mysql_conn_args = "–user=root –password=#{node[‘mysql’][‘server_root_password’]}"

execute ‘insert-dummy-data’ do
command %Q{mysql #{mysql_conn_args} #{node[‘mysite’][‘database’]} <<EOF
CREATE TABLE transformers (name VARCHAR(32) PRIMARY KEY, type VARCHAR(32));
INSERT INTO transformers (name, type) VALUES (‘Hardhead’,’Headmaster’);
INSERT INTO transformers (name, type) VALUES (‘Chromedome’,’Headmaster’);
INSERT INTO transformers (name, type) VALUES (‘Brainstorm’,’Headmaster’);
INSERT INTO transformers (name, type) VALUES (‘Highbrow’,’Headmaster’);
INSERT INTO transformers (name, type) VALUES (‘Cerebros’,’Headmaster’);
INSERT INTO transformers (name, type) VALUES (‘Fortress Maximus’,’Headmaster’);
INSERT INTO transformers (name, type) VALUES (‘Chase’,’Throttlebot’);
INSERT INTO transformers (name, type) VALUES (‘Freeway’,’Throttlebot’);
INSERT INTO transformers (name, type) VALUES (‘Rollbar’,’Throttlebot’);
INSERT INTO transformers (name, type) VALUES (‘Searchlight’,’Throttlebot’);
INSERT INTO transformers (name, type) VALUES (‘Wideload’,’Throttlebot’);
EOF}
not_if "echo ‘SELECT count(name) FROM transformers’ | mysql #{mysql_conn_args} –skip-column-names #{node[‘mysite’][‘database’]} | grep ‘^3$’"
end
[/ruby]

and add in the new database variable in Vagrantfile:

[ruby highlight=”22″]Vagrant.configure("2") do |config|
config.vm.box = "precise32"
config.vm.box_url = "http://files.vagrantup.com/precise32.box"
config.vm.network :forwarded_port, guest: 80, host: 8080

config.vm.provision :shell, :inline => "apt-get clean; apt-get update"

config.vm.provision :chef_solo do |chef|

chef.json = {
"apache" => {
"default_site_enabled" => false
},
"mysql" => {
"server_root_password" => "blahblah",
"server_repl_password" => "blahblah",
"server_debian_password" => "blahblah"
},
"mysite" => {
"name" => "My AWESOME site",
"web_root" => "/var/www/mysite",
"database" => "great_cartoons"
}
}

chef.cookbooks_path = ["cookbooks","site-cookbooks"]
chef.add_recipe "mysql::server"
chef.add_recipe "mysite"
end
end
[/ruby]

Now we need a page to display that data, but we need to pass in the mysql password as a parameter. That means we need to use a template; create the file templates/default/robotsindisguise.php.erb with this content:

[php]<?php
$con = mysqli_connect("localhost","root", "<%= @pwd %>");
if (mysqli_connect_errno($con))
{
die(‘Could not connect: ‘ . mysqli_connect_error());
}

$sql = "SELECT * FROM great_cartoons.transformers";
$result = mysqli_query($con, $sql);

?>
<table>
<tr>
<th>Transformer Name</th>
<th>Type</th>
</tr>
<?php
while($row = mysqli_fetch_array($result, MYSQL_ASSOC))
{
?>
<tr>
<td><?php echo $row[‘name’]?></td>
<td><?php echo $row[‘type’]?></td>
</tr>
<?php
}//end while
?>
</tr>
</table>
<?php
mysqli_free_result($result);
mysqli_close($con);
?>
[/php]

That line at the top might look odd:

[php]$con = mysqli_connect("localhost","root", "<%= @pwd %>");
[/php]

But bear in mind that it’s an ERB (Extended RuBy) file so gets processed by the ruby parser to generate the resulting file; the PHP processor only kicks in once the file is requested from a browser.

As such, if you kick off a vagrant up now and (eventually) vagrant ssh in, open /var/www/robotsindisguise.php in nano/vi and you’ll see the line

[php]$con = mysqli_connect("localhost","root", "<%= @pwd %>");
[/php]

has become

[php]$con = mysqli_connect("localhost","root", "blahblahblah");
[/php]

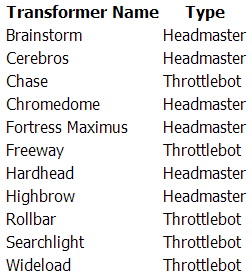
browsing to http://localhost:8080/robotsindisguise.php should give something like this:

Autobots: COMBINE!

2. Tidy it up a bit

Right now we’ve got data access stuff in the default.rb recipe, so let’s move that lot out; I’ve created the file /recipes/data.rb with these contents:

data.rb
[ruby]include_recipe "mysql::ruby"

mysql_connection = {:host => "localhost", :username => ‘root’,
:password => node[‘mysql’][‘server_root_password’]}

mysql_database node[‘mysite’][‘database’] do
connection mysql_connection
action :create
end

mysql_database_user "root" do
connection mysql_connection
password node[‘mysql’][‘server_root_password’]
database_name node[‘mysite’][‘database’]
host ‘localhost’
privileges [:select,:update,:insert, :delete]
action [:create, :grant]
end

mysql_conn_args = "–user=root –password=#{node[‘mysql’][‘server_root_password’]}"

execute ‘insert-dummy-data’ do
command %Q{mysql #{mysql_conn_args} #{node[‘mysite’][‘database’]} <<EOF
CREATE TABLE transformers (name VARCHAR(32) PRIMARY KEY, type VARCHAR(32));
INSERT INTO transformers (name, type) VALUES (‘Hardhead’,’Headmaster’);
INSERT INTO transformers (name, type) VALUES (‘Chromedome’,’Headmaster’);
INSERT INTO transformers (name, type) VALUES (‘Brainstorm’,’Headmaster’);
INSERT INTO transformers (name, type) VALUES (‘Highbrow’,’Headmaster’);
INSERT INTO transformers (name, type) VALUES (‘Cerebros’,’Headmaster’);
INSERT INTO transformers (name, type) VALUES (‘Fortress Maximus’,’Headmaster’);
INSERT INTO transformers (name, type) VALUES (‘Chase’,’Throttlebot’);
INSERT INTO transformers (name, type) VALUES (‘Freeway’,’Throttlebot’);
INSERT INTO transformers (name, type) VALUES (‘Rollbar’,’Throttlebot’);
INSERT INTO transformers (name, type) VALUES (‘Searchlight’,’Throttlebot’);
INSERT INTO transformers (name, type) VALUES (‘Wideload’,’Throttlebot’);
EOF}
not_if "echo ‘SELECT count(name) FROM transformers’ | mysql #{mysql_conn_args} –skip-column-names #{node[‘mysite’][‘database’]} | grep ‘^3$’"
end
[/ruby]

I’ve moved the php recipe references into recipes/webfiles.rb:

webfiles.rb
[ruby]include_recipe "php"
include_recipe "php::module_mysql"

# — Setup the website
# create the webroot
directory "#{node.mysite.web_root}" do
mode 0755
end

# copy in an index.html from mysite/files/default/index.html
cookbook_file "#{node.mysite.web_root}/index.html" do
source "index.html"
mode 0755
end

# copy in my usual favicon, just for the helluvit..
cookbook_file "#{node.mysite.web_root}/favicon.ico" do
source "favicon.ico"
mode 0755
end

# copy in the mysql demo php file
template "#{node.mysite.web_root}/robotsindisguise.php" do
source "robotsindisguise.php.erb"
variables ({
:pwd => node.mysql.server_root_password
})
mode 0755
end

# use a template to create a phpinfo page (just creating the file and passing in one variable)
template "#{node.mysite.web_root}/phpinfo.php" do
source "testpage.php.erb"
mode 0755
variables ({
:title => node.mysite.name
})
end
[/ruby]

So /receipes/default.rb now looks like this:

default.rb
[ruby]include_recipe "apache2"
include_recipe "apache2::mod_php5"

# call "web_app" from the apache recipe definition to set up a new website
web_app "mysite" do
# where the website will live
docroot "#{node.mysite.web_root}"

# apache virtualhost definition
template "mysite.conf.erb"
end

include_recipe "mysite::webfiles"
include_recipe "mysite::data"
[/ruby]

Summary

Over the past three articles we’ve automated the creation of a virtual environment via a series of code files, flat files, and template files, and a main script to pull it all together. The result is a full LAMP stack virtual machine. We also created a new website and pushed that on to the VM also.

All files used in this post can be found in the associated github repo.

Any comments or questions would be greatly appreciated, as would pull requests for improving my lame ruby and php skillz! (and lame css and html..)

Chef For Developers part 2

I’m continuing with my plan to create a series of articles for learning Chef from a developer perspective.

Part #1 gave an intro to Chef, Chef Solo, Vagrant, and Virtualbox. I also created my first Ubuntu VM running Apache and serving up the default website.

In this article I’ll get on to creating a cookbook of my own, and evolve it whilst introducing PHP into the mix.

Creating and evolving your own cookbook

1. Cook your own book

Downloaded configuration cookbooks live in the cookbooks subdirectory; this should be left alone as you can exclude it from version control knowing that the cookbooks are remotely hosted and can be downloaded as needed.

For your own ones you need to create a new directory; the convention for this has become to use site-cookbooks, but you can use whatever name you like as far as I can tell. You just need to add a reference to that directory in the Vagrantfile:

[bash]chef.cookbooks_path = ["cookbooks", "site-cookbooks", "blahblahblah"][/bash]

Within that new subdirectory you need to have, at a minimum, a recipes subdirectory with a default.rb ruby file which defines what your recipe does. Other key subdirectories are files (exactly that: files to be referenced/copied/whatever) and templates (ruby ERB templates which can be referenced to create a new file).

To create this default structure (for a cookbook called mysite) just use the one-liner:

[bash]mkdir -p site-cookbooks/mysite/{recipes,{templates,files}/default}[/bash]

You’ll need to create two new files to spin up our new website; a favicon and a flat index html file. Create something simple and put them in the files/default/ directory (or use my ones).

Now in order for them to be referenced there needs to be a default.rb in recipes:

[ruby]# — Setup the website
# create the webroot
directory "#{node.mysite.web_root}" do
mode 0755
end

# copy in an index.html from mysite/files/default/index.html
cookbook_file "#{node.mysite.web_root}/index.html" do
source "index.html"
mode 0755
end

# copy in my usual favicon, just for the helluvit..
cookbook_file "#{node.mysite.web_root}/favicon.ico" do
source "favicon.ico"
mode 0755
end[/ruby]

This will create a directory for the website (the location of which needs to be defined in the chef.json section of the Vagrantfile), copy the specified files from files/default/ over, and set the permissions on them all so that the web process can access them.

You can also use the syntax:

[ruby]directory node[‘mysite’][‘web_root’] do[/ruby]

in place of

[ruby]directory "#{node.mysite.web_root}" do[/ruby]

So how will Apache know about this site? Better configure it with a conf file from a template; create a new file in templates/default/ called mysite.conf.erb:

[ruby]<VirtualHost *:80>
DocumentRoot <%= @params[:docroot] %>
</VirtualHost>[/ruby]

And then reference it from the default.rb recipe file (add to the end of the one we just created, above):

[ruby]web_app "mysite" do
# where the website will live
docroot "#{node.mysite.web_root}"

# apache virtualhost definition
template "mysite.conf.erb"
end[/ruby]

That just calls the web_app method that exists within the Apache cookbook to create a new site called “mysite”, set the docroot to the same directory as we just created, and configure the virtual host to reference it, as configured in the ERB template.

The Vagrantfile now needs to become:

[ruby]Vagrant.configure("2") do |config|
config.vm.box = "precise32"
config.vm.box_url = "http://files.vagrantup.com/precise32.box"
config.vm.network :forwarded_port, guest: 80, host: 8080

config.vm.provision :chef_solo do |chef|

chef.json = {
"apache" => {
"default_site_enabled" => false
},
"mysite" => {
"name" => "My AWESOME site",
"web_root" => "/var/www/mysite"
}
}

chef.cookbooks_path = ["cookbooks","site-cookbooks"]
chef.add_recipe "apache2"
chef.add_recipe "mysite"
end
end[/ruby]

Pro tip: be careful with quotes around the value for default_site_enabled; “false” == true whereas false == false, apparently.

Make sure you’ve destroyed your existing vagrant vm and bring this new one up, a decent one-liner is:

[bash]vagrant destroy –force && vagrant up[/bash]

You should see a load of references to your new cookbook in the output and hopefully once it’s finished you’ll be able to browse to http://localhost:8080 and see something as GORGEOUS as:

Salmonpink is underrated

2. Skipping the M in LAMP, Straight to the P: PHP

Referencing PHP

Configure your code to bring in PHP; a new recipe needs to be referenced as a module of Apache:

[ruby]chef.add_recipe "apache2::mod_php5"[/ruby]

It’s probably worth mentioning that

[ruby]add_recipe "apache"[/ruby]

actually means

[ruby]add_recipe "apache::default"[/ruby]

As such, mod_php5 is a recipe file itself, much like default.rb is; you can find it in the Apache cookbook under cookbooks/apache2/recipes/mod_php5.rb and all it does is call the approriate package manager to install the necessary libraries.

You may find that you receive the following error after adding in that recipe reference:

[bash]apt-get -q -y install libapache2-mod-php5=5.3.10-1ubuntu3.3 returned 100, expected 0[/bash]

To get around this you need to add in some simple apt-get housekeeping before any other provisioning:

[ruby]config.vm.provision :shell, :inline => "apt-get clean; apt-get update"[/ruby]

PHPInfo

Let’s make a basic phpinfo page to show that PHP is in there and running. To do this you could create a new file and just whack in a call to phpinfo(), but I’m going to create a new template so we can pass in a page title for it to use (create your own, or just use mine):

[html]<html>
<head>
<title><%= @title %></title>
.. snip..
</head>
<body>
<h1><%= @title %></h1>
<div class="description">
<?php
phpinfo( );
?>
</div>
.. snip ..
</body>
</html>[/html]

The default.rb recipe now needs a new section to create a file from the template:

[ruby]# use a template to create a phpinfo page (just creating the file and passing in one variable)
template "#{node.mysite.web_root}/phpinfo.php" do
source "testpage.php.erb"
mode 0755
variables ({
:title => node.mysite.name
})
end[/ruby]

Destroy, rebuild, and browse to http://localhost:8080/phpinfo.php:

A spanking new phpinfo page - wowzers!

Notice the heading and the title of the tab are set to the values passed in from the Vagrantfile.

3. Refactor the Cookbook

We can actually put the add_recipe calls inside of other recipes using include_recipe, so that the dependencies are explicit; no need to worry about forgetting to include apache in the Vagrantfile if you’re including it in your recipe itself.

Let’s make default.rb responsible for the web app itself, and make a new recipe for creating the web files; create a new webfiles.rb in recipes/mysite and move the file related stuff in there:

webfiles.rb
[ruby]# — Setup the website
# create the webroot
directory "#{node.mysite.web_root}" do
mode 0755
end

# copy in an index.html from mysite/files/default/index.html
cookbook_file "#{node.mysite.web_root}/index.html" do
source "index.html"
mode 0755
end

# copy in my usual favicon, just for the helluvit..
cookbook_file "#{node.mysite.web_root}/favicon.ico" do
source "favicon.ico"
mode 0755
end

# use a template to create a phpinfo page (just creating the file and passing in one variable)
template "#{node.mysite.web_root}/phpinfo.php" do
source "testpage.php.erb"
mode 0755
variables ({
:title => node.mysite.name
})
end[/ruby]

default.rb now looks like

[ruby]include_recipe "apache2"
include_recipe "apache2::mod_php5"

# call "web_app" from the apache recipe definition to set up a new website
web_app "mysite" do
# where the website will live
docroot "#{node.mysite.web_root}"

# apache virtualhost definition
template "mysite.conf.erb"
end

include_recipe "mysite::webfiles"[/ruby]

And Vagrantfile now looks like:

[ruby]Vagrant.configure("2") do |config|
config.vm.box = "precise32"
config.vm.box_url = "http://files.vagrantup.com/precise32.box"
config.vm.network :forwarded_port, guest: 80, host: 8080

config.vm.provision :shell, :inline => "apt-get clean; apt-get update"

config.vm.provision :chef_solo do |chef|

chef.json = {
"apache" => {
"default_site_enabled" => false
},
"mysite" => {
"name" => "My AWESOME site",
"web_root" => "/var/www/mysite"
}
}

chef.cookbooks_path = ["cookbooks","site-cookbooks"]
chef.add_recipe "mysite"
end
end[/ruby]

The add_recipes are now include_recipes moved to default.rb, the file related stuff is in webfiles.rb and there’s an include_recipe to reference this new file:

[ruby]include_recipe "mysite::webfiles"[/ruby]

Why the refactoring is important!

Well, refactoring is a nice, cathartic, thing to do anyway. But there’s also a specific reason for doing it here: once we move from using Chef Solo to Grown Up Chef (aka Hosted Chef) the Vagrantfile won’t be used anymore.

As such, moving the logic out of the Vagrantfile (e.g., add_recipe calls) and into our own cookbook (e.g. include_recipe calls) will allow us to use our same recipe in both Chef Solo and also Hosted Chef.

Next up

We’ll be getting stuck in to MySQL integration and evolving a slightly more dynamic recipe.

All files used in this post can be found in the associated github repo.

Chef For Developers

Chef, Vagrant, VirtualBox

In this upcoming series of articles I’ll be trying to demonstrate (and learn for myself) how to effectively configure the creation of an environment. I’ve decided to look into Chef as my environment configuration tool of choice, just because it managed to settle in my brain quicker than Puppet did.

I’m planning on starting really slowly and simply using Chef Solo so I don’t need to learn about the concepts of hosted Chef servers and Chef client nodes to begin with. I’ll be using virtual machines instead of metal, so will be using VirtualBox for the VM-ing and Vagrant for the VM orchestration.

Sounds like Ops to me..

The numerous other articles I’ve read about using Chef all seem to assume a fundemental Linux SysOps background, which melted my little brain somewhat; hence why I’m starting my own series and doing it from a developer perspective.

LINUX?!

Don’t worry if you’re not familiar with Linux; although I’ll start with a Linux VM I’ll eventually move on to applying the same process to Windows, and the commands used in Linux will be srsly basic. Srsly.
Lolz.

Part 1 – I ♥ LAMP

This first few articles will cover:

Chef

Chef

“Chef is an automation platform that transforms infrastructure into code”. You are ultimately able to describe what your infrastructure looks like in ruby code and manage your entire server estate via a central repository; adding, removing, and updating features, applications, and configuration from the command line with an extensive Chef toolbelt.

Yes, there are knives. And cookbooks and recipes. Even a food critic!

Here’s the important bit: The difference between Chef Solo and one of the Hosted Chef options

Chef Solo

  1. You only have a single Chef client which uses a local json file to understand what it is comprised of.
  2. Cookbooks are either saved locally to the client or referenced via URL to a tar archive.
  3. There is no concept of different environments.

Hosted Chef

  1. You have a master Chef server to which all Chef client nodes connect to understand what they are comprised of.
  2. Cookbooks are uploaded to the Chef server using the Knife command line tool.
  3. There is the concept of different environments (dev, test, prod).

I’ll eventually get on to this in more detail as I’ll be investigating Chef over the next few posts in this series; for now, please just be aware that in this scenario Chef Solo is being used to demonstrate the benefit of environment configuration and is not being recommended as a production solution. Although in some cases it might be.

VirtualBox

virtualbox

“VirtualBox is a cross-platform virtualization application”. You can easily configure a virtual machine in terms of RAM, HDD size and type, network interface type and number, CPU, even cnfigure shared folders between host and client. Then you can point the virtual master drive at an ISO on the host computer and install an OS as if you were sitting at a physical machine.

This has so many uses, including things like setting up a development VM for installing loads of dev tools if you want to keep your own computer clean, or setting up a presentation machine containing just powerpoint, your slides, and Visual Studio for demos.

Vagrant

vagrant up

Vagrant is an open source development environment virtualisation technology written in Ruby. Essentially you use Vagrant to script against VirtualBox, VMWare, AWS or many others; you can even write your own provider for it to hook into!

The code for Vagrant is open source and can be found on github

Getting started

Downloads

For this first post you don’t even need to download the Chef client, so we’ll leave that for now.

Go and download Vagrant and VirtualBox and install them.

Your First Scripted Environment

1. Get a base OS image

To do this download a Vagrant “box” (an actual base OS, of which there are many) from the specified URL, assign a friendly name (e.g. “precise32”) to it, and create a base “Vagrantfile” using Vagrant’s “init” method, from the command line run:

[bash]vagrant init precise32 http://files.vagrantup.com/precise32.box[/bash]

vagrant init

A Vagrantfile is a little bit of ruby to define the configuration of your Vagrant box; the autogenerated one is HUGE but its pretty much all tutorial-esque comments. Ignoring the comments gives you something like this:

[ruby]Vagrant::Config.run do |config|
config.vm.box = "precise32"
config.vm.box_url = "http://files.vagrantup.com/precise32.box"
end
[/ruby]

Yours might also look like this depending on whether you’re defaulting to Vagrant v2 or v1:

[ruby]Vagrant.configure("2") do |config|
config.vm.box = "precise32"
config.vm.box_url = "http://files.vagrantup.com/precise32.box"
end
[/ruby]

This is worth bearing in mind as the syntax for various operations differ slightly between versions.

2. Create and start your basic VM

From the command line:

Create and start up the basic vm

[bash]vagrant up[/bash]

vagrant up

If you have Virtualbox running you’ll see the new VM pop up and the preview window will show it booting.

vagrant up in virtualbox

SSH into it

[bash]vagrant ssh[/bash]

vagrant ssh

Stop it

[bash]vagrant halt[/bash]

vagrant halt

Remove all trace of it

[bash]vagrant destroy[/bash]

vagrant destroy

And that’s your first basic, scripted, virtual machine using Vagrant! Now let’s add some more useful functionality to it:

3. Download Apache Cookbook

Create a subdirectory “cookbooks” in the same place as your Vagrantfile, then head over to the opscode github repo and download the Apache2 cookbook into the “cookbooks” directory.

OpsCode cookbooks repo for Apache

Apache

[bash]git clone https://github.com/opscode-cookbooks/apache2.git[/bash]

Gitting it

4. Set up Apache using Chef Solo

Now it starts to get interesting.

Update your Vagrantfile to include port forwarding so that browsing to localhost:8080 redirects to your VM’s port 80:

[ruby]Vagrant.configure("2") do |config|
config.vm.box = "precise32"
config.vm.box_url = "http://files.vagrantup.com/precise32.box"
config.vm.network :forwarded_port, guest: 80, host: 8080
end[/ruby]

Now add in the Chef provisioning to include Apache in the build:

[ruby]Vagrant.configure("2") do |config|
config.vm.box = "precise32"
config.vm.box_url = "http://files.vagrantup.com/precise32.box"
config.vm.network :forwarded_port, guest: 80, host: 8080

config.vm.provision :chef_solo do |chef|
chef.cookbooks_path = ["cookbooks"]
chef.add_recipe "apache2"
end
end[/ruby]

Kick it off:

[bash]vagrant up[/bash]

Vagrant with Apache - starting boot

..tick tock..

Vagrant with Apache - finishing boot

So we now have a fresh new Ubunutu VM with Apache installed and configured and running on port 80, with our own port 8080 forwarded to the VM’s port 80; let’s check it out!

Browsing the wonderful Apache site

Huh? Where’s the lovely default site you normally get with Apache? Apache is definitely running – check the footer of that screen.

What’s happening is that on Ubuntu the default site doesn’t get enabled so we have to do that ourselves. This is also a great intro to passing data into the chef provisioner.

Add in this little chunk of JSON to the Vagrantfile:

[ruby]chef.json = {
"apache" => {
"default_site_enabled" => true
}
}[/ruby]

So it should now look like this:

[ruby]Vagrant.configure("2") do |config|
config.vm.box = "precise32"
config.vm.box_url = "http://files.vagrantup.com/precise32.box"
config.vm.network :forwarded_port, guest: 80, host: 8080

config.vm.provision :chef_solo do |chef|

chef.json = {
"apache" => {
"default_site_enabled" => true
}
}

chef.cookbooks_path = ["cookbooks"]
chef.add_recipe "apache2"
end
end[/ruby]

The chef.json section passes the specified variable values into the specified recipe file. If you dig into default.rb in /cookbooks/apache/recipes you’ll see this block towards the end:

[ruby]apache_site "default" do
enable node[‘apache’][‘default_site_enabled’]
end[/ruby]

Essentially this says “for the site default, set it’s status equal to the value defined by default_site_enabled in the apache node config section”. For Ubuntu this defaults to false (other OSs default it to true) and we’ve just set ours to true.

Let’s try that again:

[bash]vagrant reload[/bash]

(reload is the equivalent of vagrant halt && vagrant up)

Notice that this time, towards the end of the run, we get the message

[bash]INFO: execute[a2ensite default] ran successfully[/bash]

instead of on the previous one:

[bash]INFO: execute[a2dissite default] ran successfully[/bash]

  • a2ensite = enable site
  • a2dissite = disable site

So what does this look like?

Browsing the wonderful Apache site.. take 2

BOOM!

Next up

Let’s dig into the concept of Chef recipes and creating our own ones.

RaspberryPi 101: Part #3 – Uses #1: Media PC

(Apologies in advance for what will be an image-heavy post!)

Intro

XBMC (originally the XBox Media Centre) is an award-winning free and open source (GPL) software media player and entertainment hub for digital media. Raspbmc is a distribution of XBMC tailored specifically for the raspberry pi.

Using it you can easily stream audio and video from your local network, USB devices, and the interwebs for the price of a ‘pi, the cables needed, and an SD card.

Raspbmc Installer for Windows

Download the installer

There are various download options including getting the full ISO yourself and manually doing the install. The easiest and recommended option is to download the bootstrap installer which ensures you get the correct, and latest, version of XBMC and can also set up networking prior to the install, which saves the need to configure this manually from the pi itself.

The download options are all on the raspbmc download page

Run the installer

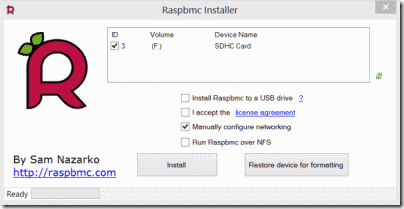
Insert the SD card you’re going to install raspbmc to; be sure you select the correct device in the setup screen as it does wipe the entire device during installation.

xbmc - windows installer - 1

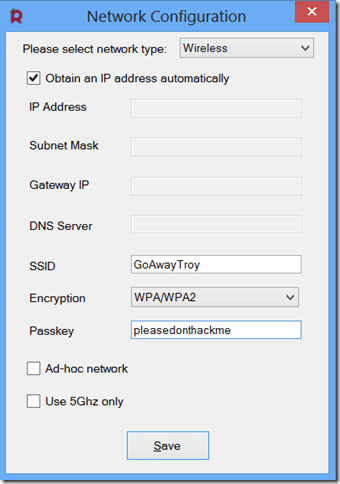
Set up networking

I think this is a great touch; allowing you to configure your network settings (wired or wireless) as part of the install process, so that your pi should just work after plugging in the power and SD card

xbmc - windows installer - 2 - network config

Plug it in, Go Go Go!

Once the bootstrap installer has been written to your SD card, put the SD card into your pi, plug it into the HDMI port and turn on the pi. If it supports HMDI CEC, your TV should automagically turn on and change to the new HDMI input.

2013-03-04 08.20.06

CEC (consumer electronics control) is the control protocol in HDMI which allow systems which run over an HDMI port to interact with the host device, either via the host’s remote control for input or transmitting similar input in order to control the host.

Automatically turning on your TV and changing to the correct HDMI source when you turn on you pi whilst running Raspbmc is one example of the device controlling the host.

Interacting with Raspbmc on your TV just using the TV remote control is an example of the host’s remote controlling the device.

This makes what could be a complex and nerdy device available to those other family members who may not be as nerdy as yourself; no need to ssh in to start a service to download a plugin, or VNC over to browse your network, or plug in a keyboard and mouse to search for some music. Pretty clever stuff!

After a lengthy wait to download the full latest XBMC distro (I presume) and setup your system you should be presented with the default XMBC home screen

2013-03-04 08.19.39

From here you can do oh so many things! Stream your music from your network or attached USB device, stream video likewise (y’know, bog standard media centre stuff), if you have a PVR backend then you can use it to view live TV, the EPG, configure recording and pause of live TV.

2013-03-04 08.18.23

You can install a selection of plugins for audio, video, themes, and other things like weather apps. If you choose to install video add onsyou can find such awesome plugins as Wired and TED (and Anime Vice.. there’s some weirdass cartoons on that one):

 2013-03-04 08.17.03

2013-03-04 08.16.49

2013-03-04 12.23.14

These can effortlessly stream HD video to your TV, which I think is pretty impressive for something so small and cheap!

The weather app is pretty decent too, except I could not for the life of me figure out how to change it from Fahrenheit to Centigrade.

 2013-03-04 08.17.32    

ssh is running by default, but the default pi password doesn’t seem to be "raspberry". As such, I had to connect it to my tv to set the password (under Programs -> Add-ons -> System Configuration -> Password Management). I believe the default settings are username “root” password “root”

In summary

This is a fantastic use for a pi, especially if you don’t already have a media centre setup. However, as you can read from my Year of 101s #2 : Smart TV posts, I already have a media centre built into my TV for this sort of thing; it can already install apps (the TED app works great, as do all of the catch up tv ones) so I wouldn’t use Raspbmc myself.

Backup a WordPress Amazon EC2 instance

Previously I’ve had some difficulty backing up my microistance WordPress MySql db; running mysqldump would cause 100% CPU use until I rebooted the instance and restart apache & mysql.

Why was mysqldump evil?

At least I’ve finally discovered the reason I’d get those nasty CPU spikes:

w2db_fail[1]

The culprit is, most likely, the Slimstat plugin:

screenshot-2[1]

This is a real-time web analytics plugin which has a lovely dashboard view showing you everything about who is or has viewed your site, how long they were there for, how they got there, etc. Addictive stuff.

However, in order to get these stats it saves a lot of data in a new set of mysql tables; these tables not only get really big, but are also being accessed constantly.

As such, a brief overview for backing up from the command line, as referenced in the WordPress codex has a couple of mysqldump commands similar to:

[code]mysqldump –add-drop-table -h <hostname> -u <username> -p <database name>[/code]

This will try to backup everything in the named database, which would include all Slimstat tables.

Solutions

There are a couple of approaches to this. I’ve now done both.

  1. Change your backup script to select the wordpress mysql tables only
  2. Use google analytics instead of slimstat

Using google analytics

Head over to www.google.co.uk/analytics and setup your account, then save the file it gives you onto your web host to prove it’s you. Now you can get lovely stats just by placing a tracking script reference in the footer of your WordPress theme; be careful to reimplement this if you change themes.

analytics

Selecting the WordPress tables

Get the table names for all wordpress tables (assuming you went with the default naming convention of a “wp_” prefix; if not, adapt to suit your convention):

mysql -u<username> -p<password> –skip-column-names -e "select table_name from information_schema.TABLES where TABLE_NAME like ‘wp_%’;"

Pipe it into mysqldump:

mysql -u<username> -p<password> –skip-column-names -e "select table_name from information_schema.TABLES where TABLE_NAME like ‘wp_%’;" | xargs mysqldump –add-drop-table -u<username> -p<password> <database name>

send that output to a file:

mysql -u<username> -p<password> –skip-column-names -e "select table_name from information_schema.TABLES where TABLE_NAME like ‘wp_%’;" | xargs mysqldump –add-drop-table -u<username> -p<password> <database name> > <backup file name>

In summary

Using this info I can now create a backup script that actually works; it will generate a single gzipped tar of all my website’s content files (including wordpress code) and the database backup:

[code]#!/bin/bash

# Set the date format, filename and the directories where your backup files will be placed and which directory will be archived.
NOW=$(date +"%Y-%m-%d-%H%M")
FILE="mywebsitebackup.$NOW.tar"
BACKUP_DIR="/home/ec2-user/_backup"
WWW_DIR="/var/www"

# MySQL database credentials
DB_USER="root"
DB_PASS="enteryourpwdhere"
DB_NAME="wordpress"
DB_FILE="mydbbackup.$NOW.sql"

# dump the wordpress dbs
mysql -u$DB_USER -p$DB_PASS –skip-column-names -e "select table_name from information_schema.TABLES where TABLE_NAME like ‘wp_%’;" | xargs mysqldump –add-drop-table -u$DB_USER -p$DB_PASS $DB_NAME > $BACKUP_DIR/$DB_FILE

# archive the website files
tar -cvf $BACKUP_DIR/$FILE $WWW_DIR

# append the db backup to the archive
tar –append –file=$BACKUP_DIR/$FILE $BACKUP_DIR/$DB_FILE

# remove the db backup
rm $BACKUP_DIR/$DB_FILE

# compress the archive
gzip -9 $BACKUP_DIR/$FILE
[/code]

Save that in a script, make it executable, and if you like you can add a cron task to create a backup on a regular basis. A couple of things to watch out for:

  1. These files can be big, so will use up a good chunk of your elastic block store volumes, which cost a few dollars more than a teeny EC2 instance
  2. Creating the archive can be a bit processor intensive sometimes, which may stress your poor little microinstance

Coming up

Using this backup I automate the creation of a duplicate blog and script the entire process using Chef and Vagrant!

Raspberry Pi 101: Part 2b – More setup

Before I get onto XBMC, here’s a little extra setup I’ve done with my rPi. Remember, I’m currently using the raspbian distro, so don’t go trying the same steps when you’re using RISC or something else.

Wifi

edimax
The edimax wifi dongle I bought needed a little massaging to get working; unfortunately I could’t set it up directly from the command line and it appears that currently the only solution for configuring wifi within raspbian is to start the GUI desktop:

[code]startx[/code]

and punch the wifi config desktop icon. This will open the wifi config gui and allow you to scan and setup your connection.

Once this is done a restart should still keep the wifi connectivity

SSH via Connectbot sans password

I like to use connectbot to ssh into many things and I’m lazy so don’t fancy typing passwords if I don’t need to.

As such, here’s how to set up your raspberry pi with authorized key ssh access:

Generate a key

Install Connectbot from the android store

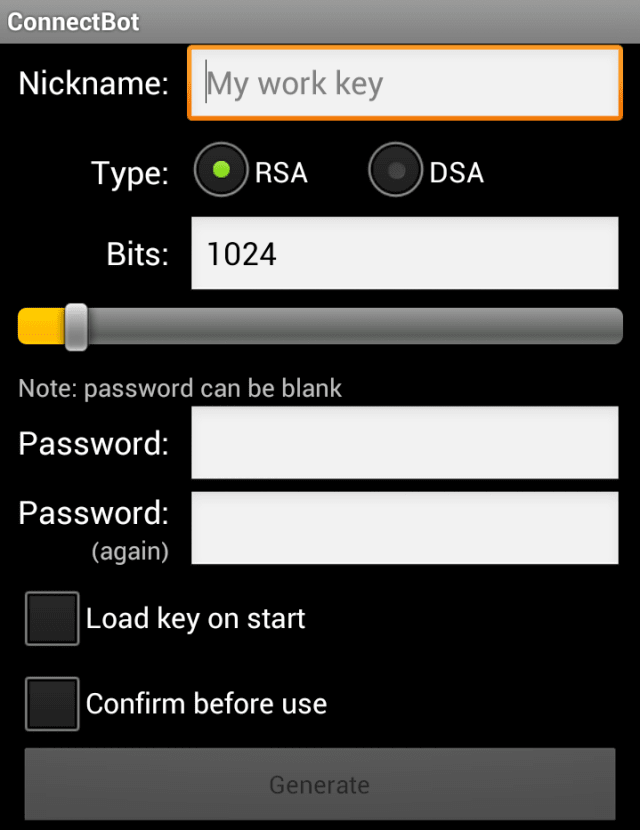
Generate a new key from the “manage keys” page
connectbot generate key

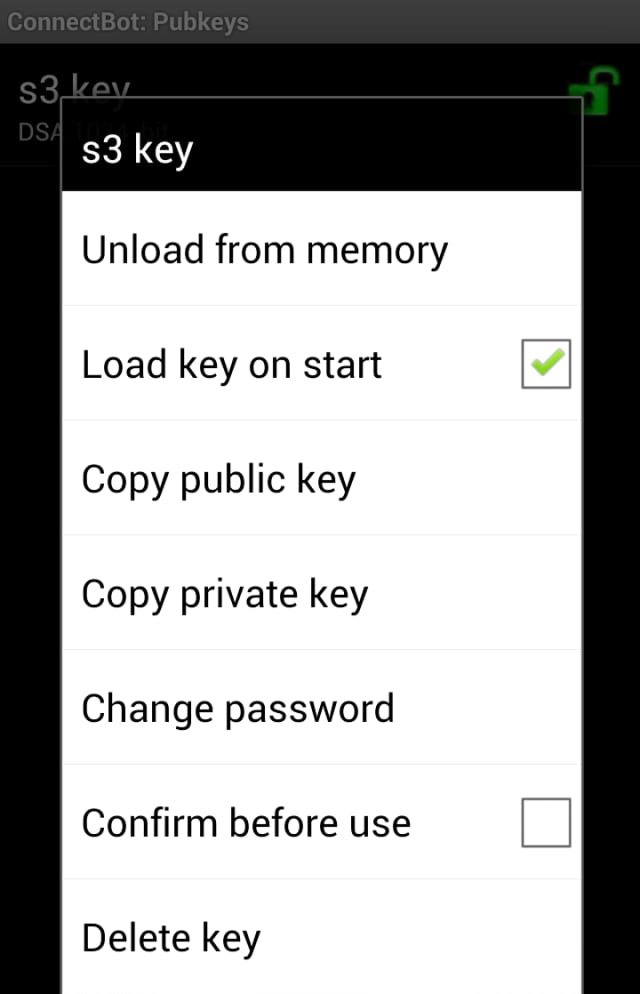
Copy the public key to clipboard
connectbot copy to clipboard

SSH into your raspberryPi from your connectbot instance using the username “pi” and password “raspberry” (unless you changed it from the default)

Paste the key into a new authorized_key file (there isn’t one created by default):

[code]cd ~
mkdir .ssh
chmod 700 .ssh[/code]

Then use the menu soft key to select “paste” after typing “echo”:

[code]echo [paste clipboard contents] >> .ssh/authorized_keys
chmod 600 .ssh/authorized_keys[/code]

Now you can exit the session and should be able to log back in without needing to enter a username or password. Whoop.

VNC

Just for the hell of it (and because I’ve become interested thanks to the blog posts at the end of this article) I’ve set up VNC on the pi. To do this is as easy as

[code]sudo apt-get install tightvncserver[/code]

and then start the server using something like

[code]sudo vncserver :1 -geometry 1024×768 -depth 24[/code]

You can then connect using your VNC viewer of choice to {the rPi’s IP}:1, e.g. 192.168.0.100:1

References

A great couple of posts on SSH and tunnels using the rPi here and here

DevOps Consulting: I Think I Will

I posted a lengthy reply to a blog entitled “Devops Consulting: Why I Don’t” (essentially “devops doesn’t mean what you think it means, stop using it badly, there’s no such thing as a devops consultant”, which I disagree with since that’s what I’m trying to become!) so thought I may as well blog it as well to keep any discussion going. Your thoughts are appreciated.

To me a devops consultant is someone who is knowledgeable in many things from the entire length of the development lifecycle; like value stream mapping, impact mapping, fishbone/5 whys retrospectives, multiple development methodologies, various test automation frameworks, various build automation frameworks, various environment automation frameworks, release management tools, various reporting and monitoring frameworks, as well as the business knowledge to know how to put it all together to identify the best mix of things to suit a given company who is struggling to gain business benefit from their projects in a timely manner.

Not necessarily being an expert at hardcore technical depth in all of those areas, but knowing which tools to take out from the toolbox for which job.

I agree that the term devops is ambiguous and hugely incorrectly overused – mainly due to it sounding much like a person instead of a culture – but that doesn’t mean that the term can mean something that is a set of skills a consultant can have.

Recently I’ve started to think that it could be used in a similar fashion to “agile”; you could affix it to existing disciplines to expand their meaning:

devops engineer – someone who knows about implementing a CI process using build automation, packaging, and environment automation

devops tester – someone who knows about building testable software right from the idea initiation through development, defect tracking and reporting, test automation, and the resulting feedback loop

devops developer – bit trickier; possibly someone working on building or expanding the automation tools, as opposed to an application developer?

devops consultant – someone who can be dropped into a company, assess their processes, people, and technologies, and work out what changes would need to be made in order to achieve better throughput, where to make the changes and recommend which technologies to use (without necessarily being able to implement the changes themselves, but having the network of skilled devops-** people who can).

That’s my understanding of it anyway, Environment automation is one part of a big term – and may not even be the right answer for certain companies anyway.

Aside #10 – Send To Kindle WordPress plugin

Whilst uber geeking it up (streaming a HD Wired.com video podcast to my TV via a raspberry pi with the world’s teeniest usb wifi and a USB battery pack – my next RPi post will cover this!) I learned that WordPress has a new plugin for sending posts straight to your Kindle!

Great idea, since I’m always wanting to read some long post but don’t have the time, so would love a “read it later” button to push it to another device.

Installing the plugin

Here’s all it took to install on this blog:

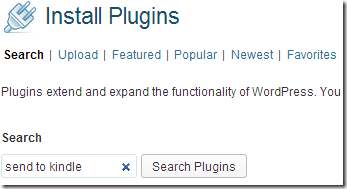
Search for "Send to Kindle” from the plugin page on your wordpress install/site.

Send To Kindle - finding plugin 1

Find the “Send To Kindle” plugin from “Amazon Inc” and click “install”

Send To Kindle - finding plugin 2

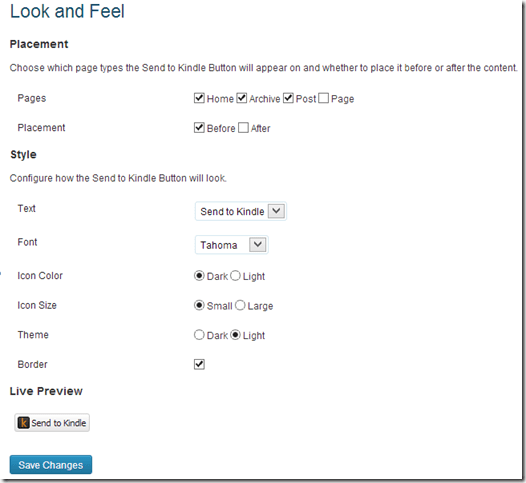
Once installed you have a couple of options

Send To Kindle - plugin installed

You can configure the basics, such as where to display it, what font to use, what text to display (you’re limited to “Kindle”, “Send to Kindle”, or nothing..), which colour scheme to use, what size icon and of which colour, what colour background, and whether to display a border or not.

Send To Kindle - plugin setup - basic

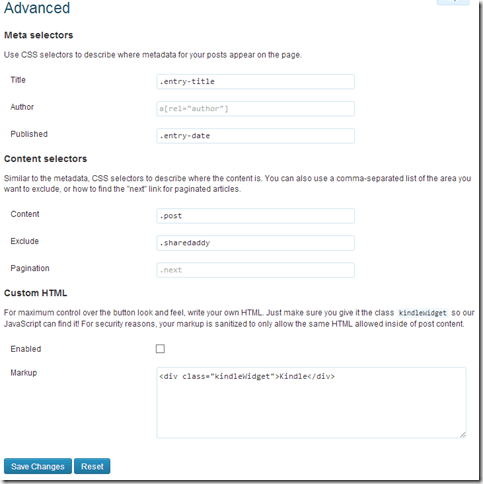
If you want to mess around with the display yourself then the Advanced controls allow this, as well as some default settings of where to pull the post details from.

Send To Kindle - plugin setup - advanced

Then this will appear wherever you’ve chosen.

Button in action

Here it is on a post

Send To Kindle - button appearing

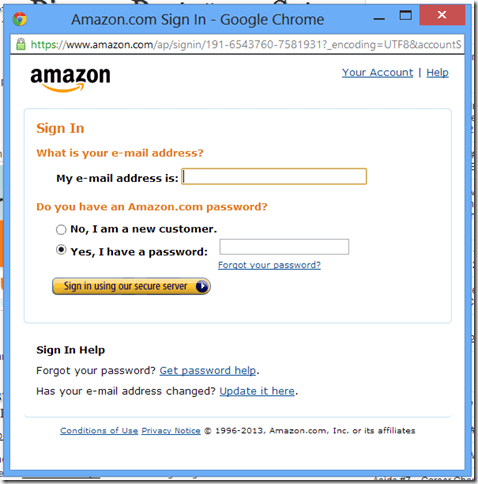
Clicking that  button pops up a window to get you to log in to your Amazon account …

Send To Kindle - Log In

and choose which device you send it to…

Send To Kindle - Configure Settings

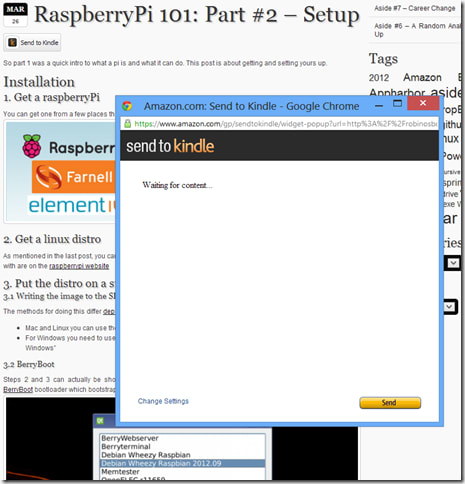
Then content will be loaded and processed for Kindle viewing:

Send To Kindle - Awaiting Content  

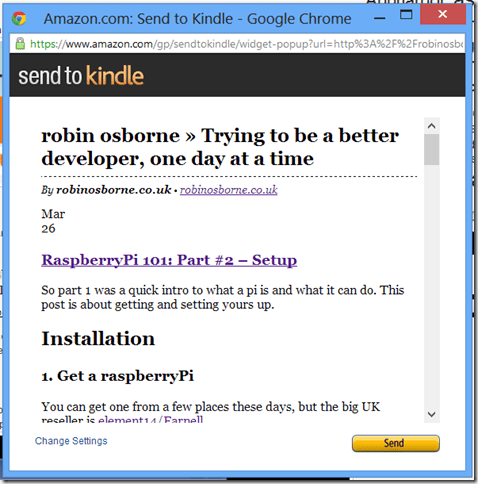
Which means it ends up looking like this:

Send To Kindle - Content Loaded

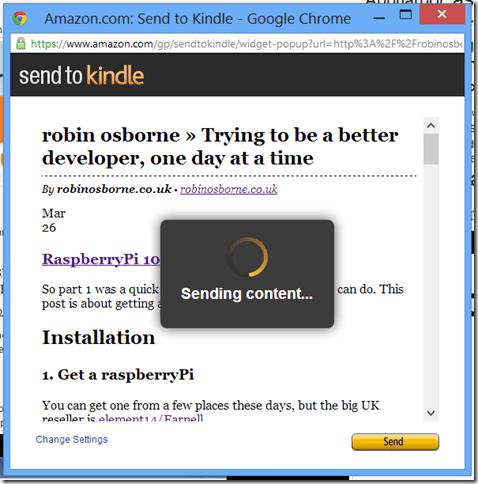
Clicking the “Send” button first gives you a quick thinky thinky image:

Send To Kindle - Uploading

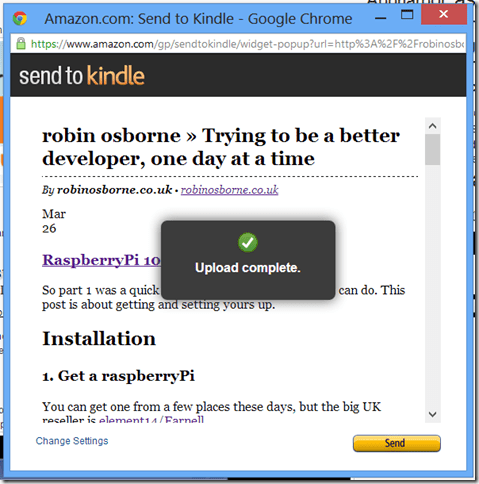
Before shortly letting you know it’s all ok

Send To Kindle - Upload Complete 


Viewing the post on your Kindle

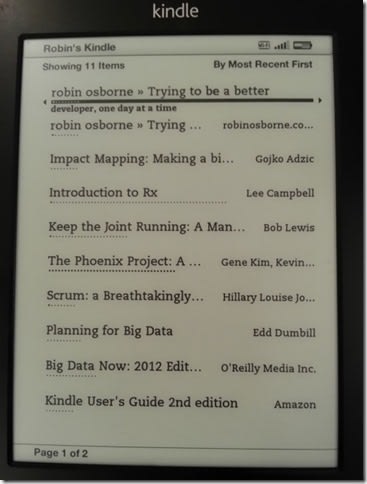
You can then see this post on your Kindle the next time you turn it on in a Wifi (or 3G if your Kindle has Whispernet and you selected that as the delivery mechanism) area:

Here I have a couple of posts sent to my Kindle displaying on the home screen:

Send To Kindle - Viewing post content on Kindle - Listing

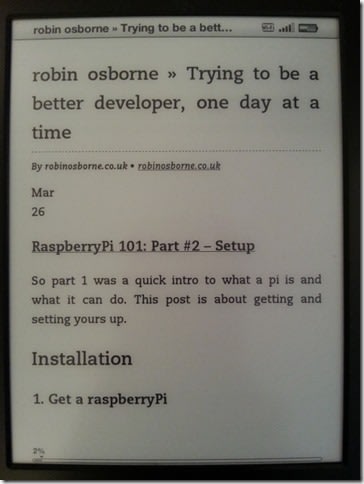
Selecting the RaspberryPi Part #2 post (which you can’t tell from the two on the home screen at the moment – I can probably sort this by changing the selectors in the advanced settings on the plugin page) here we have some basic text content:

Send To Kindle - Viewing post content on Kindle

Some image content:

Send To Kindle - Viewing post content on Kindle - Image

And some code example content:

Send To Kindle - Viewing post content on Kindle - Code

The code example is rendered via the wonderful SyntaxHighlighter plugin, hence the weird “view sourceprint?” link at the top of each one.

Summary

Pretty cool concept, huh? No idea if my posts are worth doing this to, but I like the idea of it. And it’s easy too; once installed you can either say “put this everywhere on every post” or just use the [sendToKindle] smart code.