Smart TV 101: Wrap up

Year of 101s, Part 2 – Smart TV February

Summary – What was it all about?

February was my 101 on developing for the Samsung Smart TV; a bit of a random subject n the first place and I also managed to get quite off track by the end after a hiatus in the middle.

Part #1 – Intro

I started with an intro to what Smart TVs are.

Part #2 – App Development

Second was an overview of what apps are, how they’re developed and then got into developing a basic app.

Part #3 – Deploying Apps

Next I did a post about deploying the apps to your tv for testing

I had intended to give a detailed article on developing these apps since I had spent a lot of time in January researching these posts and couldn’t find a decent article anywhere containing this info.

However, during the writing of my second or third post I found a well hidden but utterly perfect article covering everything I had planned to write about; my post would have ended up being a reproduction of that article which is a waste of everyone’s time and not very nice for the author of the original article!

The more useful resources are:

As such I had to think of something still related to Smart TV apps, but also interesting and different enough to be worth writing.

This is where the plan to do without the IDE came in and I tried to dissect the process and implement it manually.

Part #4 – Creating Packages without the SDK

I finally attempted to do without, Apache (done), generate the package (uh.. not quite), and scrap Eclipse (no dice).

What I gained from this was more headaches related to node’s async fun, and also opened up a few other avenues for future development; essentially I’ll be able to link Jan’s 101, Feb’s 101, and also March’s 101 all together!

Summary

Once I realised that Smart TV apps were just webpages, the creation of apps become kinda boring for a blog series. Deploying apps was still quite interesting, so I liked that one. The detail of creating an app was covered wonderfully in the other articles I found, so no point repeating that stuff.

A few things I discovered that weren’t really related; if you start your node server on port 80 and get a failure related to “ENV” and “process” that looks like it couldn’t access the port and you’re not sure what process is stealing that port, try [code]netstat -anbo | findstr :80[/code]

Next Up

Hopefully March will be a more fruitful month – I’ll be getting stuck into a tasty slice of raspberryPi!

Node.js 101: Wrap up

Year of 101s, Part 1 – Node January

Summary – What was it all about?

I set out to spend January learning some node development fundementals.

Part #1 – Intro

I started with a basic intro to using node – a Hello World – which covered what node.js is, how to create the most basic of all programs, and mentioned some of the development environments.

Part #2 – Serving web content

Second was creating a very simple node web server, which covered using nodemon to develop your node app, the concept of exports, basic request routing, and serving various content types.

Part #3 – A basic API

Next was a simple API implementation, where I proxy calls to the Asos API, return a remapped subset of the data returned, reworked the routing creating basic search functionality and a detail page, and touched on being able to pass in command line arguements.

Part #4 – Basic deployment and hosting with Appharbor, Azure, and Heroku

Possibly the most interesting and fun post for me to work on involved deploying the node code on to three cloud hosting solutions where I discovered the oddities each provider has, various solutions to the problems this raises, as well as some debugging cleverness (nice work, Heroku!). The simplicity of a git-remote-push-deploy process is incredible, and really makes quick application development and hosting even more enjoyable!

Part #5 – Packages

Another interesting one was getting to play with node packages, the node package manager (npm), the express web framework, jade templating engine, and stylus css pre-processor, and deploying node apps with packages to cloud hosting.

Part #6 – Web-based development

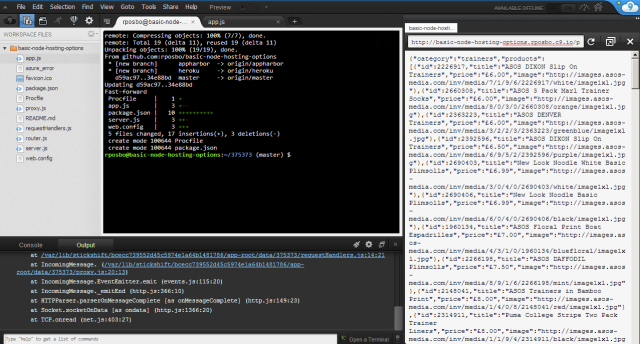
The final part covered the fantastic Cloud9IDE, including a (very) basic intro to github, and how Cloud9 can still be used in developing and deploying directly to Azure, Appharbor, or Heroku.

What did I get out of it?

I really got into githubbing and OSSing, and really had to try hard to not over stretch myself as I had starting forking repos to try and make a few tweaks to things whilst working on the node month.

It has been extremely inspiring and has opened up so many other random tangents for me to explore in other projects at some other time. Very motivating stuff.

I’ve now got a month of half decent blog posts – I had only intended to do a total of 4 posts but including this one I’ve done 7, since I kept adding more information as it turned up and needed to split a few posts into two.

Also I’ve learned a bit about blogging; trying to do posts well in advance allowed me to build up the details once I’d discovered more whilst working on subsequent posts. For example, how Appharbor and Azure initially track master – but can be configured to track different branches. Also, debugging with Heroku only came up whilst working with packages in Heroku.

Link list

Node tutorials and references

Setting up a node development environment on Windows
Node Beginner – a great article, and I’ve also bought the associated eBooks.
nodejs.org – the official node site, the only place to go for reference

Understanding Javascript better

Execution in The Kingdom of Nouns
Object Orientation and Inheritance in Javascript

Appharbor

Appharbor and git

Heroku

Heroku toolbelt download and reference
node on Heroku

Azure

Checkout what Azure can do!

February – coming up, Samsung Smart TV App Development!

Yeah, seriously. How random is that?.. 🙂

Node.js 101: Part #6 – Web-Based Development

Web-Based Development

Following on from my recent post about doing something this year, I’m committing to doing 12 months of “101”s; posts and projects themed at begining something new (or reasonably new) to me

January is all about node, and I started with a basic intro, then cracked open a basic web server with content-type manipulation and basic routing, created a basic API, before getting stuck into some great deployment and hosting solutions and then an intro to using node packages including cloud deployment

In my previous posts I’ve been developing code locally, committing to a local git repo and pushing to a remote git repo. This is fine for the particular situation, but what about when I’m not at my own pc and feel the need to make some changes? Maybe I’m at my dad’s place using his netbook with no dev tools installed?

Cloud9IDE

Cloud9 is an incredible web-based development environment that is so feature-rich you’d usually expect to fork out wads of cash for the opportunity to use it: LIVE interactive collaborative development in the same shared IDE (see multiple people editing a file at once), code completion, syntax highlighting, an integrated console for those useful commands like ssh, git, npm.

It’s frikkin open source too, so you could install it on your own servers and have your own private IDE for your own code, based in a web browser. How amazing is that?

It’s built on Node.js in the back-end and javascript and HTML5 at the front. I’ve been playing around on there for the past year, and it’s been improving all the time – it’s just the best thing around. Go and start using it now. There are still some bugs, but if you find something you can always try to fix it and send a pull request!

c9-demo-1

So. That’s great for my web-based development, so how about if I need to collaborate on this project with people who I’m not sharing my C9 environment with?

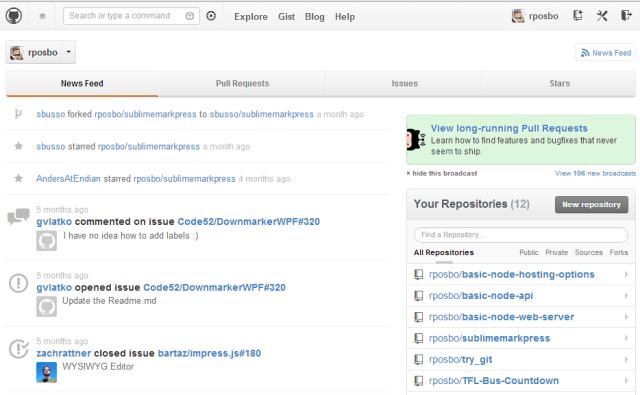
GitHub

If you’re not already using github but are already using git (what the hell are you playing at?!), go and sign up for this exceptionally “powerful collaboration, review, and code management for open source and private development projects.”

You configure github as your git remote, push your code to it, and other users can pull, fork, edit, and send pull requests, so that you’re still effectively in charge of your own code repository whilst others can contribute to it or co-develop with you.

github-demo-1

Great. So how do I deploy my code if I’m using this sort of remote, web-based development environment?

Azure/AppHarbor/Heroku

Deploying to an existing Azure/Appharbor/Azure site from Cloud9IDE is the same as from your local dev pc; set up a remote and push to it! C9 has a built in terminal should the bare command line at the bottom of the screen not do it for you.

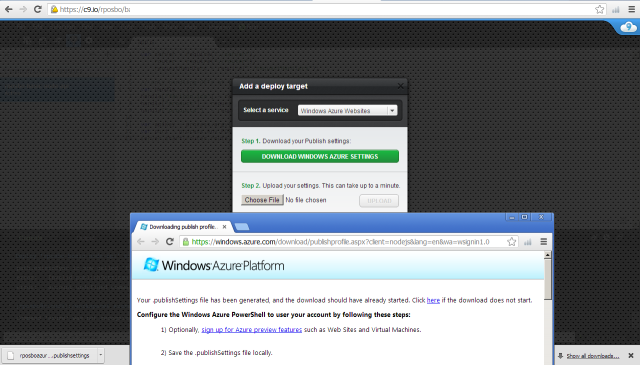
As for creating a new hosting environment, C9 also includes the ability to create them from within itself for both Azure and Heroku! I’ve actually never managed to get this working, but am quite happy to create the empty project on Heroku/Azure/Appharbor and use git from within C9 to deploy.

c9-azure-setup-1

Coming up

Next post will be the last for this first month of my Year of 101s: January Wrap-Up – Node.js 101; a summary of what I’ve learned in January whilst working with Node, as well as a roundup of the useful links I’ve used to get all of the information.

What’s in February’s 101?.. wait and see..!

Node.js 101: Part #5 – Packages

Following on from my recent post about doing something this year, I’m committing to doing 12 months of “101”s; posts and projects themed at begining something new (or reasonably new) to me

January is all about node, and I started with a basic intro, then cracked open a basic web server with content-type manipulation and basic routing, created a basic API, before getting stuck into some great deployment and hosting solutions

Node Packages

Up until now I’ve been working with node using the basic code I’ve written myself. What about if you want to create an application that utilises websockets? Or how about a Sinatra-inspired web framework to shortcut the routing and request handling I’ve been writing? Maybe you want to have a really easy to build website without having to write HTML with a nice look without writing any CSS? Like coffeescript? mocha? You gaddit.

Thanks to the node package manager you can easily import pre-built packages into your project to do alllll of these things and loads more. This command line tool (which used to be separate but is now a part of the node install itself) can install the packages in a ruby gem-esque/.Net nuget fashion, pulling down all the dependencies automatically.

Example usage:
[code]npm install express -g[/code]

The packages (compiled C++ binaries, just like node itself) are pulled either into your working directory (local node_modules folder) or as a global package (with the “-g” parameter). You then reference the packages in your code using “requires”.

Or you can install everything your project needs at once by creating a package.json e.g.:
[code]{
"name": "basic-node-package",
"version": "0.0.1",
"dependencies": {
"express": "*",
"jade": "*",
"stylus": "*",
"nib": "*"
}
}[/code]

And then call [code]npm install[/code]

A great intro to using these four packages can be found on the clock website

I’ve decided to write a wrapper for my basic node API using express, jade, stylus, and nib. All I’m doing is call the api and displaying the results on a basic page. The HTML is being written in jade and the css in stylus & nib. Routing is being handled by express.

app.js
[js]var express = require(‘express’)
, stylus = require(‘stylus’)
, nib = require(‘nib’)
, proxy = require(‘./proxy’)

var app = express()
function compile(str, path) {
return stylus(str)
.set(‘filename’, path)
.use(nib())
}
app.set(‘views’, __dirname + ‘/views’)
app.set(‘view engine’, ‘jade’)
app.use(express.logger(‘dev’))
app.use(stylus.middleware(
{ src: __dirname + ‘/public’
, compile: compile
}
))
app.use(express.static(__dirname + ‘/public’))

var host = ‘rposbo-basic-node-api.azurewebsites.net’;

app.get(‘/products/:search/:key’, function (req,response) {
console.log("Request handler ‘products’ was called");

var requestPath = ‘/products/’ + req.params.search + ‘?key=’ + req.params.key;

proxy.getRemoteData(host, requestPath, function(json){
var data = JSON.parse(json);

response.render(‘products’,
{
title: ‘Products for’ + data.category,
products: data.products,
key: req.params.key
}
);
})
});

app.get(‘/product/:id/:key’, function (req,response) {
console.log("Request handler ‘product’ was called");

var requestPath = ‘/product/’ + req.params.id + ‘?key=’ + req.params.key;

proxy.getRemoteData(host, requestPath, function(json){
var data = JSON.parse(json);

response.render(‘product’,
{
title: data.title,
product: data
}
);
})
});

app.get(‘/’, function (req,response) {
console.log("Request handler ‘index’ was called");
response.end("Go");
});

app.listen(process.env.PORT);
[/js]

So that file sets up the express, jade, and stylus references and wires up the routes for /products/ and /product/ which then make a call using my old proxy.js to the API; I can probably do all of this with a basic inline http get, but I’m just reusing it for the time being.

Notice how the route “/products/:search/:key” which would actually be something like “/products/jeans/myAp1k3Y” is referenced using req.params.search and req.params.key.

Then all I’m doing is making the API call, parsing the returned JSON and passing that parsed object to the view.

The views are written in jade and have a main shared one:
layout.jade
[code]!!!5
html
head
title #{title}
link(rel=’stylesheet’, href=’/stylesheets/style.css’)
body
header
h1 basic-node-packages
.container
.main-content
block content
.sidebar
block sidebar
footer
p Running on node with Express, Jade and Stylus[/code]

Then the route-specific ones:

products.jade:
[code]extend layout
block content
p
each product in products
li
a(href=’/product/’ + product.id + ‘/’ + key)
img(src=product.image)
p
=product.title[/code]

and

product.jade:
[code]extend layout
block content
p
img(src=product.image)
li= product.title
li= product.price[/code]

The stylesheet is written in stylus & nib:

style.styl
[css]/*
* Import nib
*/
@import ‘nib’

/*
* Grab a custom font from Google
*/
@import url(‘http://fonts.googleapis.com/css?family=Quicksand’)

/*
* Nib provides a CSS reset
*/
global-reset()

/*
* Store the main color and
* background color as variables
*/
main-color = #fa5b4d
background-color = #faf9f0

body
font-family ‘Georgia’
background-color background-color
color #444

header
font-family ‘Quicksand’
padding 50px 10px
color #fff
font-size 25px
text-align center

/*
* Note the use of the `main-color`
* variable and the `darken` function
*/
background-color main-color
border-bottom 1px solid darken(main-color, 30%)
text-shadow 0px -1px 0px darken(main-color, 30%)

.container
margin 50px auto
overflow hidden

.main-content
float left

p
margin-bottom 20px

li
width:290
float:left

p
line-height 1.8

footer
margin 50px auto
border-top 1px dotted #ccc
padding-top 5px
font-size 13px[/css]

And this is compiled into browser-agnostic css upon compilation of the app.

The other files used:

proxy.js:
[js]var http = require(‘http’);

function getRemoteData(host, requestPath, callback){

var options = {
host: host,
port: 80,
path: requestPath
};

var buffer = ”;
var request = http.get(options, function(result){
result.setEncoding(‘utf8’);

result.on(‘data’, function(chunk){
buffer += chunk;
});

result.on(‘end’, function(){
callback(buffer);
});
});

request.on(‘error’, function(e){console.log(‘error from proxy call: ‘ + e.message)});
request.end();
};
exports.getRemoteData = getRemoteData;[/js]

package.json
[js]{
"name": "basic-node-package",
"version": "0.0.1",
"dependencies": {
"express": "*",
"jade": "*",
"stylus": "*",
"nib": "*"
}
}[/js]

web.config
[xml]<configuration>
<system.web>
<compilation batch="false" />
</system.web>
<system.webServer>
<handlers>
<add name="iisnode" path="app.js" verb="*" modules="iisnode" />
</handlers>
<iisnode loggingEnabled="false" />

<rewrite>
<rules>
<rule name="myapp">
<match url="/*" />
<action type="Rewrite" url="app.js" />
</rule>
</rules>
</rewrite>
</system.webServer>
</configuration>[/xml]

All of these files are, as usual, on Github

Deployment with Packages

Something worth bearing in mind is that deploying something which includes packages and the result of packages (e.g. minified js or css from styl) requires all of these artifacts to be added into your git repo before deployment to certain hosts such as Appharbor and Azure; Heroku will actually run an npm install as part of the deployment step, I believe, and also compile the .styl into .css, unlike Azure/Appharbor.

The files above give a very basic web interface to the /products/ and /product/ routes:
asos-jade-products-1

asos-jade-product-1

Coming up

Web-based node development and deployment!

Node.js 101 : Part #4 – Basic Deployment and Hosting with Azure, Heroku, and AppHarbor

Following on from my recent post about doing something this year, I’m committing to doing 12 months of “101”s; posts and projects themed at beginning something new (or reasonably new) to me.

January is all about node, and I started with a basic intro, then cracked open a basic web server with content-type manipulation and basic routing, and the last one was a basic API implementation

Appharbor, Azure, and Heroku

Being a bit of a cocky git I said on twitter at the weekend:

It’s not quite that easy, but it’s actually not far off!

Deployment & Hosting Options

These are not the only options, but just three that I’m aware of and have previously had a play with. A prerequisite for each of these – for the purposes of this post – is using git for version control since AppHarbor, Azure, and Heroku support git hooks and remotes; this means essentially you can submit your changes directly to your host, which will automatically deploy them (if pre-checks pass).

I’ll be using the set of files from my previous API post for this one, except I need to change the facility to pass in command line args for the api key to instead take it from a querystring parameter.

The initial files are the same as the last post and can be grabbed from github

Those changes are:

app.js (removed lines about getting value from command line):

[js]var server = require("./server"),
router = require("./router"),
requestHandlers = require("./requestHandlers");

// only handling GETs at the moment
var handle = {}
handle["favicon.ico"] = requestHandlers.favicon;
handle["product"] = requestHandlers.product;
handle["products"] = requestHandlers.products;

var port = process.env.PORT || 3000;
server.start(router.route, handle, port);[/js]

server.js (added in querystring param usage):

[js highlight=”7″]var http = require("http"),
url = require("url");

function start(route, handle, port) {
function onRequest(request, response) {
var pathname = url.parse(request.url).pathname;
var apiKey = url.parse(request.url, true).query.key;
route(handle, pathname, response, apiKey);
}

http.createServer(onRequest).listen(port);
console.log("Server has started listening on port " + port);
}

exports.start = start;[/js]

The “.query” returns a querystring object, which means I can get the parameter “key” by using “.key” instead of something like [“key”].

Ideal scenario

In the perfect world all I’d need to do is something like:
[code]git add .
git commit -m "initial node stuff"
git push {azure/appharbor/heroku/whatever} master
…..
done
…..
new site deployed to blahblah.websitey.net
…..
have a lovely day
[/code]
and I could pop off for a cup of earl grey.

In order to get to that point there were a few steps I needed to take for each of the three hosts.

Appharbor

appharbor-home-1

Getting started

First things first; go and sign up for a free account with AppHarbor.

Then set up a new application in order to be given your git remote endpoint to push to.

I’ve previously had a play with Appharbor, but this is the first time I’m using it for more than just a freebie host.

Configuring

It’s not quite as simple as I would have liked; there are a couple of things that you need to bear in mind. Although Appharbor supports node deployments they are primarily a .Net hosting service and use Windows hosting environments (even though they’re on EC2 as opposed to Azure). Running node within iis means that you need to supply a web.config file and give it some IIS-specific info.

The config file I had to use is:
[xml highlight=”3,9″]<configuration>
<system.web>
<compilation batch="false" />
</system.web>
<system.webServer>
<handlers>
<add name="iisnode" path="app.js" verb="*" modules="iisnode" />
</handlers>
<iisnode loggingEnabled="false" />

<rewrite>
<rules>
<rule name="myapp">
<match url="/*" />
<action type="Rewrite" url="app.js" />
</rule>
</rules>
</rewrite>
</system.webServer>
</configuration>[/xml]

Most of that should be pretty straightforward (redirect all calls to app.js), but notice the lines about compilation and logging; the permissions under which the appharbor deployment process runs for node projects doesn’t have access to the filesystem so can’t create anything in a “temp” dir (precompilation) nor write any log files upon errors. As such, you need to disable these.

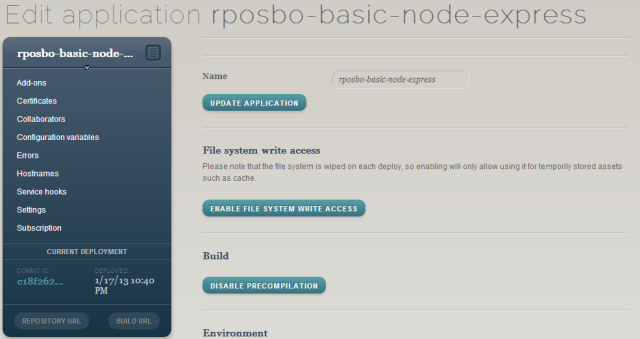
You could also enable file system access and disable precompilation within your application’s settings – as far as I can tell, it does the same thing.

appharbor-settings-1

Deploying

Commit that web.config to your repo, add a remote for appharbor, then push to it – any branch other than master, default, or trunk needs a manual deploy instead of it happening automatically, but you can specify the branch name to track within your appharbor application settings; I put in the branch name “appharbor” that I’ve been developing against and it automatically deploys when I push that branch or master, but not any others.

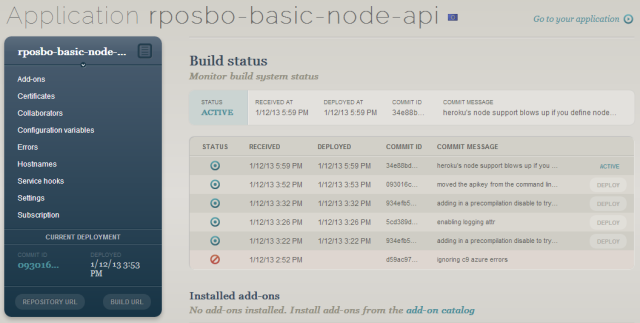
You’ll see your dashboard updates and deploys (automatic deployment if it’s a tracked branch):

appharbor-deploy-dashboard-1

And then you can browse to your app:

appharbor-deploy-result-1

Azure

azure-home-1

Getting started

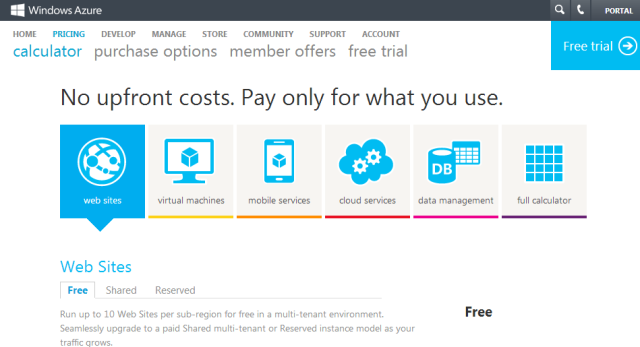
Again, first step is to go and sign up for Azure – you can get a free trial, and if you only want to host up to 10 small websites then it’s completely free.

You’ll need to set up a new Azure website in order to be given your git remote endpoint to push to.

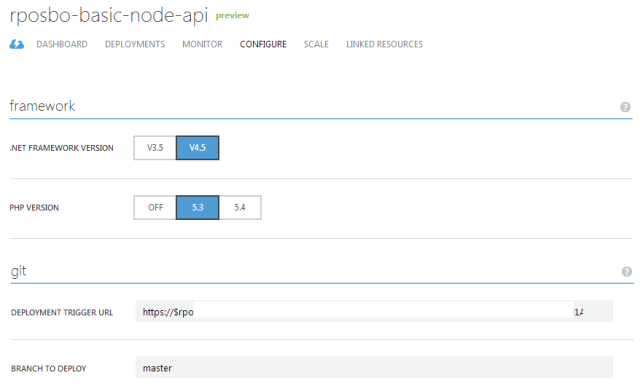
Configuring

This is pretty similar to the AppHarbor process in that Azure Websites sit on Windows and IIS, so you need to define a web.config to set up IIS for node. The same web.config works as for AppHarbor.

Deploying

Although you can push to Appharbor from any branch and it will only deploy automatically from the specific tracked branch, you can’t choose to manually deploy from within azure, so you either need to use [code]git push azure {branch}:master[/code] (assuming your remote is called “azure”) or you can define your tracked branch in the configuration section:

azure-settings-1

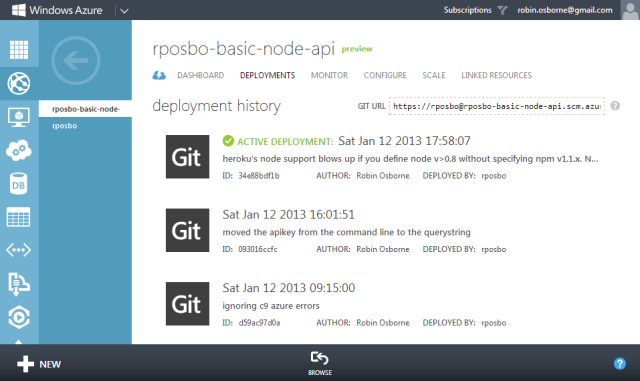
Following a successful push your dashboard updates and deploys:

azure-deploy-dashboard-1

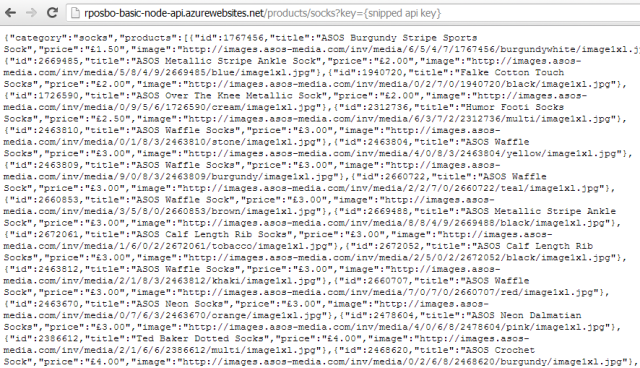
And then your app is browsable:

azure-deploy-result-1

Heroku

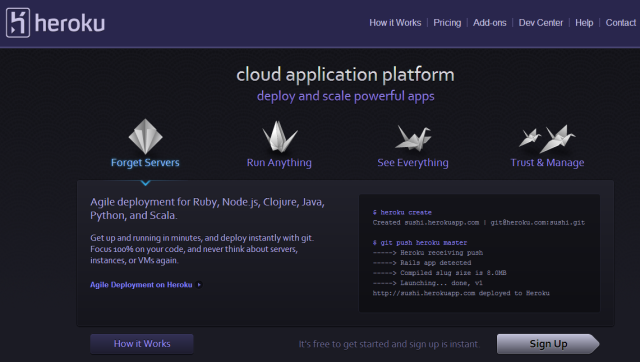
heroku-home-1

Getting started

Sign up for a free account.

Configuring

Heroku isn’t Windows based as it’s aimed at hosting Ruby, Node.js, Clojure, Java, Python, and Scala. What this means for our node deployment is that we don’t need a web.config to get the application running on Heroku. It’s still running on Amazon’s EC2 as far as I can tell though.

However, we do need to jump through several other strange hoops:

Procfile

The procfile is a list of the “process types in an application. Each process type is a declaration of a command that is executed when a process of that process type is executed.” These can be arbitrarily named except for the “web” one which handles HTTP traffic.

For node, this Procfile needs to be:

Procfile:
[code]web: node app.js[/code]

Should I want to pass in command line arguments, as in the previous version of my basic node API code, I could do it in this file i.e. [code]web: node app.js mYAp1K3Y[/code]

Deploying

Heroku Toolbelt

There’s a command line tool which you need to install in order to use Heroku, called the Toolbelt; this is the Heroku client which allows you to do a lot of powerful things from the command line including scaling up and down, and start and stopping your application.

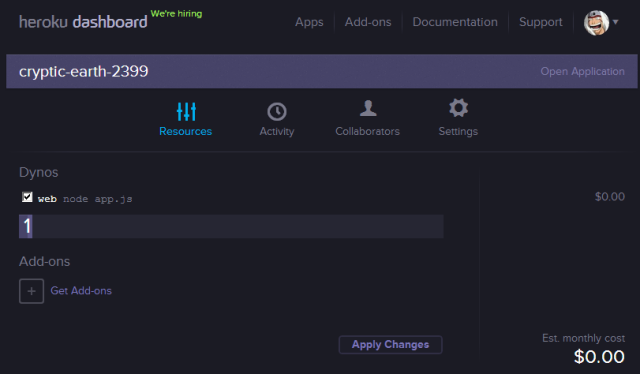
Instead of adding heroku as a git remote yourself you need to open a command line in your project’s directory and run [code]heroku login[/code]and then[code]heroku create[/code]
Your application space will now have been created within Heroku automatically (no need to log in and create one first) as well as your git remote; this will have the default name of “heroku”

Deploying code is still the same as before [code]git push heroku master[/code]

In Heroku you do need to commit to master to have your code built and deployed, and I couldn’t find anywhere to specify a different tracking branch.

Before that we need to create the last required file:
package.json:
[js]{
"name": "rposbo-basic-node-hosting-options",
"author": "Robin Osborne",
"description": "the node.js files used in my blog post about a basic node api being hosted in various places (github, azure, heroku)",
"version": "0.0.1",
"engines": {
"node": "0.8.x",
"npm": "1.1.x"
}
}[/js]

This file is used by npm (node package manager) to install the module dependencies for your application; e.g. express, jade, stylus. Even though our basic API project has no specifc dependencies, the file is still required by Heroku in order to define the version of node and npm to use (otherwise your application simply isn’t recognised as a node.js app).

Something to consider is that Heroku doesn’t necessarily have the same version of node installed as you might; I defined 0.8.16 and received an error upon deployment which listed the available versions (the highest at time of writing is 0.8.14). I decided to define my required version as “0.8.x” (any version that is major 0 minor 8).

However, if you define a version of node in the 0.8.x series you must also define the version of npm. A known issue, apparently. Not only that, it needs to be specifically “1.1.x”.

Add these settings into the “engines” section of the package.json file, git add, git commit, and git push to see your dashboard updated:

heroku-deploy-dashboard-1

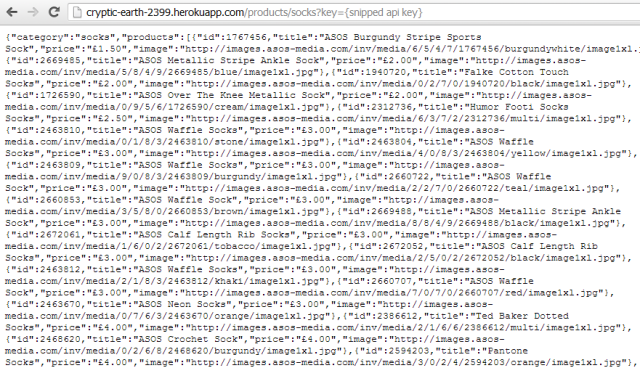
And then your app – with a quite random URL! – is available:

heroku-deploy-result-1

If you have problems pushing due to your existing public keys not existing within heroku, run the following to import them [code]heroku keys:add[/code]

You can also scale up and down your number of instances using the Heroku client: [code]heroku ps:scale web=1[/code]

Debugging

The Heroku Toolbelt is a really useful client to have; you can check your logs with [code]heroku logs[/code] and you can even leave a trace session open using [code]heroku logs –tail[/code], which is amazing for debugging problems.

The error codes you encounter are all listed on the heroku site as is all of the information on using the Heroku Toolbelt logging facility.

A quick one: if you see the error “H14”, then although your deployment may have worked it hasn’t automatically kicked off a web role – you can see this where it says “dyno=” instead of “dyno=web.1”; you just need to run the following command to start one up: [code]heroku ps:scale web=1[/code]

Also – make sure you’ve created a Procfile (with capitalised “P”) and that it contains [code]web: node app.js[/code]

Summary

Ok, so we can now easily deploy and host our API. The files that I’ve been working with throughout this post are on github; everything has been merged into master (both heroku files and web.config) so it can be deployed to any of these hosts.

There are also separate branches for Azure/Appharbor and Heroku should you want to check the different files in isolation.

Next Up

Node packages!

Node.js 101 : Part #3 – A Basic API

Following on from my recent post about doing something this year, I’m committing to doing 12 months of “101”s; posts and projects themed at begining something new (or reasonably new) to me.

January is all about node, and I started with a basic intro, then cracked open a basic web server with content-type manipulation and basic routing.

Building and calling an API in node

Now on to the meat of this month; building a basic RESTful API. I don’t plan on writing the underlying business logic myself, so will just wrap an existing API in order to further demonstrate the routing, content type usage, and proxying calls to another server.

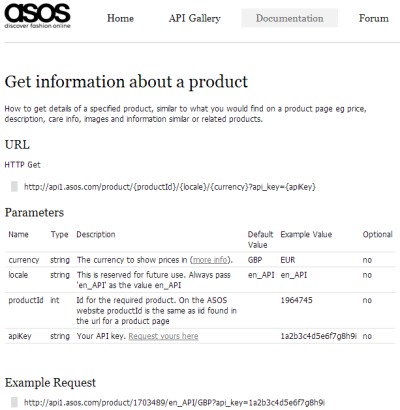
For this post I’ll be using the Asos API for querying the Asos database of clothes and returning the data necessary to build other basic applications on; intially a web site, but later on various apps on various devices.

The Underlying API: Asos.com

Asos, the online fashion “destination”, had an API open for developers to mess aorund with for a short period and as one of the first people to get involved I managed to snap up an api key. This will give me the ability to query the product catalogue and do basic functions such as adding products to a basket.

Asos
asos-1

Asos API
asos-api-1

An example request takes the format:
[code]http://api1.asos.com/product/{productId}/{locale}/{currency}?api_key={apiKey}[/code]

and an example response is:
[code]
{
"BasePrice":35.0,
"Brand":"ASOS",
"Colour":null,
"CurrentPrice":"£35.00",
"InStock":true,
"IsInSet":false,
"PreviousPrice":"",
"PriceType":"Full",
"ProductId":1703489,
"ProductImageUrls":[
"http://images.asos.com/inv/media/9/8/4/3/1703489/red/image1xxl.jpg",
"http://images.asos.com/inv/media/9/8/4/3/1703489/image2xxl.jpg",
"http://images.asos.com/inv/media/9/8/4/3/1703489/image3xxl.jpg",
"http://images.asos.com/inv/media/9/8/4/3/1703489/image4xxl.jpg"
],
"RRP":"",
"Size":null,
"Sku":"101050",
"Title":"ASOS Fringe Sleeve Mesh Crop",
"AdditionalInfo":"100% Polyester\n\n\n\n\n\nSIZE &amp; FIT \n\nModel wears: UK 8/ EU 36/ US 4\n\n\n\nSize UK 8/ EU 36/ US 4 side neck to hem measures: 46cm/18in",
"AssociatedProducts":[{
"BasePrice":35.0,
"Brand":"ASOS",
"Colour":null,
"CurrentPrice":"£35.00",
"InStock":false,
"IsInSet":false,
"PreviousPrice":"",
"PriceType":"Full",
"ProductId":1645550,
"ProductImageUrls":[
"http://images.asos.com/inv/media/0/5/5/5/1645550/black/image1l.jpg"
],
"RRP":"",
"Size":null,
"Sku":null,
"Title":"ASOS Panel Mesh Body Contour Top",
"ProductType":"Recommendations"
}],
"CareInfo":"Machine wash according to instructions on care label",
"Description":"Fringed crop top, featuring a reinforced boat neckline, raglan style slashed sleeves with tasselled fringe trim, and a cropped length, in a sheer finish.",
"Variants":[
{
"BasePrice":35.00,
"Brand":null,
"Colour":"Beige",
"CurrentPrice":"£35.00",
"InStock":true,
"IsInSet":false,
"PreviousPrice":"",
"PriceType":"Full",
"ProductId":1716611,
"ProductImageUrls":[
"http://images.asos.com//inv/media/9/8/4/3/1703489/beige/image1xxl.jpg"
],
"RRP":"",
"Size":"UK 6",
"Sku":null,
"Title":null
}]
}[/code]

For the purposes of this post all I want to do is wrap a couple of the slightly confusing and overly complex Asos API calls with some really basic, more RESTy, ones.

To do this I’m going to initially create a new module called:

proxy.js
[js]var http = require(‘http’);

function getRemoteData(host, requestPath, callback){
var options = {
host: host,
port: 80,
path: requestPath
};

var buffer = ”;
var request = http.get(options, function(result){
result.setEncoding(‘utf8’);
result.on(‘data’, function(chunk){
buffer += chunk;
});
result.on(‘end’, function(){
callback(buffer);
});
});
request.on(‘error’, function(e){console.log(‘error from proxy call: ‘ + e.message)});
request.end();
};

exports.getRemoteData=getRemoteData;[/js]

As you can see, all this does is make an HTTP GET call to a remote server, passing the “options” object.

Using the “on” event wiring up notation, I’ve just appended the chunks of data returned from the GET call to a variable, which is then passed to the referenced callback function.

Now I’ll wire this up:
requestHandlers.js:
[js]var proxy = require(‘./proxy’);

function products(response) {
console.log("Request handler ‘products’ was called");

var host = ‘api1.asos.com’;
var requestPath = ‘/productlisting/search/jeans/1/PriceAscending/en_API/GBP?api_key={snipped api key}’;

response.writeHead(200, {"Content-Type": "application/json"});

proxy.getRemoteData(host, requestPath, function(json){
response.write(json);
response.end();
});
}

exports.products = products;[/js]

I’m removing the previously entered hello, goodbye, and favicon routes for brevity. Notice the reference to the proxy module at the top as well as the new handler itself.

The URL used above executes a product search for the term “jeans”.

Wire it all up:
server.js:
[js]var http = require("http"),
url = require("url");

function start(route, handle, port) {
function onRequest(request, response) {
var pathname = url.parse(request.url).pathname;
route(handle, pathname, response);
}

http.createServer(onRequest).listen(port);
console.log("Server has started listening on port " + port);
}

exports.start = start;[/js]

app.js
[js highlight=”6″]var server = require("./server"),
router = require("./route"),
requestHandlers = require("./requestHandlers");

var handle = {}
handle["/products"] = requestHandlers.products

var port = process.env.PORT || 3000;
server.start(router.route, handle, port);[/js]

Kick off [code]nodemon app.js[/code]

If you were to have an API key and had put it in the URL above, you’d see something like:
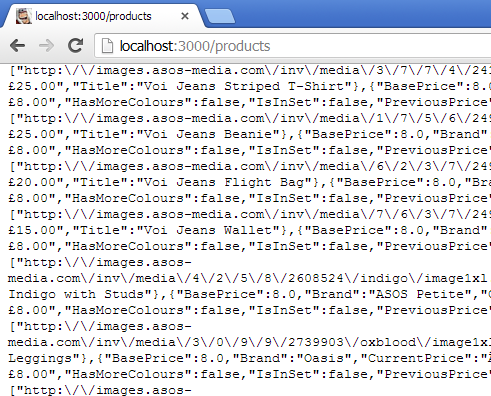
asos-products-1

Right. Ok. That’s a lot of data. Just for now I’d like to make it easier to view, so I’ll limit what is returned and also just write out a basic HTML page.

requestHandlers.js:
[js highlight=”8,11,13-20″]var proxy = require(‘./proxy’);

function products(response) {
console.log("Request handler ‘products’ was called");

var host = ‘api1.asos.com’;
var requestPath = ‘/productlisting/search/jeans/1/PriceAscending/en_API/GBP?api_key={snipped api key}’;
response.writeHead(200, {"Content-Type": "text/html"});

proxy.getRemoteData(host, requestPath, function(json){
var data = JSON.parse(json);

var html = "<h1>Asos Search for JEANS</h1>";
response.write(html);

for(var i=0; i<data.ItemCount; i++) {
if (data.Listings[i] != null){
response.write("<li>"
+ data.Listings[i].Title + "<br /><img src=’"
+ data.Listings[i].ProductImageUrl + "’ /></li>");
}
}

response.end();
});
}

exports.products = products;
[/js]

Given that the Asos Api returns valid JSON I can just parse it and then access the structure of that JSON; in this case the ItemCount & Listings at the top level and Title & ProductImageUrl within Listings.

This will now display something like:
asos-products-2

(Really? A beanie is the first result in the search for “jeans”? Anyway…)

Actually searching

Next we’ll just make the request actually execute a search with the value passed in to our own API, using the format “/products/{search term}”

Firstly I’ll edit the router to take the primary route handler from the first part of the URL (e.g “http://localhost:3000/products/jeans”) and pass the full path into the router for further use.

router.js:
[js highlight=”2,4,5″]function route(handle, pathname, response) {
var root = pathname.split(‘/’)[1];

if (typeof handle[root] === ‘function’) {
handle[root](response, pathname);
} else {
console.log("No request handler found for " + pathname);
response.writeHead(404, {"Content-Type": "text/plain"});
response.write("404 Not found");
response.end();
}
}

exports.route = route;[/js]

Next change the request handler to pick out the next section from the url e.g. “http://localhost:3000/products/jeans

requestHandlers.js:
[js highlight=”6,8,15″]var proxy = require(‘./proxy’);

function products(response) {
console.log("Request handler ‘products’ was called");

var search = path.split(‘/’)[2];
var host = ‘api1.asos.com’;
var requestPath = ‘/productlisting/search/’ + search + ‘/1/PriceAscending/en_API/GBP?api_key={snipped api key}’;

response.writeHead(200, {"Content-Type": "text/html"});

proxy.getRemoteData(host, requestPath, function(json){
var data = JSON.parse(json);

var html = "<h1>Asos Search for " + search + "</h1>";
response.write(html);

for(var i=0; i<data.ItemCount; i++) {
if (data.Listings[i] != null){
response.write("<li>"
+ data.Listings[i].Title + "<br /><img src=’"
+ data.Listings[i].ProductImageUrl + "’ /></li>");
}
}

response.end();
});
}

exports.products = products;
[/js]

One last tweak to the initialisation file to remove a leading slash which isn’t needed now that we’re splitting the url to match instead of using the full url path:

app.js:
[js highlight=”6″]var server = require("./server"),
router = require("./router"),
requestHandlers = require("./requestHandlers");

var handle = {}
handle["products"] = requestHandlers.products;

var port = process.env.PORT || 3000;
server.start(router.route, handle, port);[/js]

We now have basic search capabilities:
asos-products-search-1

Now let’s get a basic product detail page working. For this I should need to just add a new request handler and wire it up.

requestHandlers.js:
[js highlight=”20,22″]var proxy = require(‘./proxy’);

function products(response, path) {
console.log("Request handler ‘products’ was called");

var search = path.split(‘/’)[2];
var host = ‘api1.asos.com’;
var requestPath = ‘/productlisting/search/’ + search + ‘/1/PriceAscending/en_API/GBP?api_key={snipped api key}’;

response.writeHead(200, {"Content-Type": "text/html"});

proxy.getRemoteData(host, requestPath, function(json){
var data = JSON.parse(json);

var html = "<h1>Asos Search for " + search + "</h1>";
response.write(html);

for(var i=0; i<data.ItemCount; i++) {
if (data.Listings[i] != null){
response.write("<li><a href=’/product/" + data.Listings[i].ProductId + "’>"
+ data.Listings[i].Title + "<br /><img src=’"
+ data.Listings[i].ProductImageUrl + "’ /></a></li>");
}
}

response.end();
});
}

function product(response, path) {
console.log("Request handler ‘product’ was called for " + path);

var productId = path.split(‘/’)[2];
var host = ‘api1.asos.com’;
var requestPath = ‘/product/’ + productId + ‘/en_API/GBP?api_key={snipped api key}’;

response.writeHead(200, {"Content-Type": "text/html"});
proxy.getRemoteData(host, requestPath, function(json){
var data = JSON.parse(json);

var html = "<h1>" + data.Title + "</h1>"
+ "<img src=’" + data.ProductImageUrls[0].replace(‘xxl’,’xl’) + "’ />"
response.write(html);
response.end();
});
}
exports.products = products;
exports.product = product;
[/js]

As well as the new handler I’ve also added a link from the listing page to the detail page, just for FUN.

app.js:
[js highlight=”7″]var server = require("./server"),
router = require("./router"),
requestHandlers = require("./requestHandlers");

var handle = {}
handle["products"] = requestHandlers.products;
handle["product"] = requestHandlers.product;

var port = process.env.PORT || 3000;
server.start(router.route, handle, port);[/js]

asos-product-1

Back to JSON

Ok, so that’s a very basic website wrapped around an API. Since I plan to use this wrapper as a basic API itself I’m going to revert it to returning JSON and simplify the data structure for my needs.

requestHandlers.js:
[js]var proxy = require(‘./proxy’);

function products(response, path) {
console.log("Request handler ‘products’ was called");

var search = path.split(‘/’)[2];
var host = ‘api1.asos.com’;
var requestPath = ‘/productlisting/search/’ + search + ‘/1/PriceAscending/en_API/GBP?api_key={stripped api key}’;

response.writeHead(200, {"Content-Type": "application/json"});

proxy.getRemoteData(host, requestPath, function(json){
var data = JSON.parse(json);

var newJson = {
category: data.Description,
products: []
};

data.Listings.forEach(function(listing){
newJson.products.push({
id: listing.ProductId,
title: listing.Title,
price: listing.CurrentPrice,
image: listing.ProductImageUrl[0]
})
});

response.write(JSON.stringify(newJson));
response.end();
});
}

function product(response, path) {
console.log("Request handler ‘product’ was called for " + path);

var productId = path.split(‘/’)[2];
var host = ‘api1.asos.com’;
var requestPath = ‘/product/’ + productId + ‘/en_API/GBP?api_key={snipped api key}’;

response.writeHead(200, {"Content-Type": "application/json"});
proxy.getRemoteData(host, requestPath, function(json){
var data = JSON.parse(json);

var newJson = {
id: data.ProductId,
title: data.Title,
price: data.CurrentPrice,
available: data.InStock,
image: data.ProductImageUrls[0]
};

response.write(JSON.stringify(newJson));
response.end();
});
}
exports.products = products;
exports.product = product;[/js]

Which ends up looking like:
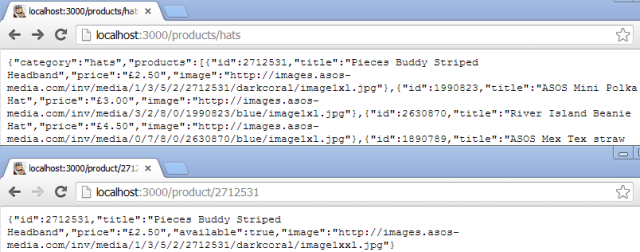
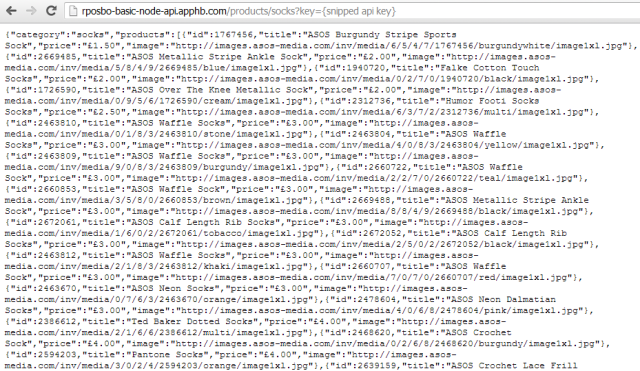
asos-json-1

That’ll do me for now, even though it would be nice to abstract the mapping out somewhere else. Out of scope for me at the moment though.

Once last thing for this post:

Passing in command line arguments

Throughout this post I’ve been diligently snipping out my API key before pasting the code in. There are many approaches to dev/qa/staging/production configuration management (some as basic as a text file, some a bit more complex) which would handle this sort of thing but for my immediate requirements I will just pass the API key in as a command line argument.

To handle this I need to edit the initialisation code in order to pick up any args passed, and documented on the nodejs.org site:

app.js:
[js highlight=”9,11″]var server = require("./server"),
router = require("./router"),
requestHandlers = require("./requestHandlers");

var handle = {}
handle["products"] = requestHandlers.products;
handle["product"] = requestHandlers.product;

var apiKey = process.argv[2];
var port = process.env.PORT || 3000;
server.start(router.route, handle, port, apiKey);[/js]

Now just pass that value around the rest of the system:

server.js:
[js highlight=”4,7″]var http = require("http"),
url = require("url");

function start(route, handle, port, apiKey) {
function onRequest(request, response) {
var pathname = url.parse(request.url).pathname;
route(handle, pathname, response, apiKey);
}

http.createServer(onRequest).listen(port);
console.log("Server has started listening on port " + port);
}

exports.start = start;[/js]

route.js:
[js highlight=”1,5″]function route(handle, pathname, response, apiKey) {
var root = pathname.split(‘/’)[1];

if (typeof handle[root] === ‘function’) {
handle[root](response, pathname, apiKey);
} else {
console.log("No request handler found for " + pathname + " (" + root+ ")");
response.writeHead(404, {"Content-Type": "text/plain"});
response.write("404 Not found");
response.end();
}
}

exports.route = route;[/js]

requestHandlers.js:
[js highlight=”3,8,34,39″]var proxy = require(‘./proxy’);

function products(response, path, apiKey) {
console.log("Request handler ‘products’ was called");

var search = path.split(‘/’)[2];
var host = ‘api1.asos.com’;
var requestPath = ‘/productlisting/search/’ + search + ‘/1/PriceAscending/en_API/GBP?api_key=’ + apiKey;

response.writeHead(200, {"Content-Type": "application/json"});

proxy.getRemoteData(host, requestPath, function(json){
var data = JSON.parse(json);

var newJson = {
category: data.Description,
products: []
};

data.Listings.forEach(function(listing){
newJson.products.push({
id: listing.ProductId,
title: listing.Title,
price: listing.CurrentPrice,
image: listing.ProductImageUrl[0]
})
});

response.write(JSON.stringify(newJson));
response.end();
});
}

function product(response, path, apiKey) {
console.log("Request handler ‘product’ was called for " + path);

var productId = path.split(‘/’)[2];
var host = ‘api1.asos.com’;
var requestPath = ‘/product/’ + productId + ‘/en_API/GBP?api_key=’ + apiKey;

response.writeHead(200, {"Content-Type": "application/json"});
proxy.getRemoteData(host, requestPath, function(json){
var data = JSON.parse(json);

var newJson = {
id: data.ProductId,
title: data.Title,
price: data.CurrentPrice,
available: data.InStock,
image: data.ProductImageUrls[0]
};

response.write(JSON.stringify(newJson));
response.end();
});
}
exports.products = products;
exports.product = product;[/js]

Then to pass in the api key just change the nodemon call to [code]nodemon app.js myApIK3y[/code]

The files for this post can be found over on github

Coming up

The next post this month will cover some nice deployment & hosting options for node!
Node.js 101 : Part #2 – Serving Web Content

Following on from my recent post about doing something this year, I’m committing to doing 12 months of “101”s; posts and projects themed at begining something new (or reasonably new) to me

Basic web server in node

(if you have no clue what node.js is, check out my quick overview from the last post)

Having installed node locally your easiest option for starting development is to open a text editor (notepad, sublimetext, notepad++, whatever) and to launch a command prompt.

  1. Create an initial node file, say app.js, put some content in there (such as console.log(“hiyaa”)) and save it.
  2. In the command prompt change to your working directory and fire off “node app.js”
  3. Now that you’ve seen that work, kill the node process with Ctrl+C

Making Changes 1 – the slow way

Now let’s move from command line development to web development.

  1. For this you’ll need a web server, so create this server.js file:

    [js]var http = require("http");

    http.createServer(function(request, response) {
    response.writeHead(200, {"Content-Type": "text/plain"});
    response.write("Hello World");
    response.end();
    }).listen(3000);[/js]

  2. Save it, run “node server.js”, open a browser and navigate to http://localhost:3000
  3. Now change the server.js file to:

    [js highlight=”5″]var http = require("http");

    http.createServer(function(request, response) {
    response.writeHead(200, {"Content-Type": "text/plain"});
    response.write("Hello moon");
    response.end();
    }).listen(3000);
    [/js]

  4. Save, refresh your browser… Huh? Nothing’s changed?

You need to restart the node process in order to pick up the changes to the code; your first port of call will be hitting Ctrl+C, up, enter.

Now refresh the page and bask in the glorious result:

Making Changes 2 – the easy way

That restart process is going to get annoying after the first hundred times; surely there’s a better way? Darn right there is! Some clever people out there have come up with numerous solutions to this, of which I have gone with nodemon, which monitors for file changes and automatically restarts the node process:

  1. Firstly run [code]npm install -g nodemon[/code]
  2. Then instead of using node server.js you use [code]nodemon server.js[/code]
  3. Give that a go, open your browser at your node site, change server.js to:

    [js highlight=”5″]var http = require("http");

    http.createServer(function(request, response) {
    response.writeHead(200, {"Content-Type": "text/plain"});
    response.write("CIAO MARS");
    response.end();
    }).listen(3000);
    [/js]

  4. Save it and notice that your command line has output an alert that the file change has been detected and the node process is restarting. Refresh your browser and you’ll see the changes already available. Hurrah!

Getting stuck in

The majority of this next section is lifted from the best node.js introduction tutorial, nodebeginner. I won’t rewrite too much of it, I’d suggest you read that post if there’s anything here I gloss over too much.

1) Exports & a basic web server

So far we’ve seen how to use a single file to run a basic web server. Using the concept of “exports” we can set this up as a self-contained module (modules are a key concept in node) and reference it from a different initialisation file.

Rewrite our current basic web server as a module and save it as “server.js”:

[js]var http = require("http");

function start(port) {
http.createServer(function(request, response) {
response.writeHead(200, {"Content-Type": "text/plain"});
response.write("Hello world");
response.end();
}).listen(port);
console.log("Server has started listening on port " + port);
}

exports.start = start;[/js]

You can see that the same functionality is in there, except that the module now returns a function instead of executing the code; no server is actually created yet.

Now let’s create a new initialisation file called “app.js” and reference the server module:

[js]var server = require("./server");

var port = process.env.PORT || 3000;
server.start(port);[/js]

Firstly, there’s the reference at the top to “./server” – this just links our server.js file so that we can call the “start” function that we exposed from that server.js file.

Secondly I’m now passing in the port to use; either the current process’s environment setting (useful for deployment later on, when you can’t control the port your process will actually run on) or default to 3000 (for development purposes).

Now kick off node and point it at “app.js” – the same familiar “Hello world” text should greet you in the browser.

2) Basic routing

That’s all well and good, but it’s not much use displaying “hello world” all the time. Firstly, let’s introduce the (exceptionally) basic concepts of routing.

Define the request handler for a particular route, and expose the function:

requestHandler.js – creating a single route, “hello”, defining what it does, and exporting it:

[js]function hello(response) {
console.log("Request handler ‘hello’ was called.");
response.writeHead(200, {"Content-Type": "text/plain"});
response.write("hello world");
response.end();
}

exports.hello = hello;[/js]

Create a basic router to match the request against the defined handlers:

router.js – a function to take an array of routes that have been wired up (“handle”), that current request’s path (“pathname”), and the response to manipulate, and attempt to match and call the correct function else return a 404:

[js]function route(handle, pathname, response) {
if (typeof handle[pathname] === ‘function’) {
handle[pathname](response);
} else {
console.log("No request handler found for " + pathname);
response.writeHead(404, {"Content-Type": "text/plain"});
response.write("404 Not found");
response.end();
}
}

exports.route = route;[/js]

Now let’s update the server.js and app.js to wire these together:

server.js – the web server, made more generic, and using the “url” module to expose the “pathname” of the current request for matching to a route, as well as slightly abstracting the request function itself:

[js]var http = require("http"),
url = require("url");

function start(route, handle, port) {
function onRequest(request, response) {
var pathname = url.parse(request.url).pathname;
route(handle, pathname, response);
}

http.createServer(onRequest).listen(port);
console.log("Server has started listening on port " + port);
}

exports.start = start;[/js]

app.js – wire up the router and request handler, define the “hello” route in a new “handles” array and map it to the “requestHandlers.hello” function, passing those into the server function:

[js]var server = require("./server"),
router = require("./route"),
requestHandlers = require("./requestHandlers");

var handle = {}
handle["/hello"] = requestHandlers.hello;

var port = process.env.PORT || 3000;
server.start(router.route, handle, port);[/js]

Fire up nodemon pointing at app.js and visit http://localhost:3000/hello to see the route “/hello” rendered magnificently on screen.

3) Returning content

Now we’ve just got the same functionality we had right at the start – good old “hello world”. Adding new request handlers and registering the routes will allow us to return more content. First up, let’s add “goodbye”:

requestHandlers.js – update this with the new content:

[js highlight=”8-13,16″]function hello(response) {
console.log("Request handler ‘hello’ was called.");
response.writeHead(200, {"Content-Type": "text/plain"});
response.write("hello world");
response.end();
}

function goodbye(response) {
console.log("Request handler ‘goodbye’ was called.");
response.writeHead(200, {"Content-Type": "text/plain"});
response.write("goodbye cruel world");
response.end();
}

exports.hello = hello;
exports.hello = goodbye;[/js]

app.js – register the new route by referencing the newly created function into the “handle” array:

[js highlight=”7″]var server = require("./server"),
router = require("./route"),
requestHandlers = require("./requestHandlers");

var handle = {}
handle["/hello"] = requestHandlers.hello;
handle["/goodbye"] = requestHandlers.goodbye;

var port = process.env.PORT || 3000;
server.start(router.route, handle, port);[/js]

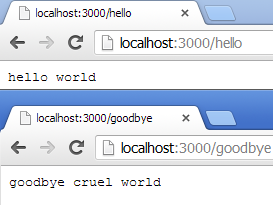
That’s all you need to do. Now kick off your process and visit http://localhost:3000/hello and http://localhost:3000/goodbye to see:

hello-bye-world-web-1

So adding new content is a case of defining a function to return content and registering a new route.

4) Returning different types of content

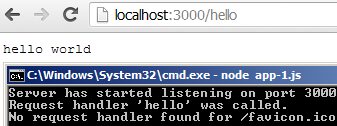
You may have noticed that when making any call to your node app you see two responses:
hello-world-web-2
That second one is the browser asking for the favicon. You can either register a route to return an HTTP 200 and nothing else (in order to avoid 404s) or you can create a route and send back an actual favicon.

requestHandlers.js – add a reference to the filesystem module “fs” and create a new handler to read an actual favicon image (I’m using my own website’s favicon) and write it out to the response stream:

[js highlight=”1,5,6,12,13,17-22,26″]var fs = require(‘fs’);

function hello(response) {
console.log("Request handler ‘hello’ was called.");
response.writeHead(200, {"Content-Type": "text/html"});
response.write("<em>hello world</em>");
response.end();
}

function goodbye(response) {
console.log("Request handler ‘goodbye’ was called.");
response.writeHead(200, {"Content-Type": "text/html"});
response.write("<em>goodbye cruel world</em>");
response.end();
}

function favicon(response) {
console.log("Request handler ‘favicon’ was called.");
var img = fs.readFileSync(‘./favicon.ico’);
response.writeHead(200, {"Content-Type": "image/x-icon"});
response.end(img,’binary’);
}

exports.hello = hello;
exports.goodbye = goodbye;
exports.favicon = favicon;[/js]

Notice the “favicon” function reads in the icon file from the filesystem and also sets the content type to “image/x-icon”.

app.js – wire up the new route:
[js highlight=”8″]var server = require("./server"),
router = require("./route"),
requestHandlers = require("./requestHandlers");

var handle = {}
handle["/hello"] = requestHandlers.hello;
handle["/goodbye"] = requestHandlers.goodbye;
handle["/favicon.ico"] = requestHandlers.favicon;

var port = process.env.PORT || 3000;
server.start(router.route, handle, port);[/js]

Refresh and you’ll get:
hello-world-web-favicon

Oooh – pretty. So adding new content is a new request handler and registering a new route, and outputting a different content type if necessary.

In summary

So that’s the basics of serving web content via node, including basic routing and content type manipulation.

The files for this post can all be found over on github

Next up: a basic RESTful API in node which I’ll be using for several of the other 101 projects throughout this year.

Year of 101

The Year of 101Following on from my recent post about doing something this year, I think I’ll start simple and commit to doing 12 months of “101”s; posts and projects themed at beginning something new (or reasonably new) to me. As such, I’m going to kick off the year, and the project, with…

January – Node.js 101

Part #1 – Intro

node-js-logo

I may have looked into node a bit during 2012 but haven’t had the chance to actually write anything myself with a point to it. As such, I’m going to start this year off by getting stuck into starting coding node, and bring together resources that help me learn during this month.

Node.js

So what’s Node when it’s at home, then?

JavaScript. A language essentially written in a couple of weeks to enable spam popups filling your screen every time you wanted to browse entertaining quotes from IMDB in the 90s.

Not really..

Ok, fine. Node itself is not JavaScript – Node.js is the engine which runs on a server and executes your JavaScript. The engine and the core modules of node are compiled binaries written in C++ (I think) – and given that it’s open source, you can check it out yourself here

Every modern browser has an ECMAScript engine in it, and it is this which executes the javascript code. A packaged compilation of Google’s V8 engine is at the heart of Node, and that makes it a solid and speedy engine to be running functionality on.

Why is it so popular?

Perhaps because it’s a bit new. Perhaps it’s nice to be able to use JavaScript on the server for once, allowing developers to use a single language for front and back end development. It’s fast, it’s async, it’s non-blocking. I just find it fun to code with.

I’m a big fan due to two particular elements:

  1. I like JavaScript as a language. I like the syntax, I like the dynamic nature. I learned it way back in the late 90s whilst at university by doing loads of “view-source”s on Angelfire and Geocities sites. Plus I was doing a degree in C++ at the time, so the syntax was already familiar but was much easier to see a visible result.

  2. Node strips development right down to basics. No fancy IDE (being practically dependant on Visual Studio for developing .Net on Windows has always really bothered me), no intellisense (you just have to KNOW THE ANSWER. Or Google it.. or check the nodejs.org website’s API documentation). I do have WebStorm (and even bought a licence during the JetBrains recent Apocolypse sale) but I currently prefer to develop Node projects in SublimeText2.

Want to say hello world?

  1. Install Node
  2. Save the below as “hiya.js”:

    [js]console.log("hello world");[/js]

  3. from a command line run:

    [code]node hiya.js[/code]

  4. You will see, amazingly:

    [code]hello world[/code]

Not very impressive, I know, but that’s not what Node is about IMO. I find the ability to easily add layers to your code and make it do a little bit more is very interesting.

Let’s change that script to also send the text to a web browser. Without a web server. No IIS, no Apache, no TomCat.

  1. Create a fully functional web server and limit it to send a single response (save the below as “hiya-web.js”):

    [js]var http = require("http");

    http.createServer(function(request, response) {
    response.writeHead(200, {"Content-Type": "text/plain"});
    response.write("Hello World");
    response.end();
    }).listen(3000);[/js]

  2. from a command line run:

    [code]node hiya-web.js[/code]

  3. open a browser and visit http://localhost:3000

    hello-world-web-0

How about changing that to send an html page instead of plain text?

  1. Change the following lines:

    [js highlight=”4,5″]var http = require("http");

    http.createServer(function(request, response) {
    response.writeHead(200, {"Content-Type": "text/html"});
    response.write("<h1>Hello World</h1>");
    response.end();
    }).listen(3000);[/js]

  2. rerun node – kill your node process (Ctrl+C), then:

    [code]node hiya.js[/code]

  3. Refresh your browser

    hello-world-web-1

You can just keep adding layers to it, which is what I’ve done in my first project (next post).

It’s pretty powerful stuff. But it’s just Javascript being executed on the server’s ECMAScript engine instead of your browser’s one. I mean, look at that code for a second – you’re referencing a global “http” node module, creating a web server, and telling it what it should do. (Don’t ask why it uses port 3000; 3000 and 8888 seem to be the standard Node.js ports for tutorials..); that’s extremely powerful stuff. And it’s pretty much just good old javascript from where you’re sitting.

Starting developing at this level is a nice form of YAGNI (you ain’t gonna need it) – don’t install an MVC framework or a CSS minification module until you actually need one. Although you can do both of those things, and I’ll get onto that in a later post.

Developing Node apps

I’ve said that you don’t need a fancy IDE for writing Node apps, and I fully understand that the same is true of most other languages, but once you get a complex project structure together in .Net writing your own msbuild commands instead of letting Visual Studio build them up for you can be somewhat counterproductive.

I’m a little bit enamoured by the development tools available for Node, and this may just be because they’re new and shiny, but they’re still nice tools. My top three are:

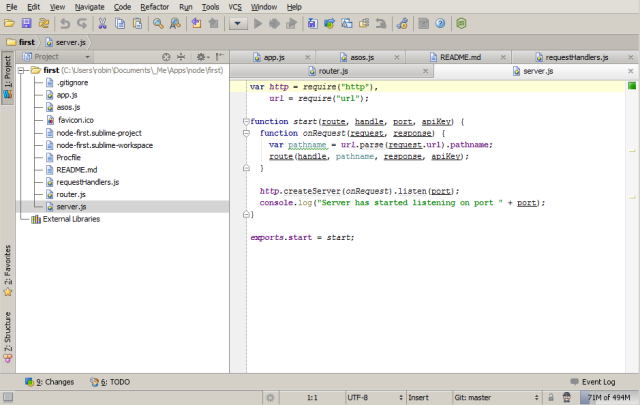
  • JetBrains WebStorm

    webstorm-node-js-asos-api-2

    This is a fully featured Node (and other language) development environment, with intellisense, inline syntax checking, live editing updates via a Chrome plugin, npm integration, VCS integration (including github, natch). Slick.

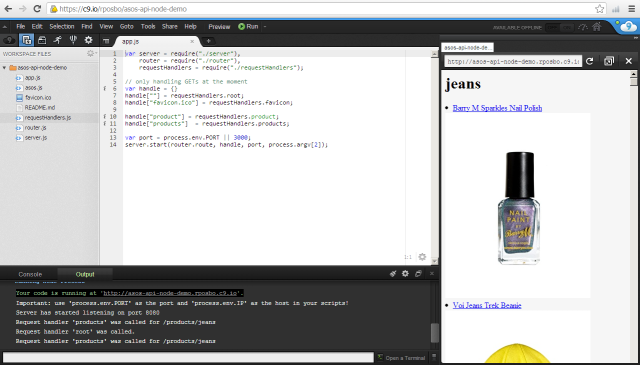
  • Cloud9IDE

    cloud-9-ide-node-js-asos-api-2

    Amazingly, this is a browser based development environment, also with inline syntax checking and intellisense, npm integration (via an in-browser command line), github/bitbucket integration, and – my favourite – integrated heroku/azure deployment. So you can collaboratively develop, debug, and deploy Node apps from a browser. Take THAT Microsoft volume licencing!

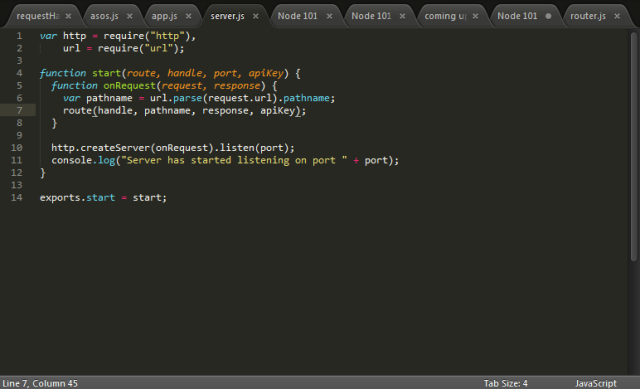
  • Sublime Text 2

    sublimetext-node-js-asos-api-2

    My personal favourite tool for pretty much anything outside of .Net development – a feature rich text editor with extensions available via python plugins. Has nothing whatsoever to do with Node. It’s about as “Node” as Notepad would be.

Coming up

The next few posts this month will cover developing an application in node, installing node packages, version control, and deployment & hosting.

I’m looking forwards to playing with getting stuck in to something new, learning my way around, and seeing how it all works. Hopefully you’ll enjoy reading that experience too!

Node.js @ UKWAUG: MS Cloud Day – Windows Azure Spring Release

The fourth session I attended was the highly energetic and speedy introduction to writing node.js and running it on Azure, presented by the author of Simple.Data and Simple.Web, and one of those voices of the developer community with a great JFDI attitude, Mark Rendle (@markrendle).

I’ve just recently got into node.js development myself and have been very much enjoying node, npm, express, stylus, and nib; there is a fantastic community and expanse of modules already and that can be a bit daunting.

During the session Mark’s short code example shows just how simple it can be to get up and running with node, and also how easy it is to deploy to Azure.

A nice comment was that we are on the road to “ecmascript harmony”! And that “Javascript is a great language so long as you ignore the 90% of it which coffeescript doens’t compile to.”

It was a very fast-paced session; hopefully my notes still make sense though..

What the various aspects of Azure do

  • compute – web, worker, vm
  • websites – .net, node, php
  • storage – blob, tables (distributed nosql, like cassandra), queues
  • sql – sql azure, reporting
  • services – servicebus, caching, acs

What are the Cloud Service types used for

  • web roles – iis, for apps
  • worker – no iis, for running anything

How to peruse the contents of blob or table

General tips for developing sites for use in Azure

  • keep static content in blob storage
  • websites commit and deploy much faster than cloud serviecs commit and deploy process
  • azure/iis needs server.js, not app.js

How to run RavenDB in Azure

  • Spin up a vm and install it!! (this used to be a much trickier process, but the recent Azure update meant that the VM support is mature enough to allow the simpler solution)

Developing node.js

Use jetbrains webstorm for debugging/ or the wonderful online editor, Cloud9IDE. Sublime Text 2 is a great editor for simple code requirements, and has great plugins for Javascript support. I also used this for taking all of the seminar notes as it has a simple “zen” zero-distractions interface

Next up – Hadoop and High Performance Computing

AppHarbor, Heroku, Git, and the Sweet, Sweet CI Process

The background: I thought that my Mobile TFL Bus Countdown site might be suddenly very popular for a very short time (for about a weekend perhaps) and didn’t want to pay for the potential sudden jolt in hosting costs from my own servers. As such, I developed it locally using git as VCS, pushed it to my newly acquired Appharbor account, and just saw it suddenly available to browse at rposbo.apphb.com

The pitch: For your own small website/app you probably edit it locally on your PC, maybe you even have source control like a good dev, you’ll compile the code and then you’ll copy it to your hosting provider, probably using FTP/ via a web interface/ SCP/ SSH.

Then at work you’re probably shouting about how awesome CI builds are and how to introduce continuous deployment as part of a branching and build strategy.

You might even use Azure or EC2 at work, maybe for your own little home projects too. Maybe you’ve learned a bit of git but your office uses TFS (ugh) or SVN (meh).

So why not do this for your own stuff? For free? In the cloud?

Imagine the ideal workflow: make some code changes –> commit them to (D)VCS –> push them to a (remote) repo –> the push kicks off a build the committed project (git hook) –> run any associated tests, then if they pass –> deploy the app to the cloud.

That’s exactly what Appharbor and Heroku do! Let’s start with the pretty one:

Heroku

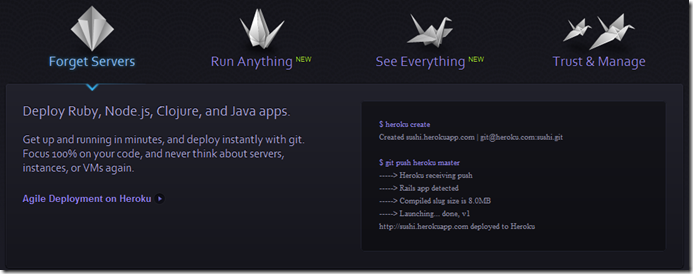
Heroku says it’s a “cloud application platform” for running scalable Ruby, Node.js, Clojure, and Java sites/apps. To create and deploy a new site is, apparently, as easy as:

[code gutter=”off”]$ heroku create
Created sushi.herokuapp.com | [email protected]:sushi.git

$ git push heroku master
—–&gt; Heroku receiving push
—–&gt; Rails app detected
—–&gt; Compiled slug size is 8.0MB
—–&gt; Launching… done, v1
http://sushi.herokuapp.com deployed to Heroku[/code]

So here the flow is: write some code –> commit to git –> push to Heroku –> code is built –> code is deployed. Done.

heroku homepage

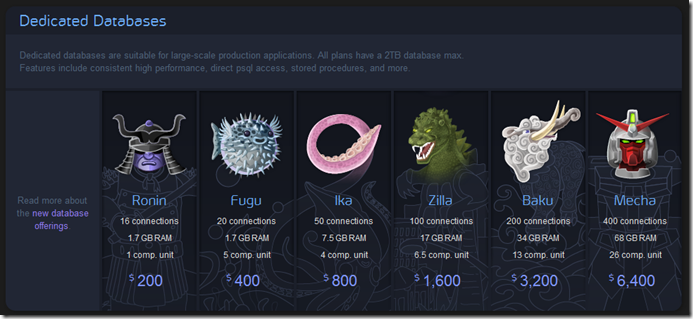
The Heroku website is fantastically full of all the information you’d want to get started, and their pictorial representation of how their solution works and the various levels of databases you can buy are geek-awesome:

heroku databases

“This app needs a BAKU DATABASE!! GRRAARRRR!!” Go and have a look and bask in the beautiful piccies and animations. No wonder this is (apparently) the place to go to write and deploy cloud hosted Facebook apps.

Thanks to Heroku I’m finally beaing pushed to learn Ruby, but haven’t managed anything quite yet, hence no demo of the Heroku flow – wait a few more posts and I’ll have something Ruby-fied and certainly some Node.js as I’ve been meaning to get into that for a while, possibly even Clojure (sounds fun) and Java (old school!).

Next up is one for the .net crowd:

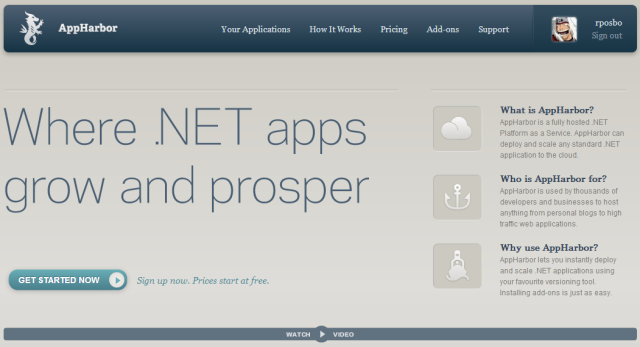
appharbor

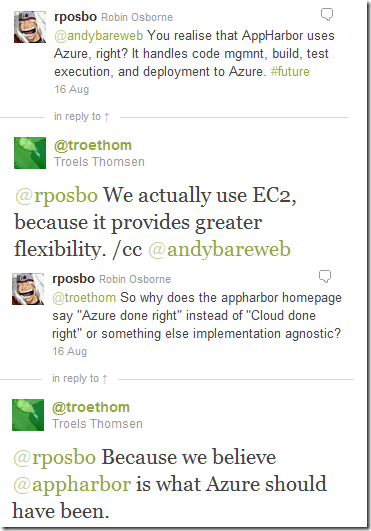
Appharbor sells itself as “Azure done right” which confused me. The website itself is verrrry low on information so I just assumed it would deploy my app to Azure. Turns out I was wrong:

appharbor chat on twitter

Despite my being pedantic over their homepage tagline I took the dive and just signed up. Only once you’ve done this do you get to see the money shot – the intro video; a new MVC app in Visual Studio to EC2 cloud via git + appharbor in a matter of minutes:

Now I have my account and I have a great intro vid I just hop into my code directory;

[code gutter=”off”]git init
git add .
git commit –m "init"
git remote add appharbor <git repo url appharbor gave me>
git push appharbor master[/code]

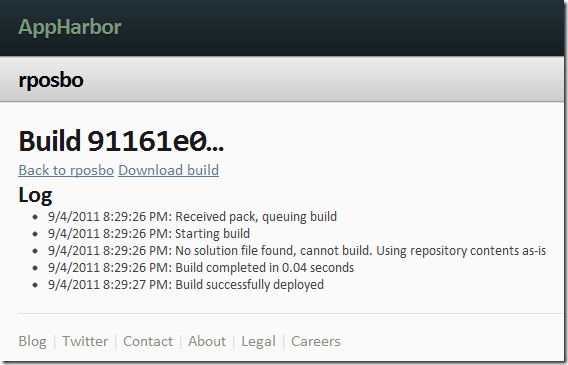
And that’s it. Committed code is checked out on their servers, built, any associated tests are executed, if everything passes then it gets deployed – and you can see all this from your Appharbor account:

appharbor deployment

(mine didn’t actually have anything to build, as it was a single html page and that really basic asmx web proxy I wrote).

In conclusion; you now have absolutely no excuse to not write and deploy whatever applications you feel like writing. There is no hosting to worry about, no build server – it just works. Use Appharbor for your .Net and use Heroku as an excuse to look at their pretty pictures and learn something that’s not .Net.

I know I will.

Comments appreciated.