My Thoughts On #NoEstimates

What?

The #NoEstimates idea is to break all pieces of work into similar sized chunks based on a consistent “slicing heuristic”; not give sizes or estimates up front, and hope to be able to predict future development based on how long each one of those similarly complex small tasks ends up taking to deliver. But also very importantly: ensure you deliver regularly.

It’s less about “not estimating”, and more about improving how you work such that estimates are less necessary. Deliver regularly, focusing on the flow, is key to this.

About that slicing heuristic: a heuristic is an approach to problem solving that is known to not be perfect, but is good enough for the time being. So a “slicing heuristic” is best guess at deciding how to split large pieces of work into similarly complex tasks. You’ll make it better each time you try until you something that works for your team.

An example slicing heuristic would be that a feature can only consist of one acceptance test; if you have more than one acceptance test, slice the feature into two or more features.

I’m probably over simplifying the concept, but it’s a pretty simple concept in the first place!

Why?

Whilst coming up with the latest iteration of the development process at Mailcloud, I coincidentally stumbled upon an article about #NoEstimates and subsequently various videos on the subject, and more articles, with support from more articles.

The idea is an interesting one, if only due to my dislike of day-long planning meetings/sizing sessions where inevitably everything ends up being a 3,5 or a 40.

Seems like a lovely idea, right? It also seems fundamentally flawed for reasons such as an inability to give a reasonable quote or estimate to a client up front, especially for extremely large projects. Also, the team has to be able to split the work into chunks of similar complexity, which is easier said than done; ever been in a sizing meeting where everything ends up almost the same size? You require a team’s ability to be consistently effective and efficient, as opposed to just being “consistent” (and not in a good way).

I’m no fan of huge, minutely detailed, projects, so perhaps these aren’t so bad?

Given that I’m one of those pesky critical thinkers, I went out and did a little research on the opposition. There are some extremely vocal detractors of this concept.

The most vocal and well known detractors of #noestimates appear to be those with significant experience in several large projects over more than 2 or 3 decades, with a background in statistical analysis, probability, and software project management.

A quote to sum up this perspective, which appears to have been adapted from a Lao Tsu quote:

“Those who have knowledge of probability, statistics, and the processes described by them can predict their future behaviour. Those without this knowledge, skills, or experience cannot”

i.e., stop being lazy and learn basic stats.

Most vocal and well known #NoEstimates proponents are either also proponents of XP or have more experience in small to medium scale projects and put less importance on statistical analysis.

There’s a lot of – quite childish – banter between these two camps on twitter an in blogs, trying to say who is right, when it’s quite obvious that these different approaches suit different projects; if your client has a fixed budget and a deadline, then not being able to give any confidence in meeting that deadline within that budget (i.e., no estimates) is not going to be a feasible option. Similarly, if you’re not quite certain what you’re building yet, or only know the start and are able to follow the Product Owner and user feedback, then estimating an uncertain backlog to give a realistic finish date is likewise unlikely.

As such, it would appear that you have to – as I always do – make up your own mind, and in some cases take a little from all available sources to create something that works for you and your team or company.

That’s exactly what I’m doing at the moment, and it’s possibly not anything that really exists yet; a little XP, a little kanban, a little scrum, a little noestimates (hey, why not? We’re a start-up!); and a damned lot of trello.

This is Dev Process version v5; I don’t doubt for a second we’ll have a v6, v7, and so on as the team grows and as the product changes.

Interested in learning more about #NoEstimates? You can check out the book, and get a free chapter to kick off with.

No Estimates Book

Generate a Blob Storage Web Site using RazorEngine

Last episode I introduced the concept of utilising RazorEngine and RazorMachine to generate html files from cshtml Razor view files and json data files, without needing a hosted ASP.Net MVC website.

We ended up with a teeny ikkle console app which could reference a few directories and spew out some resulting html.

This post will build on that concept and use Azure Blob Storage with a worker role.

File System

We already have a basic RazorEngine implementation via the RenderHtmlPage class, and that class uses some basic dependency injection/poor man’s IoC to abstract the functionality to pass in the Razor view, the json data, and the output location.

IContentRepository

The preview implementation of the IContentRepository interface merely read from the filesystem:

[csharp]namespace CreateFlatFileWebsiteFromRazor
{
internal class FileSystemContentRepository : IContentRepository
{
private readonly string _rootDirectory;
private const string Extension = ".cshtml";

public FileSystemContentRepository(string rootDirectory)
{
_rootDirectory = rootDirectory;
}

public string GetContent(string id)
{
var result =
File.ReadAllText(string.Format("{0}/{1}{2}", _rootDirectory, id, Extension));
return result;
}
}
}
[/csharp]

IDataRepository

A similar story for the IDataRepository file system implementation:

[csharp]namespace CreateFlatFileWebsiteFromRazor
{
internal class FileSystemDataRepository : IDataRepository
{
private readonly string _rootDirectory;
private const string Extension = ".json";

public FileSystemDataRepository(string rootDirectory)
{
_rootDirectory = rootDirectory;
}

public string GetData(string id)
{
var results =
File.ReadAllText(string.Format("{0}/{1}{2}", _rootDirectory, id, Extension));
return results;
}
}
}
[/csharp]

IUploader

Likewise for the file system implemention of IUploader:

[csharp]namespace CreateFlatFileWebsiteFromRazor
{
internal class FileSystemUploader : IUploader
{
private readonly string _rootDirectory;
private const string Extension = ".html";

public FileSystemUploader(string rootDirectory)
{
_rootDirectory = rootDirectory;
}

public void SaveContentToLocation(string content, string location)
{
File.WriteAllText(
string.Format("{0}/{1}{2}", _rootDirectory, location, Extension), content);
}
}
}
[/csharp]

All pretty simple stuff.

Blob Storage

All I’m doing here is changing those implementations to use blob storage instead. In order to do this it’s worth having a class to wrap up the common functions such as getting references to your storage account. I’ve given mine the ingenious title of BlobUtil:

[csharp]class BlobUtil
{
public BlobUtil(string cloudConnectionString)
{
_cloudConnectionString = cloudConnectionString;
}

private readonly string _cloudConnectionString;

public void SaveToLocation(string content, string path, string filename)
{
var cloudBlobContainer = GetCloudBlobContainer(path);
var blob = cloudBlobContainer.GetBlockBlobReference(filename);
blob.Properties.ContentType = "text/html";

using (var ms = new MemoryStream(Encoding.UTF8.GetBytes(content)))
{
blob.UploadFromStream(ms);
}
}

public string ReadFromLocation(string path, string filename)
{
var blob = GetBlobReference(path, filename);

string text;
using (var memoryStream = new MemoryStream())
{
blob.DownloadToStream(memoryStream);
text = Encoding.UTF8.GetString(memoryStream.ToArray());
}
return text;
}

private CloudBlockBlob GetBlobReference(string path, string filename)
{
var cloudBlobContainer = GetCloudBlobContainer(path);
var blob = cloudBlobContainer.GetBlockBlobReference(filename);
return blob;
}

private CloudBlobContainer GetCloudBlobContainer(string path){
var account = CloudStorageAccount.Parse(_cloudConnectionString);
var cloudBlobClient = account.CreateCloudBlobClient();
var cloudBlobContainer = cloudBlobClient.GetContainerReference(path);
return cloudBlobContainer;
}
}
[/csharp]

This means that the blob implementations can be just as simple.

IContentRepository – Blob Style

Just connect to the configured storage account, and read form the specified location to get the Razor view:

[csharp]class BlobStorageContentRepository : IContentRepository
{
private readonly BlobUtil _blobUtil;
private readonly string _contentRoot;

public BlobStorageContentRepository(string connectionString, string contentRoot)
{
_blobUtil = new BlobUtil(connectionString);
_contentRoot = contentRoot;
}

public string GetContent(string id)
{
return _blobUtil.ReadFromLocation(_contentRoot, id + ".cshtml");
}
}
[/csharp]

IDataRepository – Blob style

Pretty much the same as above, except with a different “file” extension. Blobs don’t need file extensions, but I’m just reusing the same files from before.

[csharp]public class BlobStorageDataRespository : IDataRepository
{
private readonly BlobUtil _blobUtil;
private readonly string _dataRoot;

public BlobStorageDataRespository(string connectionString, string dataRoot)
{
_blobUtil = new BlobUtil(connectionString);
_dataRoot = dataRoot;
}

public string GetData(string id)
{
return _blobUtil.ReadFromLocation(_dataRoot, id + ".json");
}
}
[/csharp]

IUploader – Blob style

The equivalent for saving it is similar:

[csharp]class BlobStorageUploader : IUploader
{
private readonly BlobUtil _blobUtil;
private readonly string _outputRoot;

public BlobStorageUploader(string cloudConnectionString , string outputRoot)
{
_blobUtil = new BlobUtil(cloudConnectionString);
_outputRoot = outputRoot;
}
public void SaveContentToLocation(string content, string location)
{
_blobUtil.SaveToLocation(content, _outputRoot, location + ".html");
}
}
[/csharp]

Worker Role

And tying this together is a basic worker role which looks all but identical to the console app:

[csharp]public override void Run()
{
var cloudConnectionString =
CloudConfigurationManager.GetSetting("Microsoft.Storage.ConnectionString");

IContentRepository content =
new BlobStorageContentRepository(cloudConnectionString, "content");

IDataRepository data =
new BlobStorageDataRespository(cloudConnectionString, "data");

IUploader uploader =
new BlobStorageUploader(cloudConnectionString, "output");

var productIds = new[] { "1", "2", "3", "4", "5" };
var renderer = new RenderHtmlPage(content, data);

foreach (var productId in productIds)
{
var result = renderer.BuildContentResult("product", productId);
uploader.SaveContentToLocation(result, productId);
}
}
[/csharp]

The Point?

By setting the output container to be public, the html files can be browsed to directly; we’ve just created an auto-generated flat file website. You could have the repository implementations access the local file system and the console app access blob storage; generate the html locally but store it remotely where it can be served from directly!

Given that we’ve already created the RazorEngine logic, the implementations of content location are bound to be simple. Swapping file system for blob storage is a snap. Check out the example code over on github

Next up

There’s a few more stages in this master plan, and following those I’ll swap some stuff out to extend this some more.

Generate a Flat File Web Site using RazorEngine and RazorMachine

Razor and ASP.Net

As a normal person you’d probably be happy with how Razor template files are used within MVC; there’s a nice convention for where they live – they’ll be in a Views folder within your project most likely – and you refer to them either by name or sometimes just by convention – what’s that? You have an ActionResult method called “Index”? I’ll go fetch the “Index” view from the folders I normally expect the cshtml files to live in for ya then.

The way this works is fantastic; development can steam ahead without the pain and confusion of all of the possible ways you could do it wrong when choosing webforms and .aspx files.

Of course, the MS implementation of an MVC framework in itself is a wonderful thing; all but enforcing the separation of concerns that is just so easy to ignore in webforms.

Razor outside of ASP.Net

But what about when you want to dynamically generate html without a process being hosted as a website? One big use case for this is email generation; sure, you could host an MVC web API and have the content generation process constantly call it, but that seems a little inefficient.

RazorEngine and RazorMachine

There are a few solutions to this; you can actually hand roll your own (I might get onto that in a future post) or you can try out some reasonably well known open source solutions like RazorEngine:

A templating engine built on Microsoft’s Razor parsing engine, RazorEngine allows you to use Razor syntax to build dynamic templates:

[csharp]string template = "Hello @Model.Name, welcome to RazorEngine!";
string result = Razor.Parse(template, new { Name = "World" });
[/csharp]

and RazorMachine:

RazorMachine is a robust and easy to use .Net Razor v2/v3 template engine. The master branch uses Razor v3. This implementation supports layouts (masterpages) and a _viewStart construct, just like MVC does support these features. The RazorEngine works independently from MVC. It only needs the System.Web.Razor reference. It almost works exacly like Asp.Net MVC

[csharp]var rm = new RazorMachine();
var result =
rm.Execute("Hello @Model.FirstName @Model.LastName", new {FirstName="John", LastName="Smith"});
[/csharp]

There’s a short stackoverflow answer comparing them (and RazorTemplates, another similar OSS solution) too.

Getting stuck in

Create a new project and use some nuget awesomeness

[powershell]Install-Package razormachine[/powershell]

Then, if you don’t already, add references to

[csharp]system.web.helpers // for json.decode
microsoft.csharp // for dynamic types
[/csharp]

If you want to debug this functionality via a console app running from VisualStudio, you may need to uncheck “enable visual studio hosting process” in Project -> Properties -> Debug

If you want to run this outside of Visual Studio, you can just run the compiled exe (bin/debug) as admin.

If you’re using a test runner then you might be fine as is. I can’t actually remember the issue I was having as I now can’t recreate it, but I think it might have been around using dynamic models and Json decoding.

RazorEngine

This is the core bit of functionality for a basic use case for RazorEngine:

[csharp]var model = Json.Decode("{\"Description\":\"Hello World\"}");
var template = "<div class=\"helloworld\">@Model.Description</div>";
const string layout = "<html><body>@RenderBody()</body></html>";

template = string.Format("{0}{1}", "@{Layout=\"_layout\";}", template);

using (var service = new TemplateService())
{
service.GetTemplate(layout, null, "_layout");
service.GetTemplate(template, model, "template");

var result = service.Parse(template, model, null, "page");

Console.Write(result);
Console.ReadKey();
}
[/csharp]

Your output should be:

[csharp]<html><body><div class="helloworld">Hello World</div></body></html>
[/csharp]

Pretty easy, right?

RazorMachine

Here’s the equivalent in RazorMachine

[csharp]var model = Json.Decode("{\"Description\":\"Hello World\"}");
var template = "<div class=\"helloworld\">@Model.Description</div>";
const string layout = "<html><body>@RenderBody()</body></html>";

var rm = new RazorMachine();
rm.RegisterTemplate("~/shared/_layout.cshtml", layout);

var renderedContent =
rm.ExecuteContent(string.Format("{0}{1}", "@{Layout=\"_layout\";}", template), model);
var result = renderedContent.Result;

Console.Write(result);
Console.ReadKey();
[/csharp]

Again, same output:

[html]<html><body><div class="helloworld">Hello World</div></body></html>
[/html]

Notice that in both of them you have to lie about there being a layout file existing somewhere; in RazorEngine you give it a name:

[csharp]template = string.Format("{0}{1}", "@{Layout=\"_layout\";}", template);[/csharp]

then refer to that name when adding the template:

[csharp]service.GetTemplate(layout, null, "_layout");[/csharp]

In RazorMachine you register the template as a dummy virtual file:

[csharp]rm.RegisterTemplate("~/shared/_layout.cshtml", layout);[/csharp]

then refer back to it as you would normally do within ASP.Net MVC when executing the content:

[csharp]var renderedContent =
rm.ExecuteContent(string.Format("{0}{1}", "@{Layout=\"_layout\";}", template), model);[/csharp]

Differences

I’ve found it easier to process sub templates (such as @Include) within RazorEngine, as I just recursively scan a file for that keyword and add the corresponding template to the service, e.g. look at the ProcessContent and ProcessSubContent methods below:

[csharp]public class RenderHtmlPage
{
private readonly IContentRepository _contentRepository;
private readonly IDataRepository _dataRepository;

public RenderHtmlPage(IContentRepository contentRepository,
IDataRepository dataRepository)
{
_contentRepository = contentRepository;
_dataRepository = dataRepository;
}

public string BuildContentResult(string page, string id)
{
using (var service = new TemplateService())
{
// get the top level razor template, e.g. "product"
// equivalent of "product.cshtml"
var content = GetContent(page);
var data = GetData(id);

ProcessContent(content, service, data);
var result = service.Parse(content, data, null, page);

return result;
}
}

private void ProcessContent(string content,
TemplateService service,
dynamic model)
{
// does the string passed in reference a Layout at the start?
const string layoutPattern = @"@\{Layout = ""([a-zA-Z]*)"";\}";

// does the string passed in reference an Include anywhere?
const string includePattern = @"@Include\(""([a-zA-Z]*)""\)";

// recursively process the Layout
foreach (Match match in Regex.Matches(content, layoutPattern,
RegexOptions.IgnoreCase))
{
ProcessSubContent(service, match, model);
}

// recursively process the @Includes
foreach (Match match in Regex.Matches(content, includePattern,
RegexOptions.IgnoreCase))
{
ProcessSubContent(service, match, model);
}
}

private void ProcessSubContent(TemplateService service,
Match match,
dynamic model)
{
var subName = match.Groups[1].Value; // got an include/layout match?
var subContent = GetContent(subName); // go get that template then
ProcessContent(subContent, service, model); // recursively process it

service.GetTemplate(subContent, model, subName); // add it to the service
}

private string GetContent(string templateToLoad)
{
// hit the filesystem, db, API, etc to retrieve the razor template
return _contentRepository.GetContent(templateToLoad);
}

private dynamic GetData(string dataToLoad)
{
// hit the filesystem, db, API, etc to return some Json data as the model
return Json.Decode(_dataRepository.GetData(dataToLoad));
}
}
[/csharp]

Why is this useful?

I’m not going to go into the details of either RazorMachine or RazorEngine; there’s plenty of documentation up on their respective websites already. I’ve used @Includes in the examples above due to its simplicity; the libraries have differing support for things like @Html.Partial and also can be extended.

Unfortunately, the html helpers (like @Html.Partial) need to have an HttpContext and run inside of ASP.Net MVC; which is what I’m trying to avoid for now.

If you pull down my initial teeny solution from github and look at the tests you’ll notice the content of the template, layout, and model are either strings or coming from the filesystem; not related to the structure of the project or files in the project or anything like that.

This means we can deploy a rendering process that returns rendered html based on strings being passed to it. Let’s play with this concept a bit more.

Flat File Web Page Generation

Say you wanted to “host” a website directly within a CDN/cache, thus avoiding the hosting via the normal route of servers and related infrastructure. Sure, writing flat html in a text editor is a solution, but what if you wanted to still be able to structure your pages into common modules, write C# code to manage the logic to dynamically combine them, and use Razor syntax and views for defining the front end?

This next section plays on this concept a bit more; we’ll write a small app that accesses a couple of directories – one for Razor files, one for data files – and generates a flat website into a third directory.

I will then expand on this concept over a series of posts, to make something more realistic and potentially useful.

Command Line & FileSystem FTW

I’ve created another repo up on github for this section, but cutting to the chase – here is the guts of demo console app:

[csharp]const string workingRoot = "../../files";
IContentRepository content =
new FileSystemContentRepository(workingRoot + "/content");

IDataRepository data =
new FileSystemDataRepository(workingRoot + "/data");

IUploader uploader =
new FileSystemUploader(workingRoot + "/output");

var productIds = new[] {"1", "2", "3", "4", "5"};
var renderer = new RenderHtmlPage(content, data);

foreach (var productId in productIds)
{
var result = renderer.BuildContentResult("product", productId);
uploader.SaveContentToLocation(result, productId);
}
[/csharp]

The various FileSystemXX implementations either just read or write files from/to the file system. Natch.

So what we’ve got here is an implementation of the RazorEngine methods I pasted in above wrapped in a RenderHtmlPage class, being called for a number of “productIds”; these happen to exist as json files on disc, e.g. “1.json”.

Each file is being combined with whatever Razor templates are listed in the product cshtml file and its referenced @Includes. The resulting html is then saved back to the file system.

So with these views in files/content:
razorengine-flat-file-website-views

And these json files in files/data:
razorengine-flat-file-website-jsondata

We get these html files generated in files/output:
razorengine-flat-file-website-htmloutput

Hopefully you can see where this is leading; we can keep Views in one place, get the model data from somewhere else, and have the extremely generic rendering logic in another place.

The Theory

With this initial version we could take an existing ASP.Net MVC website (assuming it didn’t use any html helpers in the views..) and process it offline with a known dataset to create a readonly version of the website, ready to serve from a filesystem.

Next Up

I’ll take this concept and run with it across various implementations, gradually ending up on something that might even be useful!

Smart TV 101 : Part #2 – App Development

I’m committing to doing 12 months of “101”s; posts and projects themed at beginning something new (or reasonably new) to me. January was all about node development awesomeness. February is all about Smart TV apps.

SDK

There is a wonderfully detailed SDK document for the current latest version (v4.0) which provides the environment to develop and test apps for the 2011, 2012, and 2013 series of TVs.

This consists of an IDE (a version of Eclipse), a selection of emulators for the three series of TVs it supports, automated test tools, app packaging facilities, and a few other tools.

There are examples and tutorials for projects ranging from gesture recognition, voice recognition, adaptive video streaming, through to advertisment embedding.

Developing gesture recognition apps for the 2013 Smart TV series

IDE – Ecplise

I’ve never been a fan of Eclipse as an IDE, but I’m stuck with it at the moment since it’s part of the Samsung SDK! To be fair, it does integrate into app development process quite well.

Once you’ve downloaded it from the SamsungDForum website and installed it you can create one of three types of application:

  1. Basic – for the less codey-types, using as visual editor. A bit like Visual Studio in design mode.
  2. Javascript – for writing the css, html, and js code yourself; this is the one I’ll be using
  3. Flash – strangely enough, for embedding flash into your app

ecplise-1

Within this flavour of Eclipse is the facility to launch the current application under development directly in an emulator, and also the ability to create a package for deployment (to be covered in the next post).

Emulator

As with any project in which you’re developing an application which will be running on a system that is different to the one on which you’re developing – such as iPhone or Android apps – you’re going to need a solid emulator.

The Samsung ones are actually reasonably good. There are some reasonably advanced debugging and testing facilities built into the SDK but even just having any javascript alert display within a debug window is extremely useful.

Smart TV Emulator

Developing a basic app

Right, let’s get down to business.

  1. Install the SDK
  2. Open up Eclipse
  3. Create a new Javascript app
  4. Make sure you’ve selected the project in the file explorer tab (i.e., not one of the js or html files)
  5. Click the Samsung Smart TV menu and select Open current project in Emulator

aaaaannnnd

samsung-emulator-1

WOW! Nothing!

Ok, let’s make it do something.

Add in a new div, give it an id, and whack in some text. This still won’t actually appear so edit the css and give it a height, width, and garish background colour.

There’s still one thing that you may need to check; I believe that this is now part of the standard base project, but in previous versions of the SDK you had to edit the Main.onLoad event and wire up a call to let the application manager know it was now ok to start showing things:
[js]widgetAPI.sendReadyEvent[/js]

My resulting HTML looks a bit like:
[html highlight=”8,9″]<!DOCTYPE html>
<html>
<head>
<meta http-equiv="Content-Type" content="text/html; charset=utf-8">
<title>AlrightMate</title>

<!– TODO : Common API –>
<script type="text/javascript" language="javascript" src="$MANAGER_WIDGET/Common/API/Widget.js"></script>
<script type="text/javascript" language="javascript" src="$MANAGER_WIDGET/Common/API/TVKeyValue.js"></script>

<!– TODO : Javascript code –>
<script language="javascript" type="text/javascript" src="app/javascript/Main.js"></script>

<!– TODO : Style sheets code –>
<link rel="stylesheet" href="app/stylesheets/Main.css" type="text/css">

<!– TODO: Plugins –>

</head>

<body onload="Main.onLoad();" onunload="Main.onUnload();">
<div id="content">Alright mate?</div>

<!– Dummy anchor as focus for key events –>
<a href="javascript:void(0);" id="anchor" onkeydown="Main.keyDown();"></a>

<!– TODO: your code here –>
</body>
</html>[/html]

and the autogenerated Main.js script has this onLoad method:
[js]Main.onLoad = function()
{
// Enable key event processing
this.enableKeys();
widgetAPI.sendReadyEvent();
}[/js]

Notice the $MANAGER_WIDGET files referenced in the head; these files allow access to common object modules and are on the TV itself and installed as part of the SDK.

Try running the emulator again –

samsung-emulator-2

Stonking.

Developing a slightly less basic app

Using the API created in my January posts on nodejs I’m going to create a tv app which will display the results of a product search on the Asos catalogue.

The main.js file now has an updated onload method, which makes a call to the API and then passes the returned data to a new method:
[js]Main.onLoad = function()
{
var URL = "http://rposbo-basic-node-api.apphb.com/products/socks?key=" + api_key;

if (this.XHRObj != null){
this.XHRObj.destroy();
}
this.XHRObj = new XMLHttpRequest();

if (this.XHRObj) {
alert("got XHR");
this.XHRObj.onreadystatechange = function () {
alert("State changed to " + Main.XHRObj.readyState);
if (Main.XHRObj.readyState == 4) {
alert("got data");
Main.recieveData();
}
};
this.XHRObj.open("GET", URL, true);
this.XHRObj.send(null);
}

// Enable key event processing
this.enableKeys();
widgetAPI.sendReadyEvent();
};[/js]

The new recieveData method which loops through the returned product data and creates some basic html elements to display the image and title in a list item:
[js]Main.recieveData = function () {

alert("alerting data…");
var data = JSON.parse(this.XHRObj.responseText);
for(var i=0; i<data.products.length; i++)
{
var product = data.products[i];
alert("adding " + product.title);

// image
var productImg = document.createElement("img");
productImg.setAttribute("src", product.image);

// text
var title = document.createTextNode(product.title);

// link containing both
var link = document.createElement("a");
link.appendChild(productImg);
link.appendChild(title);

// list item containing link
var listItem = document.createElement("li");
listItem.appendChild(link);

document.getElementById(‘listing’).appendChild(listItem);
}
};[/js]

No jQuery here, since I don’t want to have to load it up locally on to the tv and waste precious memory.

The single html file now looks like
index.html
[html highlight=”12″]<!DOCTYPE html>
<html>
<head>
<meta http-equiv="Content-Type" content="text/html; charset=utf-8">
<title>rposboBasicTvApp</title>

<!– TODO : Common API –>
<script type="text/javascript" language="javascript" src="$MANAGER_WIDGET/Common/API/Widget.js"></script>
<script type="text/javascript" language="javascript" src="$MANAGER_WIDGET/Common/API/TVKeyValue.js"></script>

<!– TODO : Javascript code –>
<script language="javascript" type="text/javascript" src="app/javascript/key.js"></script>
<script language="javascript" type="text/javascript" src="app/javascript/Main.js"></script>

<!– TODO : Style sheets code –>
<link rel="stylesheet" href="app/stylesheets/Main.css" type="text/css">

<!– TODO: Plugins –>

</head>

<body onload="Main.onLoad();" onunload="Main.onUnload();">

<div id="listing"></div>

<!– Dummy anchor as focus for key events –>
<a href="javascript:void(0);" id="anchor" onkeydown="Main.keyDown();"></a>

<!– TODO: your code here –>
</body>
</html>[/html]
The highlighted line is just where I define my API key and refer to it in Main.js.

This subtly changed code now looks something like:
asos-tv-emulator

Next up – deploying to a TV

We’ve got a basic app, now it’s time to get it on to the TV!

The code from this post is available on github

Year of 101s: February – Samsung Smart TV

Part #1 – Intro

I’m committing to doing 12 months of “101”s; posts and projects themed at beginning something new (or reasonably new) to me. January was all about node development awesomeness

February is going to be all about developing applications for the Samsung Smart TV.

So what’s a Smart TV?

smart-tv-1

“Smart TV” is a term used to describe a reasonably new series of internet connected televisions introduced over the past 3 or 4 years which have the facility to install applications; these can range from media streaming (e.g., free stuff from iPlayer, ITV Player, Demand 5, youtube and premium content from the likes of BlinkBox, LoveFilm, NetFlix, Curzon OD) to video chat and VOIP (e.g., Skype), and games, facebook, twitter, TED.

There are hundreds of such applications to choose from: even a pretend log fire. Srsly.

They will also stream media from your local network (DLNA or UPNP) or from USB attached devices, and some can use a USB HDD to make it a PVR.

Samsung?

Yeah, just because I have one. They started making clever TVs back in 2007 so have it working pretty well now. I also have a Samsung phone which makes streaming content to the TV (over DLNA) really easy. It’s great to take a few photos or videos on my phone and then promptly have them appear as a slideshow on the TV.

Apps

The apps that run on the Samsung TV are basically HTML pages; the app hub itself is an html page. They can be made interactive by using either javascript or flash (yes! FLASH! Who knew that was still useful for something?!).

They can be downloaded directly from the TV’s “Smart Hub” but can also be browsed online – the array and extent of what’s been made is fascinating; this is stuff you can install on your frikkin television! This is not like the TV I grew up with..
80s-tv-set-1

The apps can be developed using an SDK downloadable from Samsung, which I’ll go into detail about in the next post.

Interactivity

So wait, how can you create an interactive app using Javascript, but browsing a local html file? Everyone knows that you can’t make a cross domain ajax request, so how on earth can you get dynamic data into the page?

Well, here’s the interesting thing. If you run Fiddler you’ll see that running a cross domain ajax request from a local html file actually does the request just fine and the data is returned; it’s your browser’s security configuration that says “hell no, budday.”

local html making remote ajax call:
[html]<html>
<script src="https://ajax.googleapis.com/ajax/libs/jquery/1.9.0/jquery.min.js"></script>
<script>
$(document).ready(function(){
$.ajax({
url: "http://rposbo-basic-node-api.apphb.com/products/socks?key={snipped API key}",
success: function(data) {
$(‘#category’).html(‘<h1>’ + data.category + ‘</h1>’);
}
})
});
</script>
<body>
<div id="category" />
</body>
</html>[/html]

Chrome says no
remote-ajax-chrome-block

Fiddler says yes!
remote-ajax-fiddler-allows

App Engine

The Samsung Smart TV (at time of writing) runs a specific browser called App Engine 6.0 – from the blurb in the development documentation:

When an application is displayed and behaves on the screen, its image and text generation should be controlled and managed. For Samsung TVs with Samsung Smart TV installed, it is App Engine that performs such work. An application’s behaviors and displays are made by App Engine. While Internet Explorer and Firefox are PC-based browsers, App Engine is Samsung TV-based browser.

Supported web standards
* HTML4.01, XHTML1.0, XML1.0 Markup language specifications
* HTTP1.0/1.1
* CSS1, CSS2, CSS TV Profile 1.0
* DOM1, DOM2
* JavaScript 1.6

So, the interesting part is that the cross domain ajax request security feature isn’t enabled in App Engine, which means you can execute ajax calls from the local html page to your external service and use the returned data quite happily!

Next up – App development

I’ll cover the IDE and creating a basic app.

Node.js 101: Wrap up

Year of 101s, Part 1 – Node January

Summary – What was it all about?

I set out to spend January learning some node development fundementals.

Part #1 – Intro

I started with a basic intro to using node – a Hello World – which covered what node.js is, how to create the most basic of all programs, and mentioned some of the development environments.

Part #2 – Serving web content

Second was creating a very simple node web server, which covered using nodemon to develop your node app, the concept of exports, basic request routing, and serving various content types.

Part #3 – A basic API

Next was a simple API implementation, where I proxy calls to the Asos API, return a remapped subset of the data returned, reworked the routing creating basic search functionality and a detail page, and touched on being able to pass in command line arguements.

Part #4 – Basic deployment and hosting with Appharbor, Azure, and Heroku

Possibly the most interesting and fun post for me to work on involved deploying the node code on to three cloud hosting solutions where I discovered the oddities each provider has, various solutions to the problems this raises, as well as some debugging cleverness (nice work, Heroku!). The simplicity of a git-remote-push-deploy process is incredible, and really makes quick application development and hosting even more enjoyable!

Part #5 – Packages

Another interesting one was getting to play with node packages, the node package manager (npm), the express web framework, jade templating engine, and stylus css pre-processor, and deploying node apps with packages to cloud hosting.

Part #6 – Web-based development

The final part covered the fantastic Cloud9IDE, including a (very) basic intro to github, and how Cloud9 can still be used in developing and deploying directly to Azure, Appharbor, or Heroku.

What did I get out of it?

I really got into githubbing and OSSing, and really had to try hard to not over stretch myself as I had starting forking repos to try and make a few tweaks to things whilst working on the node month.

It has been extremely inspiring and has opened up so many other random tangents for me to explore in other projects at some other time. Very motivating stuff.

I’ve now got a month of half decent blog posts – I had only intended to do a total of 4 posts but including this one I’ve done 7, since I kept adding more information as it turned up and needed to split a few posts into two.

Also I’ve learned a bit about blogging; trying to do posts well in advance allowed me to build up the details once I’d discovered more whilst working on subsequent posts. For example, how Appharbor and Azure initially track master – but can be configured to track different branches. Also, debugging with Heroku only came up whilst working with packages in Heroku.

Link list

Node tutorials and references

Setting up a node development environment on Windows
Node Beginner – a great article, and I’ve also bought the associated eBooks.
nodejs.org – the official node site, the only place to go for reference

Understanding Javascript better

Execution in The Kingdom of Nouns
Object Orientation and Inheritance in Javascript

Appharbor

Appharbor and git

Heroku

Heroku toolbelt download and reference
node on Heroku

Azure

Checkout what Azure can do!

February – coming up, Samsung Smart TV App Development!

Yeah, seriously. How random is that?.. 🙂

Node.js 101: Part #6 – Web-Based Development

Web-Based Development

Following on from my recent post about doing something this year, I’m committing to doing 12 months of “101”s; posts and projects themed at begining something new (or reasonably new) to me

January is all about node, and I started with a basic intro, then cracked open a basic web server with content-type manipulation and basic routing, created a basic API, before getting stuck into some great deployment and hosting solutions and then an intro to using node packages including cloud deployment

In my previous posts I’ve been developing code locally, committing to a local git repo and pushing to a remote git repo. This is fine for the particular situation, but what about when I’m not at my own pc and feel the need to make some changes? Maybe I’m at my dad’s place using his netbook with no dev tools installed?

Cloud9IDE

Cloud9 is an incredible web-based development environment that is so feature-rich you’d usually expect to fork out wads of cash for the opportunity to use it: LIVE interactive collaborative development in the same shared IDE (see multiple people editing a file at once), code completion, syntax highlighting, an integrated console for those useful commands like ssh, git, npm.

It’s frikkin open source too, so you could install it on your own servers and have your own private IDE for your own code, based in a web browser. How amazing is that?

It’s built on Node.js in the back-end and javascript and HTML5 at the front. I’ve been playing around on there for the past year, and it’s been improving all the time – it’s just the best thing around. Go and start using it now. There are still some bugs, but if you find something you can always try to fix it and send a pull request!

c9-demo-1

So. That’s great for my web-based development, so how about if I need to collaborate on this project with people who I’m not sharing my C9 environment with?

GitHub

If you’re not already using github but are already using git (what the hell are you playing at?!), go and sign up for this exceptionally “powerful collaboration, review, and code management for open source and private development projects.”

You configure github as your git remote, push your code to it, and other users can pull, fork, edit, and send pull requests, so that you’re still effectively in charge of your own code repository whilst others can contribute to it or co-develop with you.

github-demo-1

Great. So how do I deploy my code if I’m using this sort of remote, web-based development environment?

Azure/AppHarbor/Heroku

Deploying to an existing Azure/Appharbor/Azure site from Cloud9IDE is the same as from your local dev pc; set up a remote and push to it! C9 has a built in terminal should the bare command line at the bottom of the screen not do it for you.

As for creating a new hosting environment, C9 also includes the ability to create them from within itself for both Azure and Heroku! I’ve actually never managed to get this working, but am quite happy to create the empty project on Heroku/Azure/Appharbor and use git from within C9 to deploy.

c9-azure-setup-1

Coming up

Next post will be the last for this first month of my Year of 101s: January Wrap-Up – Node.js 101; a summary of what I’ve learned in January whilst working with Node, as well as a roundup of the useful links I’ve used to get all of the information.

What’s in February’s 101?.. wait and see..!

Node.js 101: Part #5 – Packages

Following on from my recent post about doing something this year, I’m committing to doing 12 months of “101”s; posts and projects themed at begining something new (or reasonably new) to me

January is all about node, and I started with a basic intro, then cracked open a basic web server with content-type manipulation and basic routing, created a basic API, before getting stuck into some great deployment and hosting solutions

Node Packages

Up until now I’ve been working with node using the basic code I’ve written myself. What about if you want to create an application that utilises websockets? Or how about a Sinatra-inspired web framework to shortcut the routing and request handling I’ve been writing? Maybe you want to have a really easy to build website without having to write HTML with a nice look without writing any CSS? Like coffeescript? mocha? You gaddit.

Thanks to the node package manager you can easily import pre-built packages into your project to do alllll of these things and loads more. This command line tool (which used to be separate but is now a part of the node install itself) can install the packages in a ruby gem-esque/.Net nuget fashion, pulling down all the dependencies automatically.

Example usage:
[code]npm install express -g[/code]

The packages (compiled C++ binaries, just like node itself) are pulled either into your working directory (local node_modules folder) or as a global package (with the “-g” parameter). You then reference the packages in your code using “requires”.

Or you can install everything your project needs at once by creating a package.json e.g.:
[code]{
"name": "basic-node-package",
"version": "0.0.1",
"dependencies": {
"express": "*",
"jade": "*",
"stylus": "*",
"nib": "*"
}
}[/code]

And then call [code]npm install[/code]

A great intro to using these four packages can be found on the clock website

I’ve decided to write a wrapper for my basic node API using express, jade, stylus, and nib. All I’m doing is call the api and displaying the results on a basic page. The HTML is being written in jade and the css in stylus & nib. Routing is being handled by express.

app.js
[js]var express = require(‘express’)
, stylus = require(‘stylus’)
, nib = require(‘nib’)
, proxy = require(‘./proxy’)

var app = express()
function compile(str, path) {
return stylus(str)
.set(‘filename’, path)
.use(nib())
}
app.set(‘views’, __dirname + ‘/views’)
app.set(‘view engine’, ‘jade’)
app.use(express.logger(‘dev’))
app.use(stylus.middleware(
{ src: __dirname + ‘/public’
, compile: compile
}
))
app.use(express.static(__dirname + ‘/public’))

var host = ‘rposbo-basic-node-api.azurewebsites.net’;

app.get(‘/products/:search/:key’, function (req,response) {
console.log("Request handler ‘products’ was called");

var requestPath = ‘/products/’ + req.params.search + ‘?key=’ + req.params.key;

proxy.getRemoteData(host, requestPath, function(json){
var data = JSON.parse(json);

response.render(‘products’,
{
title: ‘Products for’ + data.category,
products: data.products,
key: req.params.key
}
);
})
});

app.get(‘/product/:id/:key’, function (req,response) {
console.log("Request handler ‘product’ was called");

var requestPath = ‘/product/’ + req.params.id + ‘?key=’ + req.params.key;

proxy.getRemoteData(host, requestPath, function(json){
var data = JSON.parse(json);

response.render(‘product’,
{
title: data.title,
product: data
}
);
})
});

app.get(‘/’, function (req,response) {
console.log("Request handler ‘index’ was called");
response.end("Go");
});

app.listen(process.env.PORT);
[/js]

So that file sets up the express, jade, and stylus references and wires up the routes for /products/ and /product/ which then make a call using my old proxy.js to the API; I can probably do all of this with a basic inline http get, but I’m just reusing it for the time being.

Notice how the route “/products/:search/:key” which would actually be something like “/products/jeans/myAp1k3Y” is referenced using req.params.search and req.params.key.

Then all I’m doing is making the API call, parsing the returned JSON and passing that parsed object to the view.

The views are written in jade and have a main shared one:
layout.jade
[code]!!!5
html
head
title #{title}
link(rel=’stylesheet’, href=’/stylesheets/style.css’)
body
header
h1 basic-node-packages
.container
.main-content
block content
.sidebar
block sidebar
footer
p Running on node with Express, Jade and Stylus[/code]

Then the route-specific ones:

products.jade:
[code]extend layout
block content
p
each product in products
li
a(href=’/product/’ + product.id + ‘/’ + key)
img(src=product.image)
p
=product.title[/code]

and

product.jade:
[code]extend layout
block content
p
img(src=product.image)
li= product.title
li= product.price[/code]

The stylesheet is written in stylus & nib:

style.styl
[css]/*
* Import nib
*/
@import ‘nib’

/*
* Grab a custom font from Google
*/
@import url(‘http://fonts.googleapis.com/css?family=Quicksand’)

/*
* Nib provides a CSS reset
*/
global-reset()

/*
* Store the main color and
* background color as variables
*/
main-color = #fa5b4d
background-color = #faf9f0

body
font-family ‘Georgia’
background-color background-color
color #444

header
font-family ‘Quicksand’
padding 50px 10px
color #fff
font-size 25px
text-align center

/*
* Note the use of the `main-color`
* variable and the `darken` function
*/
background-color main-color
border-bottom 1px solid darken(main-color, 30%)
text-shadow 0px -1px 0px darken(main-color, 30%)

.container
margin 50px auto
overflow hidden

.main-content
float left

p
margin-bottom 20px

li
width:290
float:left

p
line-height 1.8

footer
margin 50px auto
border-top 1px dotted #ccc
padding-top 5px
font-size 13px[/css]

And this is compiled into browser-agnostic css upon compilation of the app.

The other files used:

proxy.js:
[js]var http = require(‘http’);

function getRemoteData(host, requestPath, callback){

var options = {
host: host,
port: 80,
path: requestPath
};

var buffer = ”;
var request = http.get(options, function(result){
result.setEncoding(‘utf8’);

result.on(‘data’, function(chunk){
buffer += chunk;
});

result.on(‘end’, function(){
callback(buffer);
});
});

request.on(‘error’, function(e){console.log(‘error from proxy call: ‘ + e.message)});
request.end();
};
exports.getRemoteData = getRemoteData;[/js]

package.json
[js]{
"name": "basic-node-package",
"version": "0.0.1",
"dependencies": {
"express": "*",
"jade": "*",
"stylus": "*",
"nib": "*"
}
}[/js]

web.config
[xml]<configuration>
<system.web>
<compilation batch="false" />
</system.web>
<system.webServer>
<handlers>
<add name="iisnode" path="app.js" verb="*" modules="iisnode" />
</handlers>
<iisnode loggingEnabled="false" />

<rewrite>
<rules>
<rule name="myapp">
<match url="/*" />
<action type="Rewrite" url="app.js" />
</rule>
</rules>
</rewrite>
</system.webServer>
</configuration>[/xml]

All of these files are, as usual, on Github

Deployment with Packages

Something worth bearing in mind is that deploying something which includes packages and the result of packages (e.g. minified js or css from styl) requires all of these artifacts to be added into your git repo before deployment to certain hosts such as Appharbor and Azure; Heroku will actually run an npm install as part of the deployment step, I believe, and also compile the .styl into .css, unlike Azure/Appharbor.

The files above give a very basic web interface to the /products/ and /product/ routes:
asos-jade-products-1

asos-jade-product-1

Coming up

Web-based node development and deployment!

Node.js 101 : Part #4 – Basic Deployment and Hosting with Azure, Heroku, and AppHarbor

Following on from my recent post about doing something this year, I’m committing to doing 12 months of “101”s; posts and projects themed at beginning something new (or reasonably new) to me.

January is all about node, and I started with a basic intro, then cracked open a basic web server with content-type manipulation and basic routing, and the last one was a basic API implementation

Appharbor, Azure, and Heroku

Being a bit of a cocky git I said on twitter at the weekend:

It’s not quite that easy, but it’s actually not far off!

Deployment & Hosting Options

These are not the only options, but just three that I’m aware of and have previously had a play with. A prerequisite for each of these – for the purposes of this post – is using git for version control since AppHarbor, Azure, and Heroku support git hooks and remotes; this means essentially you can submit your changes directly to your host, which will automatically deploy them (if pre-checks pass).

I’ll be using the set of files from my previous API post for this one, except I need to change the facility to pass in command line args for the api key to instead take it from a querystring parameter.

The initial files are the same as the last post and can be grabbed from github

Those changes are:

app.js (removed lines about getting value from command line):

[js]var server = require("./server"),
router = require("./router"),
requestHandlers = require("./requestHandlers");

// only handling GETs at the moment
var handle = {}
handle["favicon.ico"] = requestHandlers.favicon;
handle["product"] = requestHandlers.product;
handle["products"] = requestHandlers.products;

var port = process.env.PORT || 3000;
server.start(router.route, handle, port);[/js]

server.js (added in querystring param usage):

[js highlight=”7″]var http = require("http"),
url = require("url");

function start(route, handle, port) {
function onRequest(request, response) {
var pathname = url.parse(request.url).pathname;
var apiKey = url.parse(request.url, true).query.key;
route(handle, pathname, response, apiKey);
}

http.createServer(onRequest).listen(port);
console.log("Server has started listening on port " + port);
}

exports.start = start;[/js]

The “.query” returns a querystring object, which means I can get the parameter “key” by using “.key” instead of something like [“key”].

Ideal scenario

In the perfect world all I’d need to do is something like:
[code]git add .
git commit -m "initial node stuff"
git push {azure/appharbor/heroku/whatever} master
…..
done
…..
new site deployed to blahblah.websitey.net
…..
have a lovely day
[/code]
and I could pop off for a cup of earl grey.

In order to get to that point there were a few steps I needed to take for each of the three hosts.

Appharbor

appharbor-home-1

Getting started

First things first; go and sign up for a free account with AppHarbor.

Then set up a new application in order to be given your git remote endpoint to push to.

I’ve previously had a play with Appharbor, but this is the first time I’m using it for more than just a freebie host.

Configuring

It’s not quite as simple as I would have liked; there are a couple of things that you need to bear in mind. Although Appharbor supports node deployments they are primarily a .Net hosting service and use Windows hosting environments (even though they’re on EC2 as opposed to Azure). Running node within iis means that you need to supply a web.config file and give it some IIS-specific info.

The config file I had to use is:
[xml highlight=”3,9″]<configuration>
<system.web>
<compilation batch="false" />
</system.web>
<system.webServer>
<handlers>
<add name="iisnode" path="app.js" verb="*" modules="iisnode" />
</handlers>
<iisnode loggingEnabled="false" />

<rewrite>
<rules>
<rule name="myapp">
<match url="/*" />
<action type="Rewrite" url="app.js" />
</rule>
</rules>
</rewrite>
</system.webServer>
</configuration>[/xml]

Most of that should be pretty straightforward (redirect all calls to app.js), but notice the lines about compilation and logging; the permissions under which the appharbor deployment process runs for node projects doesn’t have access to the filesystem so can’t create anything in a “temp” dir (precompilation) nor write any log files upon errors. As such, you need to disable these.

You could also enable file system access and disable precompilation within your application’s settings – as far as I can tell, it does the same thing.

appharbor-settings-1

Deploying

Commit that web.config to your repo, add a remote for appharbor, then push to it – any branch other than master, default, or trunk needs a manual deploy instead of it happening automatically, but you can specify the branch name to track within your appharbor application settings; I put in the branch name “appharbor” that I’ve been developing against and it automatically deploys when I push that branch or master, but not any others.

You’ll see your dashboard updates and deploys (automatic deployment if it’s a tracked branch):

appharbor-deploy-dashboard-1

And then you can browse to your app:

appharbor-deploy-result-1

Azure

azure-home-1

Getting started

Again, first step is to go and sign up for Azure – you can get a free trial, and if you only want to host up to 10 small websites then it’s completely free.

You’ll need to set up a new Azure website in order to be given your git remote endpoint to push to.

Configuring

This is pretty similar to the AppHarbor process in that Azure Websites sit on Windows and IIS, so you need to define a web.config to set up IIS for node. The same web.config works as for AppHarbor.

Deploying

Although you can push to Appharbor from any branch and it will only deploy automatically from the specific tracked branch, you can’t choose to manually deploy from within azure, so you either need to use [code]git push azure {branch}:master[/code] (assuming your remote is called “azure”) or you can define your tracked branch in the configuration section:

azure-settings-1

Following a successful push your dashboard updates and deploys:

azure-deploy-dashboard-1

And then your app is browsable:

azure-deploy-result-1

Heroku

heroku-home-1

Getting started

Sign up for a free account.

Configuring

Heroku isn’t Windows based as it’s aimed at hosting Ruby, Node.js, Clojure, Java, Python, and Scala. What this means for our node deployment is that we don’t need a web.config to get the application running on Heroku. It’s still running on Amazon’s EC2 as far as I can tell though.

However, we do need to jump through several other strange hoops:

Procfile

The procfile is a list of the “process types in an application. Each process type is a declaration of a command that is executed when a process of that process type is executed.” These can be arbitrarily named except for the “web” one which handles HTTP traffic.

For node, this Procfile needs to be:

Procfile:
[code]web: node app.js[/code]

Should I want to pass in command line arguments, as in the previous version of my basic node API code, I could do it in this file i.e. [code]web: node app.js mYAp1K3Y[/code]

Deploying

Heroku Toolbelt

There’s a command line tool which you need to install in order to use Heroku, called the Toolbelt; this is the Heroku client which allows you to do a lot of powerful things from the command line including scaling up and down, and start and stopping your application.

Instead of adding heroku as a git remote yourself you need to open a command line in your project’s directory and run [code]heroku login[/code]and then[code]heroku create[/code]
Your application space will now have been created within Heroku automatically (no need to log in and create one first) as well as your git remote; this will have the default name of “heroku”

Deploying code is still the same as before [code]git push heroku master[/code]

In Heroku you do need to commit to master to have your code built and deployed, and I couldn’t find anywhere to specify a different tracking branch.

Before that we need to create the last required file:
package.json:
[js]{
"name": "rposbo-basic-node-hosting-options",
"author": "Robin Osborne",
"description": "the node.js files used in my blog post about a basic node api being hosted in various places (github, azure, heroku)",
"version": "0.0.1",
"engines": {
"node": "0.8.x",
"npm": "1.1.x"
}
}[/js]

This file is used by npm (node package manager) to install the module dependencies for your application; e.g. express, jade, stylus. Even though our basic API project has no specifc dependencies, the file is still required by Heroku in order to define the version of node and npm to use (otherwise your application simply isn’t recognised as a node.js app).

Something to consider is that Heroku doesn’t necessarily have the same version of node installed as you might; I defined 0.8.16 and received an error upon deployment which listed the available versions (the highest at time of writing is 0.8.14). I decided to define my required version as “0.8.x” (any version that is major 0 minor 8).

However, if you define a version of node in the 0.8.x series you must also define the version of npm. A known issue, apparently. Not only that, it needs to be specifically “1.1.x”.

Add these settings into the “engines” section of the package.json file, git add, git commit, and git push to see your dashboard updated:

heroku-deploy-dashboard-1

And then your app – with a quite random URL! – is available:

heroku-deploy-result-1

If you have problems pushing due to your existing public keys not existing within heroku, run the following to import them [code]heroku keys:add[/code]

You can also scale up and down your number of instances using the Heroku client: [code]heroku ps:scale web=1[/code]

Debugging

The Heroku Toolbelt is a really useful client to have; you can check your logs with [code]heroku logs[/code] and you can even leave a trace session open using [code]heroku logs –tail[/code], which is amazing for debugging problems.

The error codes you encounter are all listed on the heroku site as is all of the information on using the Heroku Toolbelt logging facility.

A quick one: if you see the error “H14”, then although your deployment may have worked it hasn’t automatically kicked off a web role – you can see this where it says “dyno=” instead of “dyno=web.1”; you just need to run the following command to start one up: [code]heroku ps:scale web=1[/code]

Also – make sure you’ve created a Procfile (with capitalised “P”) and that it contains [code]web: node app.js[/code]

Summary

Ok, so we can now easily deploy and host our API. The files that I’ve been working with throughout this post are on github; everything has been merged into master (both heroku files and web.config) so it can be deployed to any of these hosts.

There are also separate branches for Azure/Appharbor and Heroku should you want to check the different files in isolation.

Next Up

Node packages!

Node.js 101 : Part #3 – A Basic API

Following on from my recent post about doing something this year, I’m committing to doing 12 months of “101”s; posts and projects themed at begining something new (or reasonably new) to me.

January is all about node, and I started with a basic intro, then cracked open a basic web server with content-type manipulation and basic routing.

Building and calling an API in node

Now on to the meat of this month; building a basic RESTful API. I don’t plan on writing the underlying business logic myself, so will just wrap an existing API in order to further demonstrate the routing, content type usage, and proxying calls to another server.

For this post I’ll be using the Asos API for querying the Asos database of clothes and returning the data necessary to build other basic applications on; intially a web site, but later on various apps on various devices.

The Underlying API: Asos.com

Asos, the online fashion “destination”, had an API open for developers to mess aorund with for a short period and as one of the first people to get involved I managed to snap up an api key. This will give me the ability to query the product catalogue and do basic functions such as adding products to a basket.

Asos
asos-1

Asos API
asos-api-1

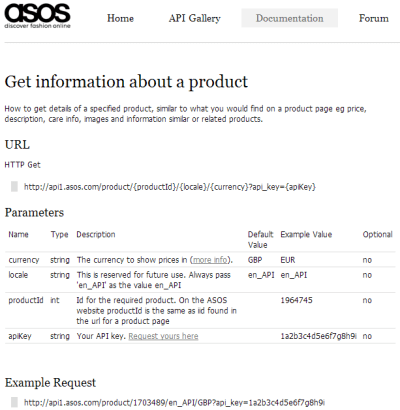
An example request takes the format:
[code]http://api1.asos.com/product/{productId}/{locale}/{currency}?api_key={apiKey}[/code]

and an example response is:
[code]
{
"BasePrice":35.0,
"Brand":"ASOS",
"Colour":null,
"CurrentPrice":"£35.00",
"InStock":true,
"IsInSet":false,
"PreviousPrice":"",
"PriceType":"Full",
"ProductId":1703489,
"ProductImageUrls":[
"http://images.asos.com/inv/media/9/8/4/3/1703489/red/image1xxl.jpg",
"http://images.asos.com/inv/media/9/8/4/3/1703489/image2xxl.jpg",
"http://images.asos.com/inv/media/9/8/4/3/1703489/image3xxl.jpg",
"http://images.asos.com/inv/media/9/8/4/3/1703489/image4xxl.jpg"
],
"RRP":"",
"Size":null,
"Sku":"101050",
"Title":"ASOS Fringe Sleeve Mesh Crop",
"AdditionalInfo":"100% Polyester\n\n\n\n\n\nSIZE &amp; FIT \n\nModel wears: UK 8/ EU 36/ US 4\n\n\n\nSize UK 8/ EU 36/ US 4 side neck to hem measures: 46cm/18in",
"AssociatedProducts":[{
"BasePrice":35.0,
"Brand":"ASOS",
"Colour":null,
"CurrentPrice":"£35.00",
"InStock":false,
"IsInSet":false,
"PreviousPrice":"",
"PriceType":"Full",
"ProductId":1645550,
"ProductImageUrls":[
"http://images.asos.com/inv/media/0/5/5/5/1645550/black/image1l.jpg"
],
"RRP":"",
"Size":null,
"Sku":null,
"Title":"ASOS Panel Mesh Body Contour Top",
"ProductType":"Recommendations"
}],
"CareInfo":"Machine wash according to instructions on care label",
"Description":"Fringed crop top, featuring a reinforced boat neckline, raglan style slashed sleeves with tasselled fringe trim, and a cropped length, in a sheer finish.",
"Variants":[
{
"BasePrice":35.00,
"Brand":null,
"Colour":"Beige",
"CurrentPrice":"£35.00",
"InStock":true,
"IsInSet":false,
"PreviousPrice":"",
"PriceType":"Full",
"ProductId":1716611,
"ProductImageUrls":[
"http://images.asos.com//inv/media/9/8/4/3/1703489/beige/image1xxl.jpg"
],
"RRP":"",
"Size":"UK 6",
"Sku":null,
"Title":null
}]
}[/code]

For the purposes of this post all I want to do is wrap a couple of the slightly confusing and overly complex Asos API calls with some really basic, more RESTy, ones.

To do this I’m going to initially create a new module called:

proxy.js
[js]var http = require(‘http’);

function getRemoteData(host, requestPath, callback){
var options = {
host: host,
port: 80,
path: requestPath
};

var buffer = ”;
var request = http.get(options, function(result){
result.setEncoding(‘utf8’);
result.on(‘data’, function(chunk){
buffer += chunk;
});
result.on(‘end’, function(){
callback(buffer);
});
});
request.on(‘error’, function(e){console.log(‘error from proxy call: ‘ + e.message)});
request.end();
};

exports.getRemoteData=getRemoteData;[/js]

As you can see, all this does is make an HTTP GET call to a remote server, passing the “options” object.

Using the “on” event wiring up notation, I’ve just appended the chunks of data returned from the GET call to a variable, which is then passed to the referenced callback function.

Now I’ll wire this up:
requestHandlers.js:
[js]var proxy = require(‘./proxy’);

function products(response) {
console.log("Request handler ‘products’ was called");

var host = ‘api1.asos.com’;
var requestPath = ‘/productlisting/search/jeans/1/PriceAscending/en_API/GBP?api_key={snipped api key}’;

response.writeHead(200, {"Content-Type": "application/json"});

proxy.getRemoteData(host, requestPath, function(json){
response.write(json);
response.end();
});
}

exports.products = products;[/js]

I’m removing the previously entered hello, goodbye, and favicon routes for brevity. Notice the reference to the proxy module at the top as well as the new handler itself.

The URL used above executes a product search for the term “jeans”.

Wire it all up:
server.js:
[js]var http = require("http"),
url = require("url");

function start(route, handle, port) {
function onRequest(request, response) {
var pathname = url.parse(request.url).pathname;
route(handle, pathname, response);
}

http.createServer(onRequest).listen(port);
console.log("Server has started listening on port " + port);
}

exports.start = start;[/js]

app.js
[js highlight=”6″]var server = require("./server"),
router = require("./route"),
requestHandlers = require("./requestHandlers");

var handle = {}
handle["/products"] = requestHandlers.products

var port = process.env.PORT || 3000;
server.start(router.route, handle, port);[/js]

Kick off [code]nodemon app.js[/code]

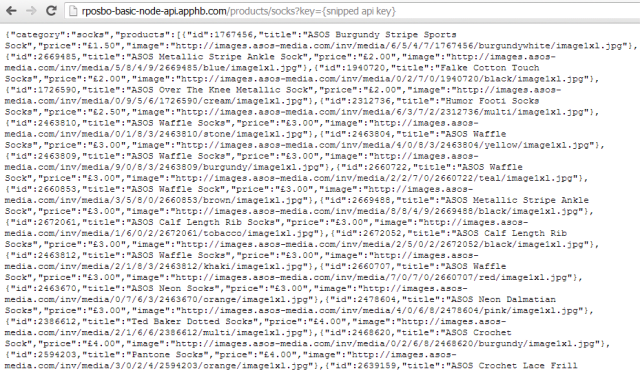
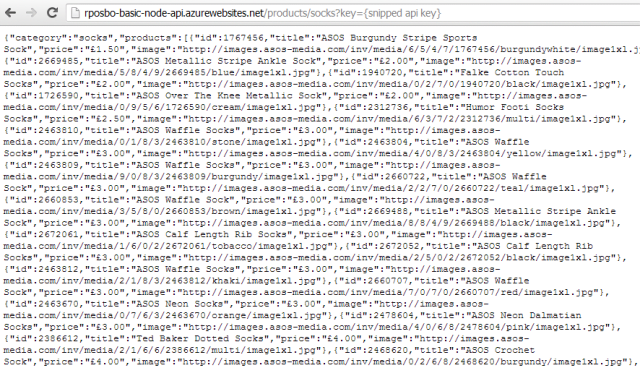
If you were to have an API key and had put it in the URL above, you’d see something like:

asos-products-1

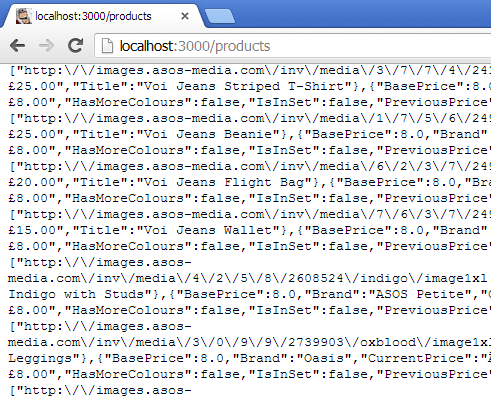
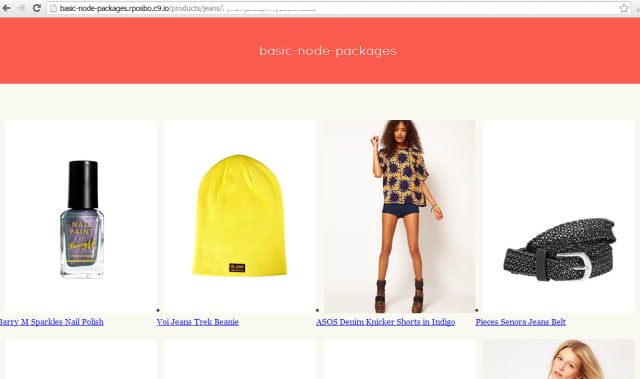
Right. Ok. That’s a lot of data. Just for now I’d like to make it easier to view, so I’ll limit what is returned and also just write out a basic HTML page.

requestHandlers.js:
[js highlight=”8,11,13-20″]var proxy = require(‘./proxy’);

function products(response) {
console.log("Request handler ‘products’ was called");

var host = ‘api1.asos.com’;
var requestPath = ‘/productlisting/search/jeans/1/PriceAscending/en_API/GBP?api_key={snipped api key}’;
response.writeHead(200, {"Content-Type": "text/html"});

proxy.getRemoteData(host, requestPath, function(json){
var data = JSON.parse(json);

var html = "<h1>Asos Search for JEANS</h1>";
response.write(html);

for(var i=0; i<data.ItemCount; i++) {
if (data.Listings[i] != null){
response.write("<li>"
+ data.Listings[i].Title + "<br /><img src=’"
+ data.Listings[i].ProductImageUrl + "’ /></li>");
}
}

response.end();
});
}

exports.products = products;
[/js]

Given that the Asos Api returns valid JSON I can just parse it and then access the structure of that JSON; in this case the ItemCount & Listings at the top level and Title & ProductImageUrl within Listings.

This will now display something like:
asos-products-2

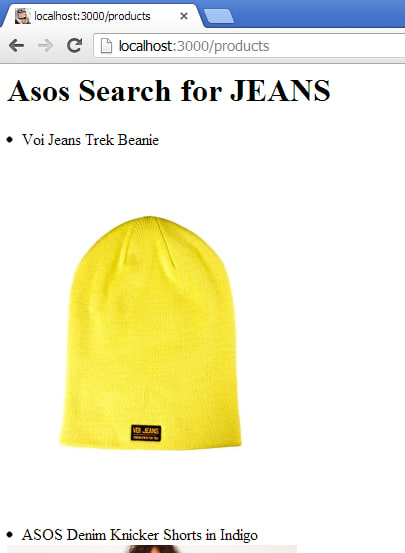
(Really? A beanie is the first result in the search for “jeans”? Anyway…)

Actually searching

Next we’ll just make the request actually execute a search with the value passed in to our own API, using the format “/products/{search term}”

Firstly I’ll edit the router to take the primary route handler from the first part of the URL (e.g “http://localhost:3000/products/jeans”) and pass the full path into the router for further use.

router.js:
[js highlight=”2,4,5″]function route(handle, pathname, response) {
var root = pathname.split(‘/’)[1];

if (typeof handle[root] === ‘function’) {
handle[root](response, pathname);
} else {
console.log("No request handler found for " + pathname);
response.writeHead(404, {"Content-Type": "text/plain"});
response.write("404 Not found");
response.end();
}
}

exports.route = route;[/js]

Next change the request handler to pick out the next section from the url e.g. “http://localhost:3000/products/jeans

requestHandlers.js:
[js highlight=”6,8,15″]var proxy = require(‘./proxy’);

function products(response) {
console.log("Request handler ‘products’ was called");

var search = path.split(‘/’)[2];
var host = ‘api1.asos.com’;
var requestPath = ‘/productlisting/search/’ + search + ‘/1/PriceAscending/en_API/GBP?api_key={snipped api key}’;

response.writeHead(200, {"Content-Type": "text/html"});

proxy.getRemoteData(host, requestPath, function(json){
var data = JSON.parse(json);

var html = "<h1>Asos Search for " + search + "</h1>";
response.write(html);

for(var i=0; i<data.ItemCount; i++) {
if (data.Listings[i] != null){
response.write("<li>"
+ data.Listings[i].Title + "<br /><img src=’"
+ data.Listings[i].ProductImageUrl + "’ /></li>");
}
}

response.end();
});
}

exports.products = products;
[/js]

One last tweak to the initialisation file to remove a leading slash which isn’t needed now that we’re splitting the url to match instead of using the full url path:

app.js:
[js highlight=”6″]var server = require("./server"),
router = require("./router"),
requestHandlers = require("./requestHandlers");

var handle = {}
handle["products"] = requestHandlers.products;

var port = process.env.PORT || 3000;
server.start(router.route, handle, port);[/js]

We now have basic search capabilities:
asos-products-search-1

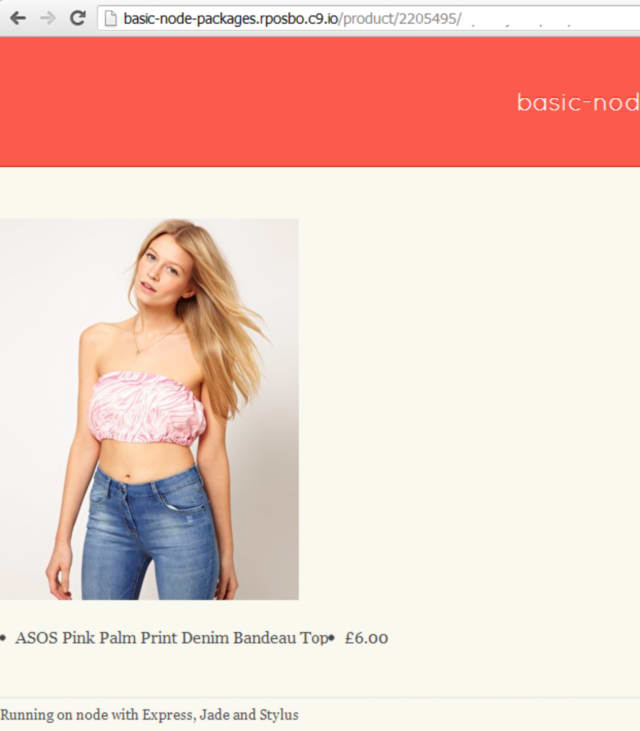
Now let’s get a basic product detail page working. For this I should need to just add a new request handler and wire it up.

requestHandlers.js:
[js highlight=”20,22″]var proxy = require(‘./proxy’);

function products(response, path) {
console.log("Request handler ‘products’ was called");

var search = path.split(‘/’)[2];
var host = ‘api1.asos.com’;
var requestPath = ‘/productlisting/search/’ + search + ‘/1/PriceAscending/en_API/GBP?api_key={snipped api key}’;

response.writeHead(200, {"Content-Type": "text/html"});

proxy.getRemoteData(host, requestPath, function(json){
var data = JSON.parse(json);

var html = "<h1>Asos Search for " + search + "</h1>";
response.write(html);

for(var i=0; i<data.ItemCount; i++) {
if (data.Listings[i] != null){
response.write("<li><a href=’/product/" + data.Listings[i].ProductId + "’>"
+ data.Listings[i].Title + "<br /><img src=’"
+ data.Listings[i].ProductImageUrl + "’ /></a></li>");
}
}

response.end();
});
}

function product(response, path) {
console.log("Request handler ‘product’ was called for " + path);

var productId = path.split(‘/’)[2];
var host = ‘api1.asos.com’;
var requestPath = ‘/product/’ + productId + ‘/en_API/GBP?api_key={snipped api key}’;

response.writeHead(200, {"Content-Type": "text/html"});
proxy.getRemoteData(host, requestPath, function(json){
var data = JSON.parse(json);

var html = "<h1>" + data.Title + "</h1>"
+ "<img src=’" + data.ProductImageUrls[0].replace(‘xxl’,’xl’) + "’ />"
response.write(html);
response.end();
});
}
exports.products = products;
exports.product = product;
[/js]

As well as the new handler I’ve also added a link from the listing page to the detail page, just for FUN.

app.js:
[js highlight=”7″]var server = require("./server"),
router = require("./router"),
requestHandlers = require("./requestHandlers");

var handle = {}
handle["products"] = requestHandlers.products;
handle["product"] = requestHandlers.product;

var port = process.env.PORT || 3000;
server.start(router.route, handle, port);[/js]

asos-product-1

Back to JSON

Ok, so that’s a very basic website wrapped around an API. Since I plan to use this wrapper as a basic API itself I’m going to revert it to returning JSON and simplify the data structure for my needs.

requestHandlers.js:
[js]var proxy = require(‘./proxy’);

function products(response, path) {
console.log("Request handler ‘products’ was called");

var search = path.split(‘/’)[2];
var host = ‘api1.asos.com’;
var requestPath = ‘/productlisting/search/’ + search + ‘/1/PriceAscending/en_API/GBP?api_key={stripped api key}’;

response.writeHead(200, {"Content-Type": "application/json"});

proxy.getRemoteData(host, requestPath, function(json){
var data = JSON.parse(json);

var newJson = {
category: data.Description,
products: []
};

data.Listings.forEach(function(listing){
newJson.products.push({
id: listing.ProductId,
title: listing.Title,
price: listing.CurrentPrice,
image: listing.ProductImageUrl[0]
})
});

response.write(JSON.stringify(newJson));
response.end();
});
}

function product(response, path) {
console.log("Request handler ‘product’ was called for " + path);

var productId = path.split(‘/’)[2];
var host = ‘api1.asos.com’;
var requestPath = ‘/product/’ + productId + ‘/en_API/GBP?api_key={snipped api key}’;

response.writeHead(200, {"Content-Type": "application/json"});
proxy.getRemoteData(host, requestPath, function(json){
var data = JSON.parse(json);

var newJson = {
id: data.ProductId,
title: data.Title,
price: data.CurrentPrice,
available: data.InStock,
image: data.ProductImageUrls[0]
};

response.write(JSON.stringify(newJson));
response.end();
});
}
exports.products = products;
exports.product = product;[/js]

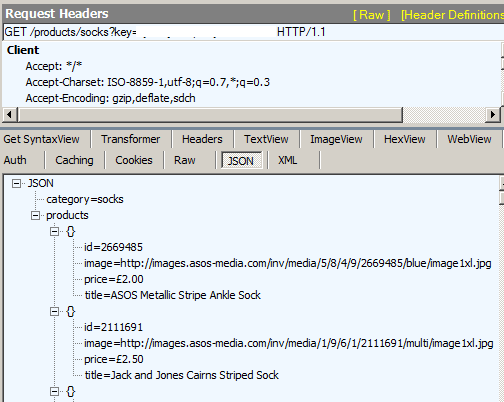
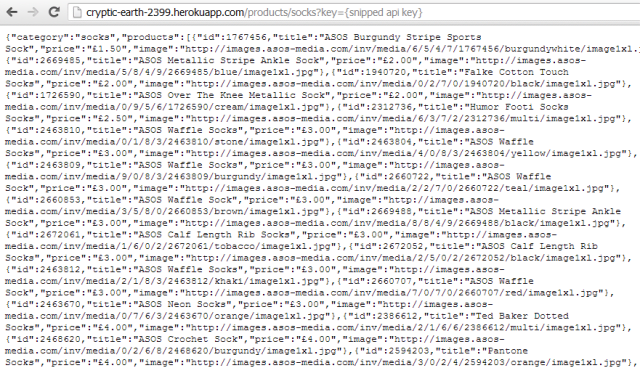
Which ends up looking like:
asos-json-1

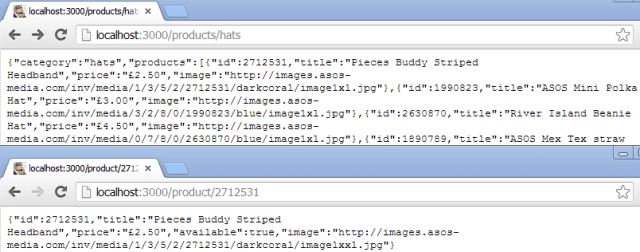
That’ll do me for now, even though it would be nice to abstract the mapping out somewhere else. Out of scope for me at the moment though.

Once last thing for this post:

Passing in command line arguments

Throughout this post I’ve been diligently snipping out my API key before pasting the code in. There are many approaches to dev/qa/staging/production configuration management (some as basic as a text file, some a bit more complex) which would handle this sort of thing but for my immediate requirements I will just pass the API key in as a command line argument.

To handle this I need to edit the initialisation code in order to pick up any args passed, and documented on the nodejs.org site:

app.js:
[js highlight=”9,11″]var server = require("./server"),
router = require("./router"),
requestHandlers = require("./requestHandlers");

var handle = {}
handle["products"] = requestHandlers.products;
handle["product"] = requestHandlers.product;

var apiKey = process.argv[2];
var port = process.env.PORT || 3000;
server.start(router.route, handle, port, apiKey);[/js]

Now just pass that value around the rest of the system:

server.js:
[js highlight=”4,7″]var http = require("http"),
url = require("url");

function start(route, handle, port, apiKey) {
function onRequest(request, response) {
var pathname = url.parse(request.url).pathname;
route(handle, pathname, response, apiKey);
}

http.createServer(onRequest).listen(port);
console.log("Server has started listening on port " + port);
}

exports.start = start;[/js]

route.js:
[js highlight=”1,5″]function route(handle, pathname, response, apiKey) {
var root = pathname.split(‘/’)[1];

if (typeof handle[root] === ‘function’) {
handle[root](response, pathname, apiKey);
} else {
console.log("No request handler found for " + pathname + " (" + root+ ")");
response.writeHead(404, {"Content-Type": "text/plain"});
response.write("404 Not found");
response.end();
}
}

exports.route = route;[/js]

requestHandlers.js:
[js highlight=”3,8,34,39″]var proxy = require(‘./proxy’);

function products(response, path, apiKey) {
console.log("Request handler ‘products’ was called");

var search = path.split(‘/’)[2];
var host = ‘api1.asos.com’;
var requestPath = ‘/productlisting/search/’ + search + ‘/1/PriceAscending/en_API/GBP?api_key=’ + apiKey;

response.writeHead(200, {"Content-Type": "application/json"});

proxy.getRemoteData(host, requestPath, function(json){
var data = JSON.parse(json);

var newJson = {
category: data.Description,
products: []
};

data.Listings.forEach(function(listing){
newJson.products.push({
id: listing.ProductId,
title: listing.Title,
price: listing.CurrentPrice,
image: listing.ProductImageUrl[0]
})
});

response.write(JSON.stringify(newJson));
response.end();
});
}

function product(response, path, apiKey) {
console.log("Request handler ‘product’ was called for " + path);

var productId = path.split(‘/’)[2];
var host = ‘api1.asos.com’;
var requestPath = ‘/product/’ + productId + ‘/en_API/GBP?api_key=’ + apiKey;

response.writeHead(200, {"Content-Type": "application/json"});
proxy.getRemoteData(host, requestPath, function(json){
var data = JSON.parse(json);

var newJson = {
id: data.ProductId,
title: data.Title,
price: data.CurrentPrice,
available: data.InStock,
image: data.ProductImageUrls[0]
};

response.write(JSON.stringify(newJson));
response.end();
});
}
exports.products = products;
exports.product = product;[/js]

Then to pass in the api key just change the nodemon call to [code]nodemon app.js myApIK3y[/code]

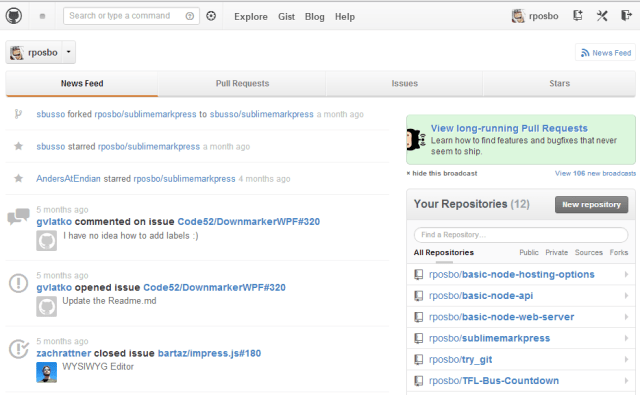
The files for this post can be found over on github
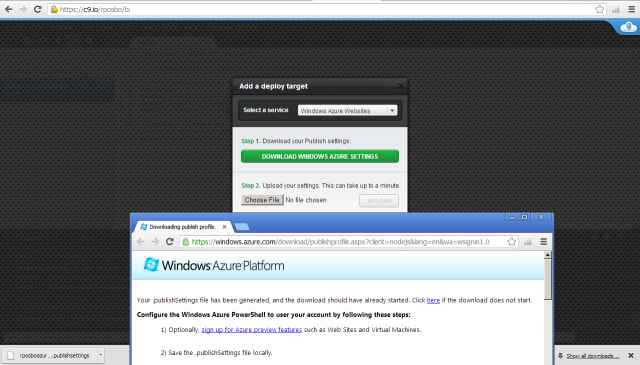
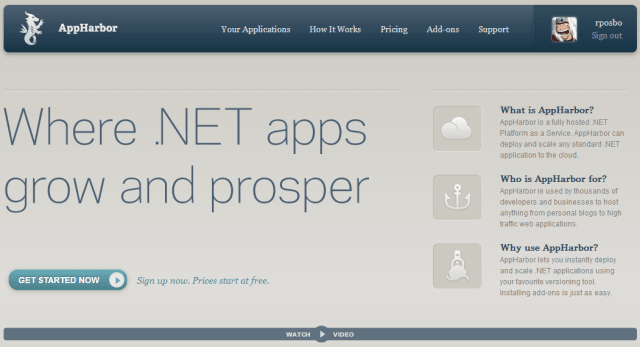
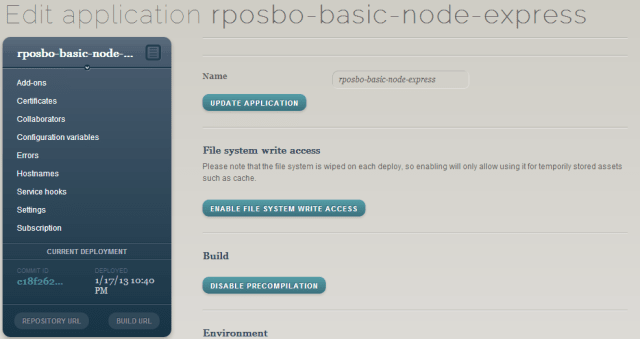
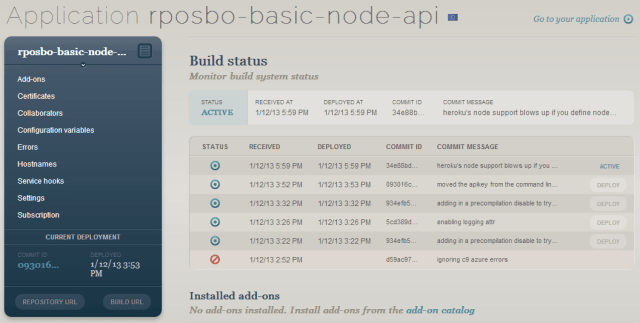
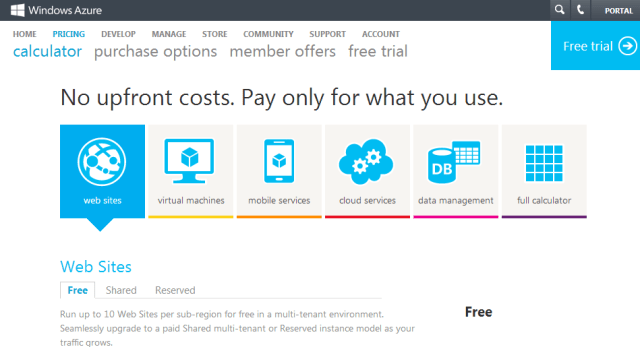
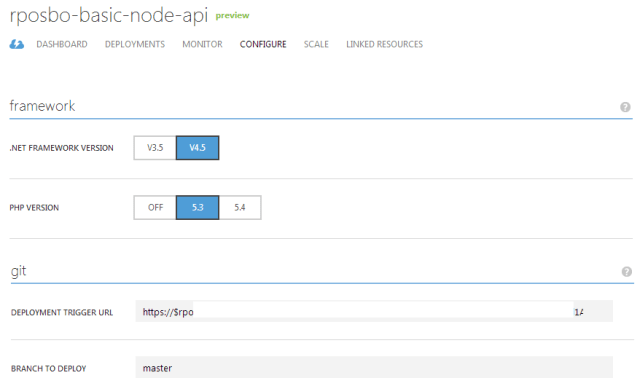
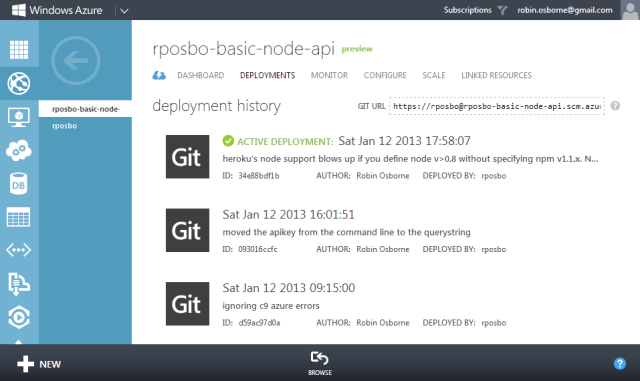
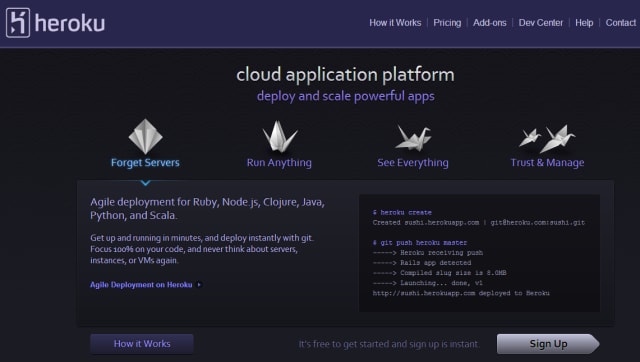
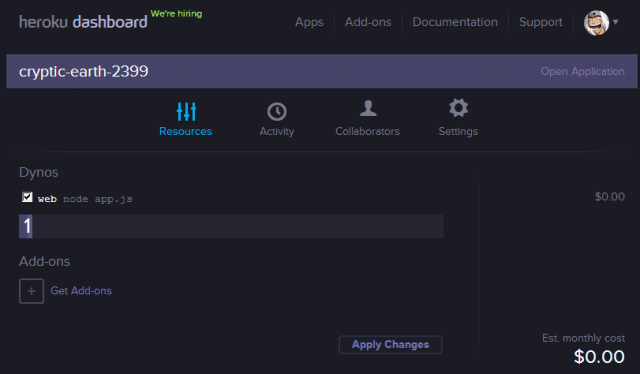
Coming up

The next post this month will cover some nice deployment & hosting options for node!